Magnets and Magnetic Fields — Edexcel GCSE Study Guide
Exam Board: Edexcel | Level: GCSE
This guide provides a comprehensive, exam-focused breakdown of Magnets and Magnetic Fields for Edexcel GCSE Physics (12.1). It covers everything from drawing field lines to the Right Hand Grip Rule, packed with worked examples, memory hooks, and examiner insights to help you secure top marks."
## Overview
Welcome to the study of Magnets and Magnetic Fields, a fundamental topic in physics that explains everything from how a compass works to the principles behind electric motors and generators. For your Edexcel GCSE exam, this topic (12.1) is crucial. It's not just about memorising facts; it's about understanding and, most importantly, being able to *visualise* and *draw* magnetic fields accurately. Examiners will test your ability to represent fields diagrammatically, distinguish between different types of magnetism, and apply rules like the Right Hand Grip Rule. This topic forms a vital foundation for understanding electromagnetism and the motor effect later in the specification, so a solid grasp here will pay dividends. Expect questions that ask you to draw field patterns, explain phenomena, and apply your knowledge to practical scenarios like electromagnets.

## Key Concepts
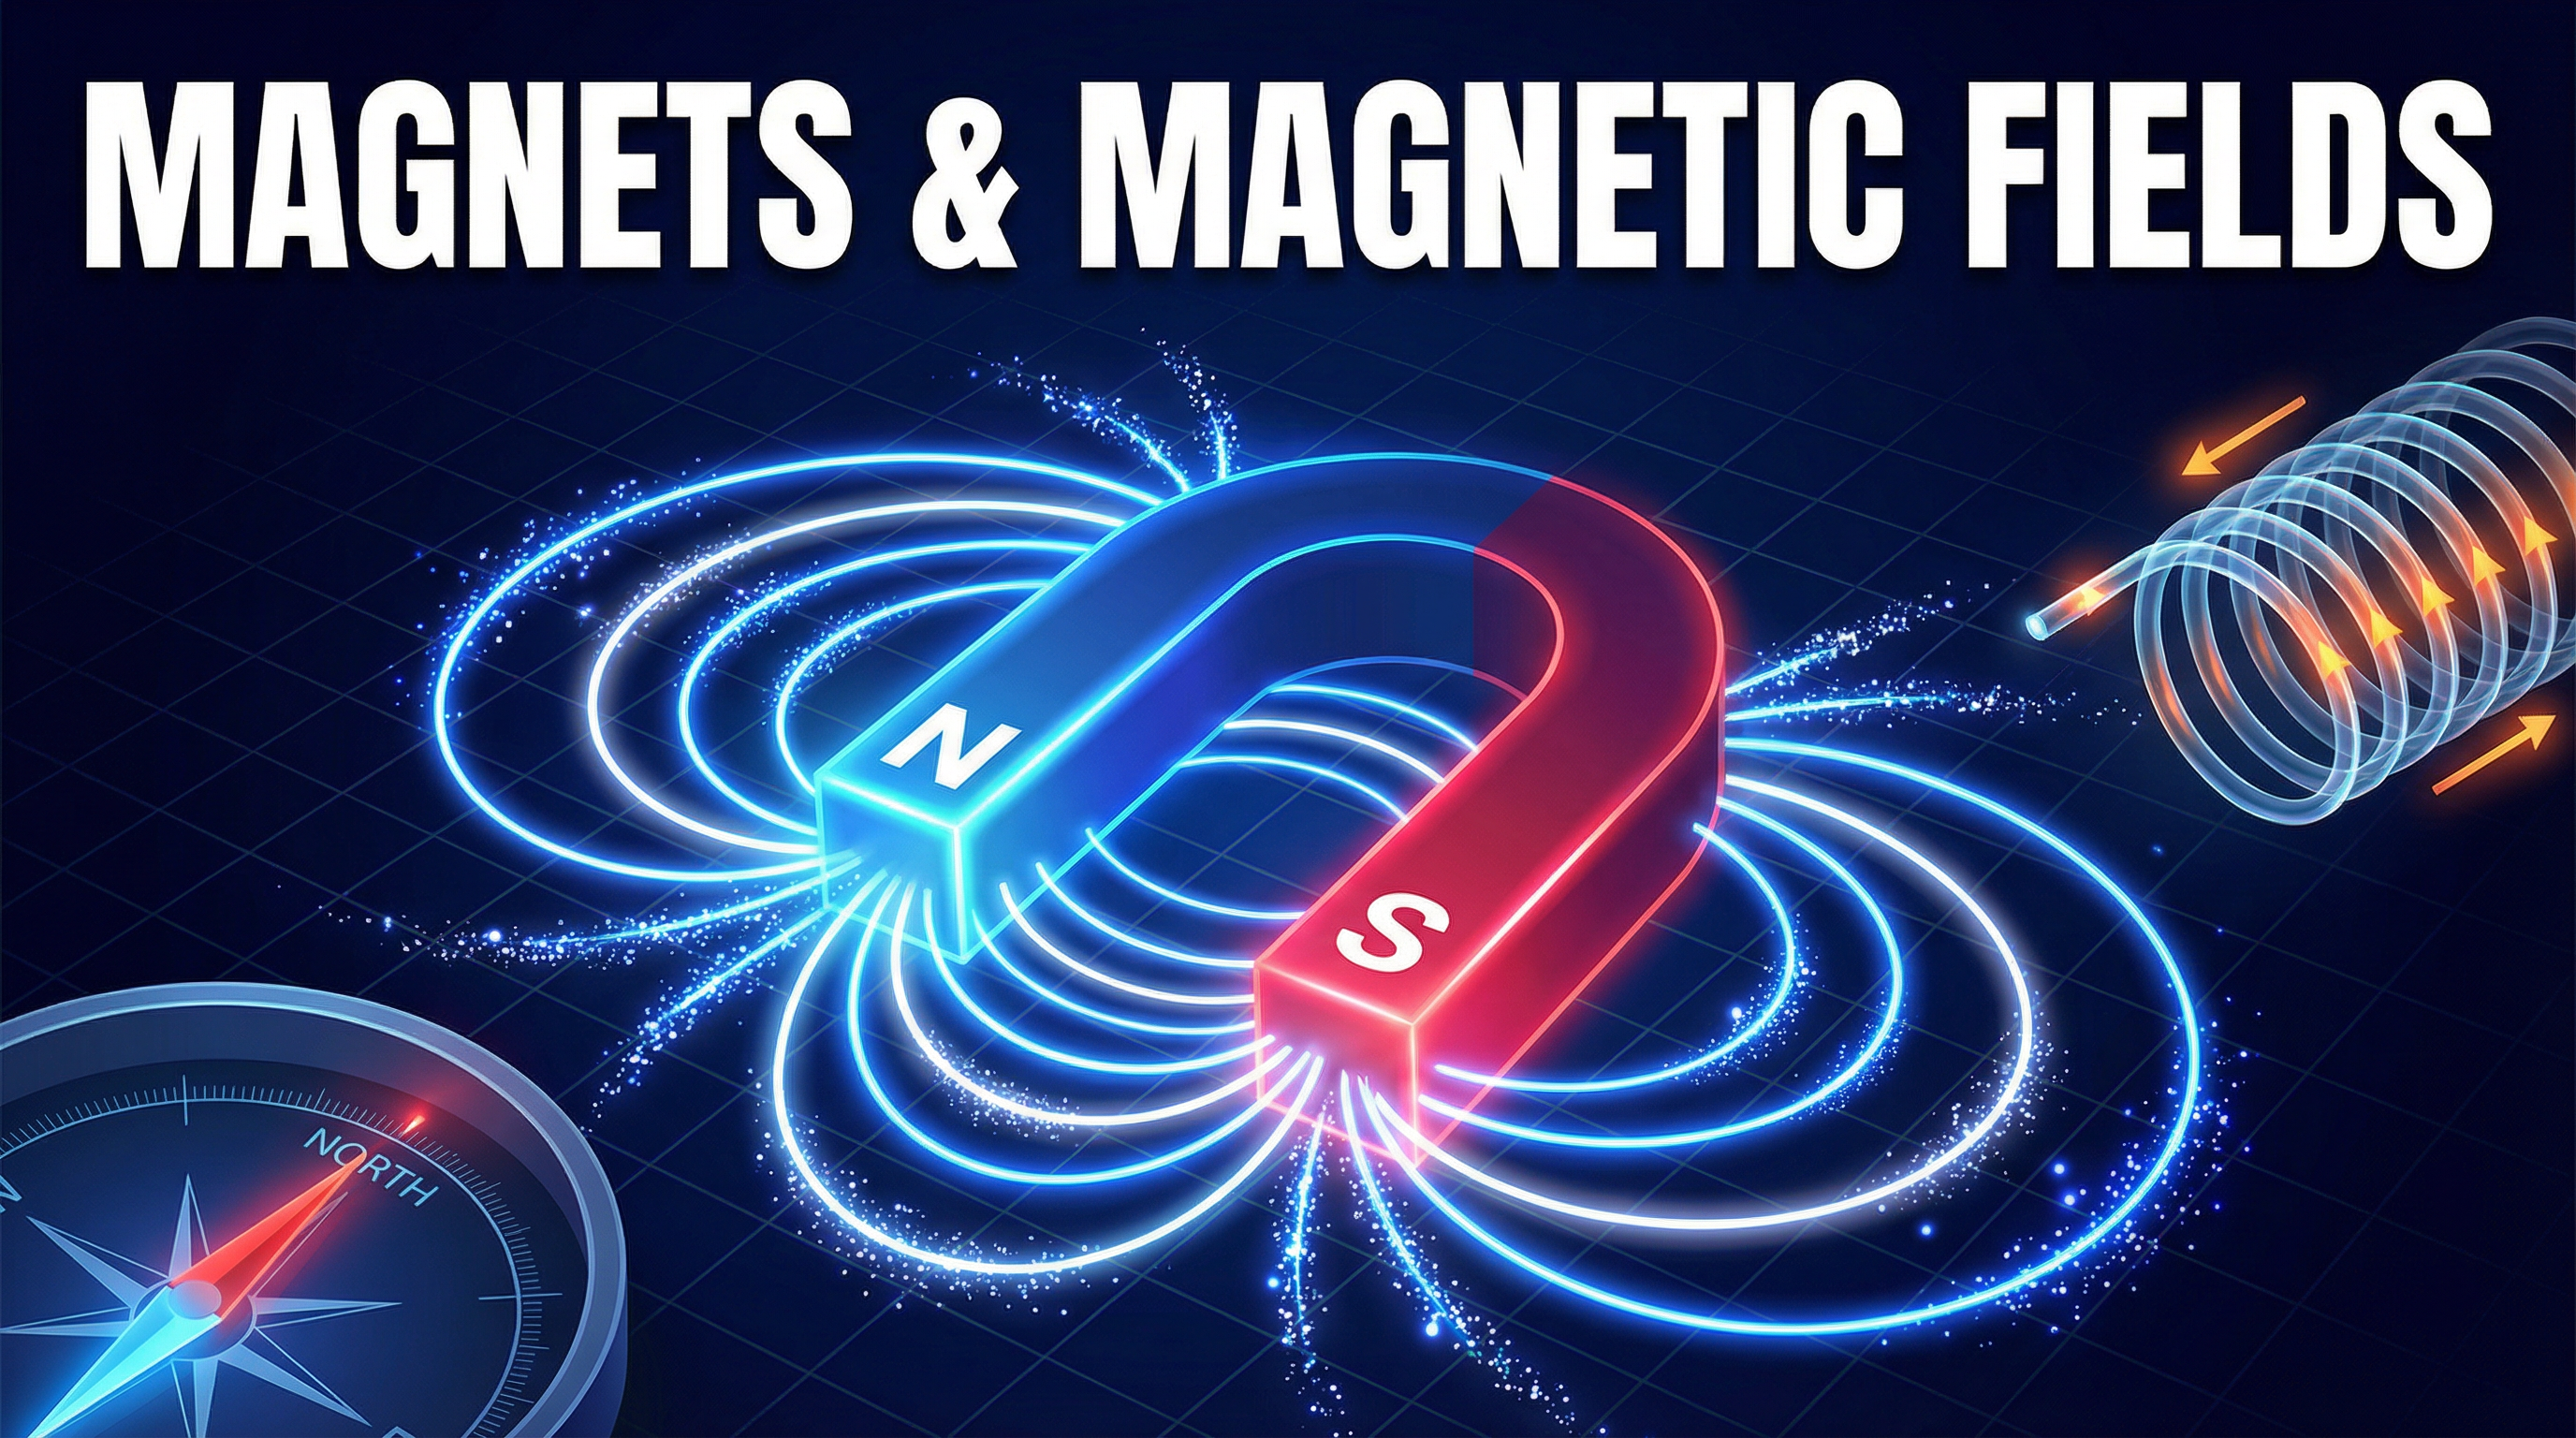
### Concept 1: Magnetic Fields and Field Lines
A **magnetic field** is a region where a magnetic material (like iron) or a moving charge (like a current in a wire) experiences a non-contact force. We can't see these fields, so we represent them using **magnetic field lines**. These are not just random squiggles; they follow strict rules that you must master.
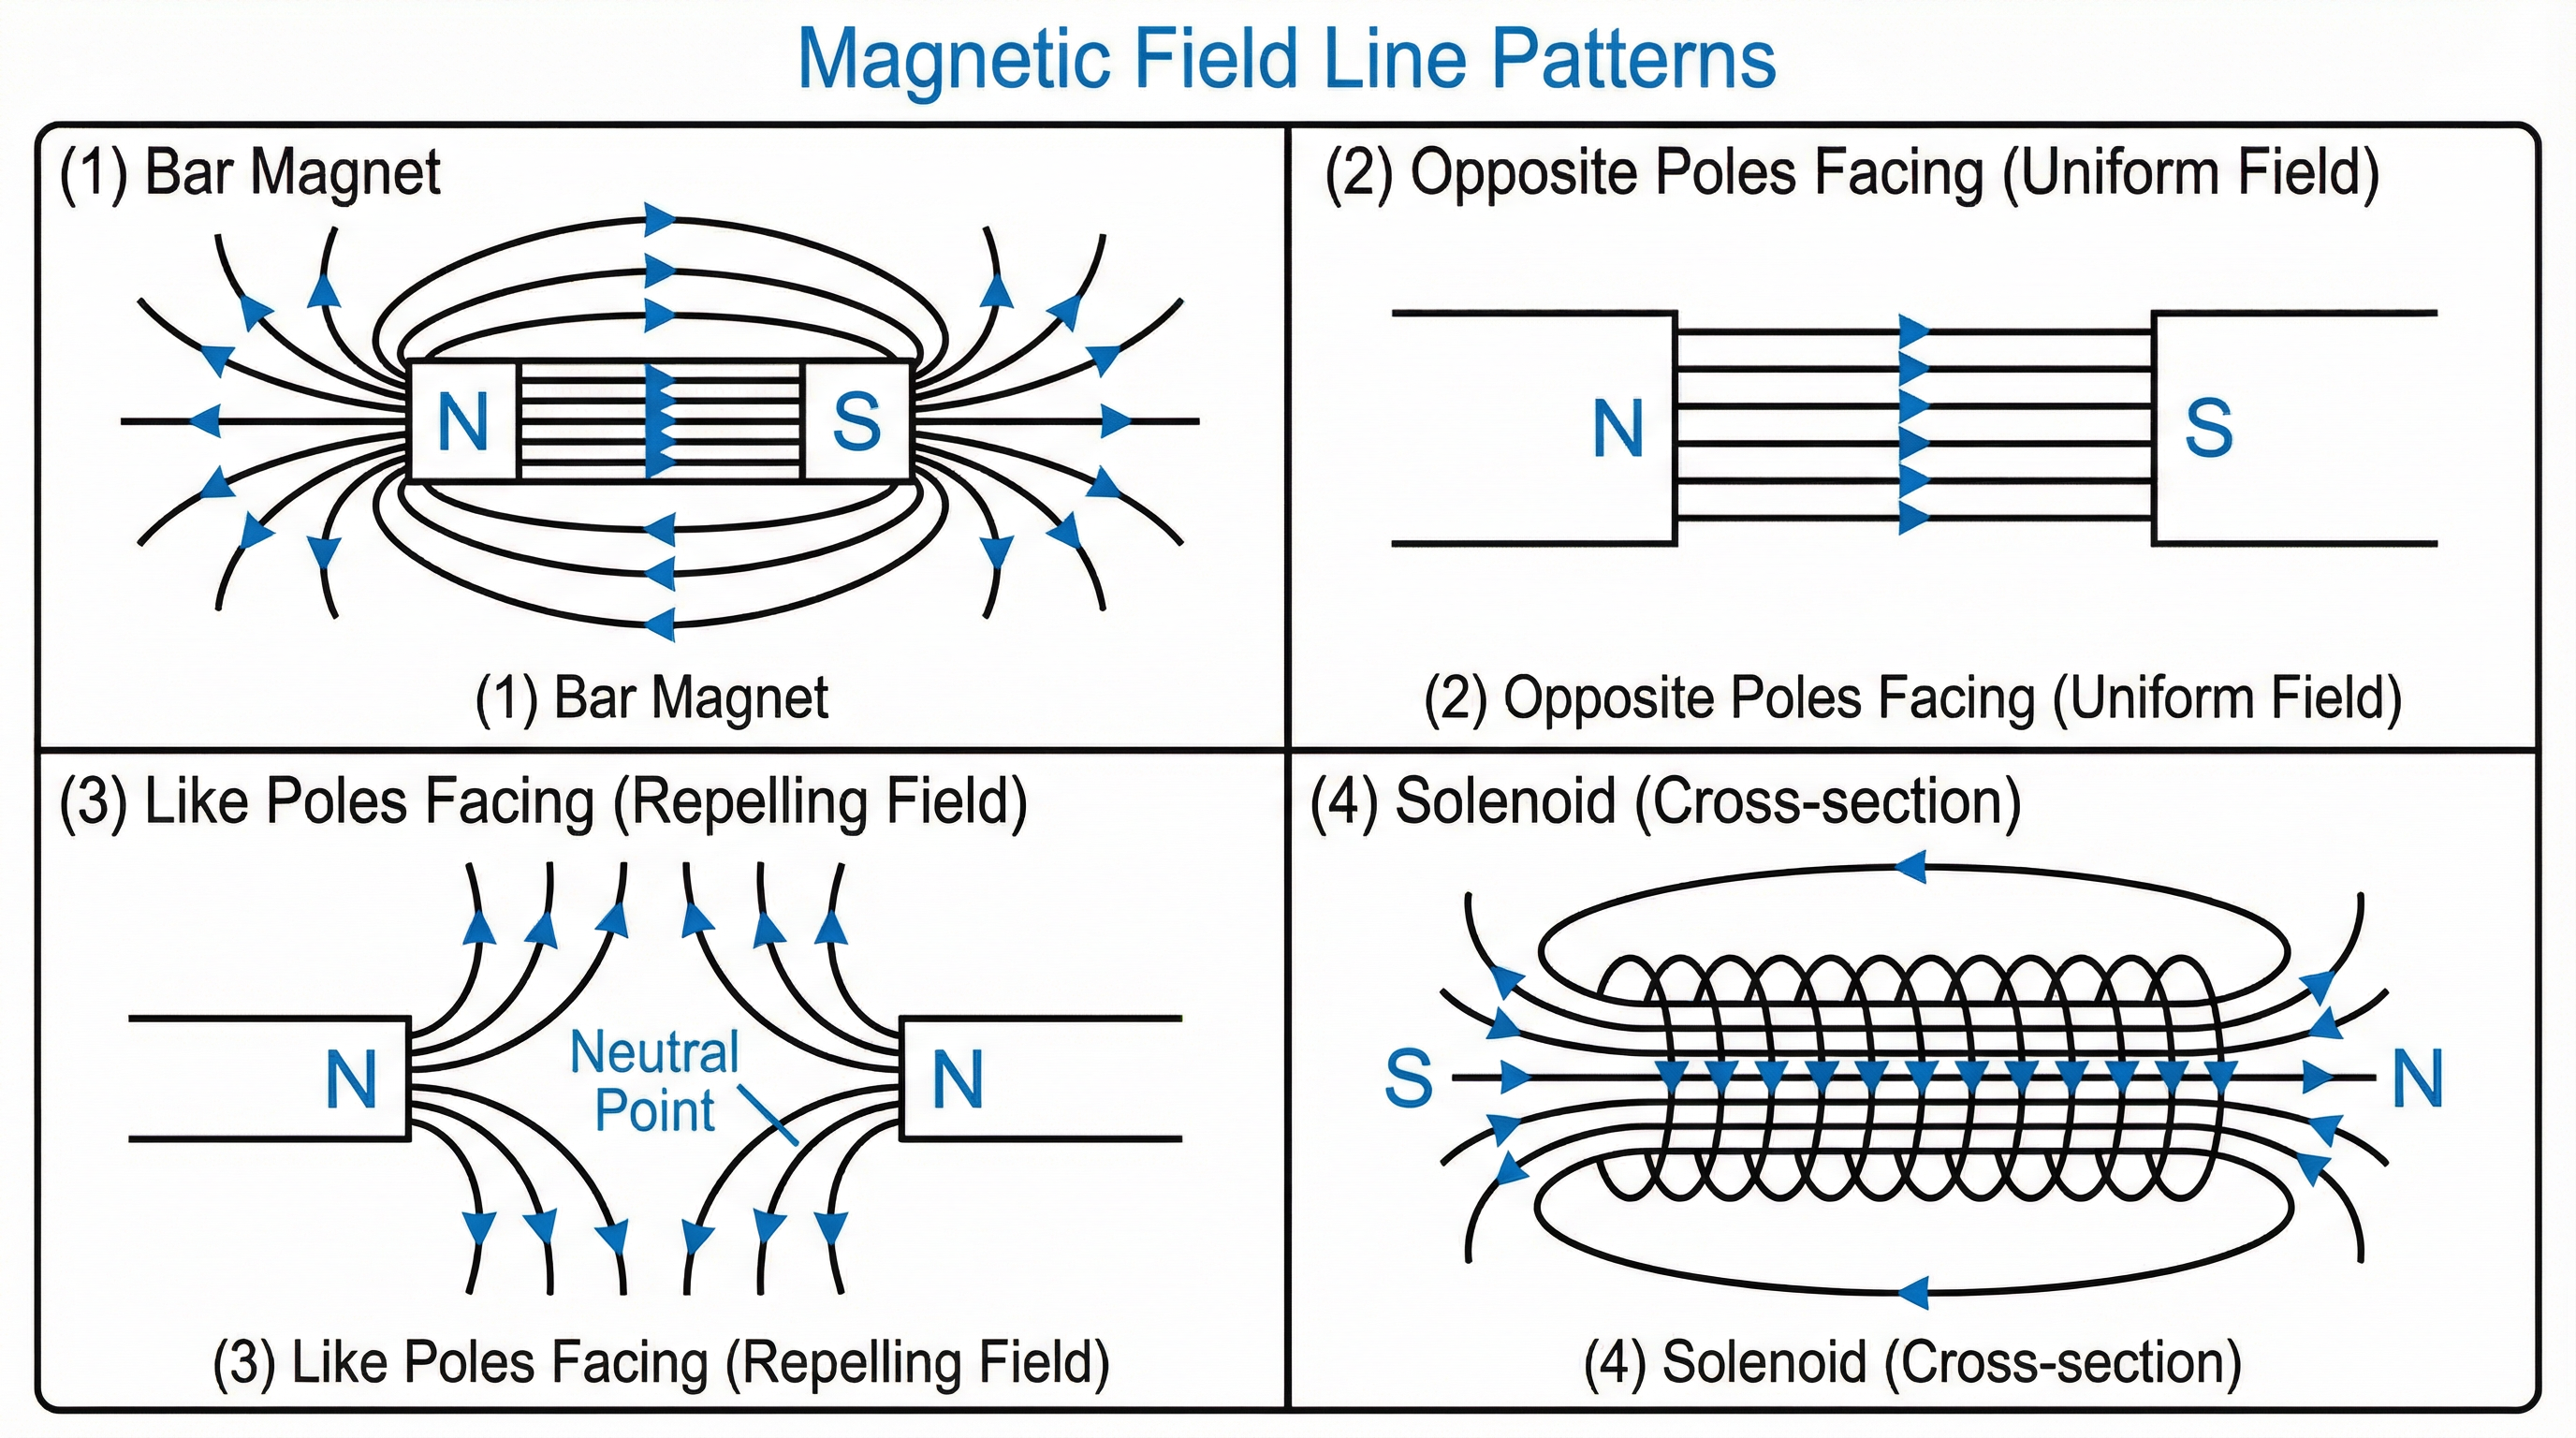
- **Direction**: Field lines always emerge from a North pole and enter a South pole on the outside of the magnet. They form continuous loops, travelling from South to North *inside* the magnet.
- **Strength**: The density of the field lines indicates the strength of the field. Where the lines are closest together, the magnetic field is strongest. For a bar magnet, this is at the poles.
- **No Crossing**: Field lines can **never** cross or touch each other. If they did, it would imply the force at that point acts in two different directions at once, which is impossible. Drawing crossing lines will result in zero marks for that diagram.
### Concept 2: Permanent vs. Induced Magnetism
It is essential to distinguish between permanent and induced magnets. Credit is often awarded for correctly identifying the type of magnetism in a given scenario.
- **Permanent Magnets**: These produce their own magnetic field all the time. They are made from **magnetically hard** materials, such as **steel**. A hard material is difficult to magnetise but, crucially, retains its magnetism once it has been magnetised. Think of a fridge magnet or a compass needle.
- **Induced Magnets**: These are materials that become magnetic only when placed within an external magnetic field. They are made from **magnetically soft** materials, like **soft iron**. A soft material is easy to magnetise and, just as importantly, loses its magnetism easily when the external field is removed. The most important rule for induced magnetism is that it **always results in a force of attraction**, regardless of which pole of the permanent magnet is used. The permanent magnet induces an opposite pole in the part of the soft material closest to it, leading to attraction.
### Concept 3: The Magnetic Field of a Current-Carrying Wire
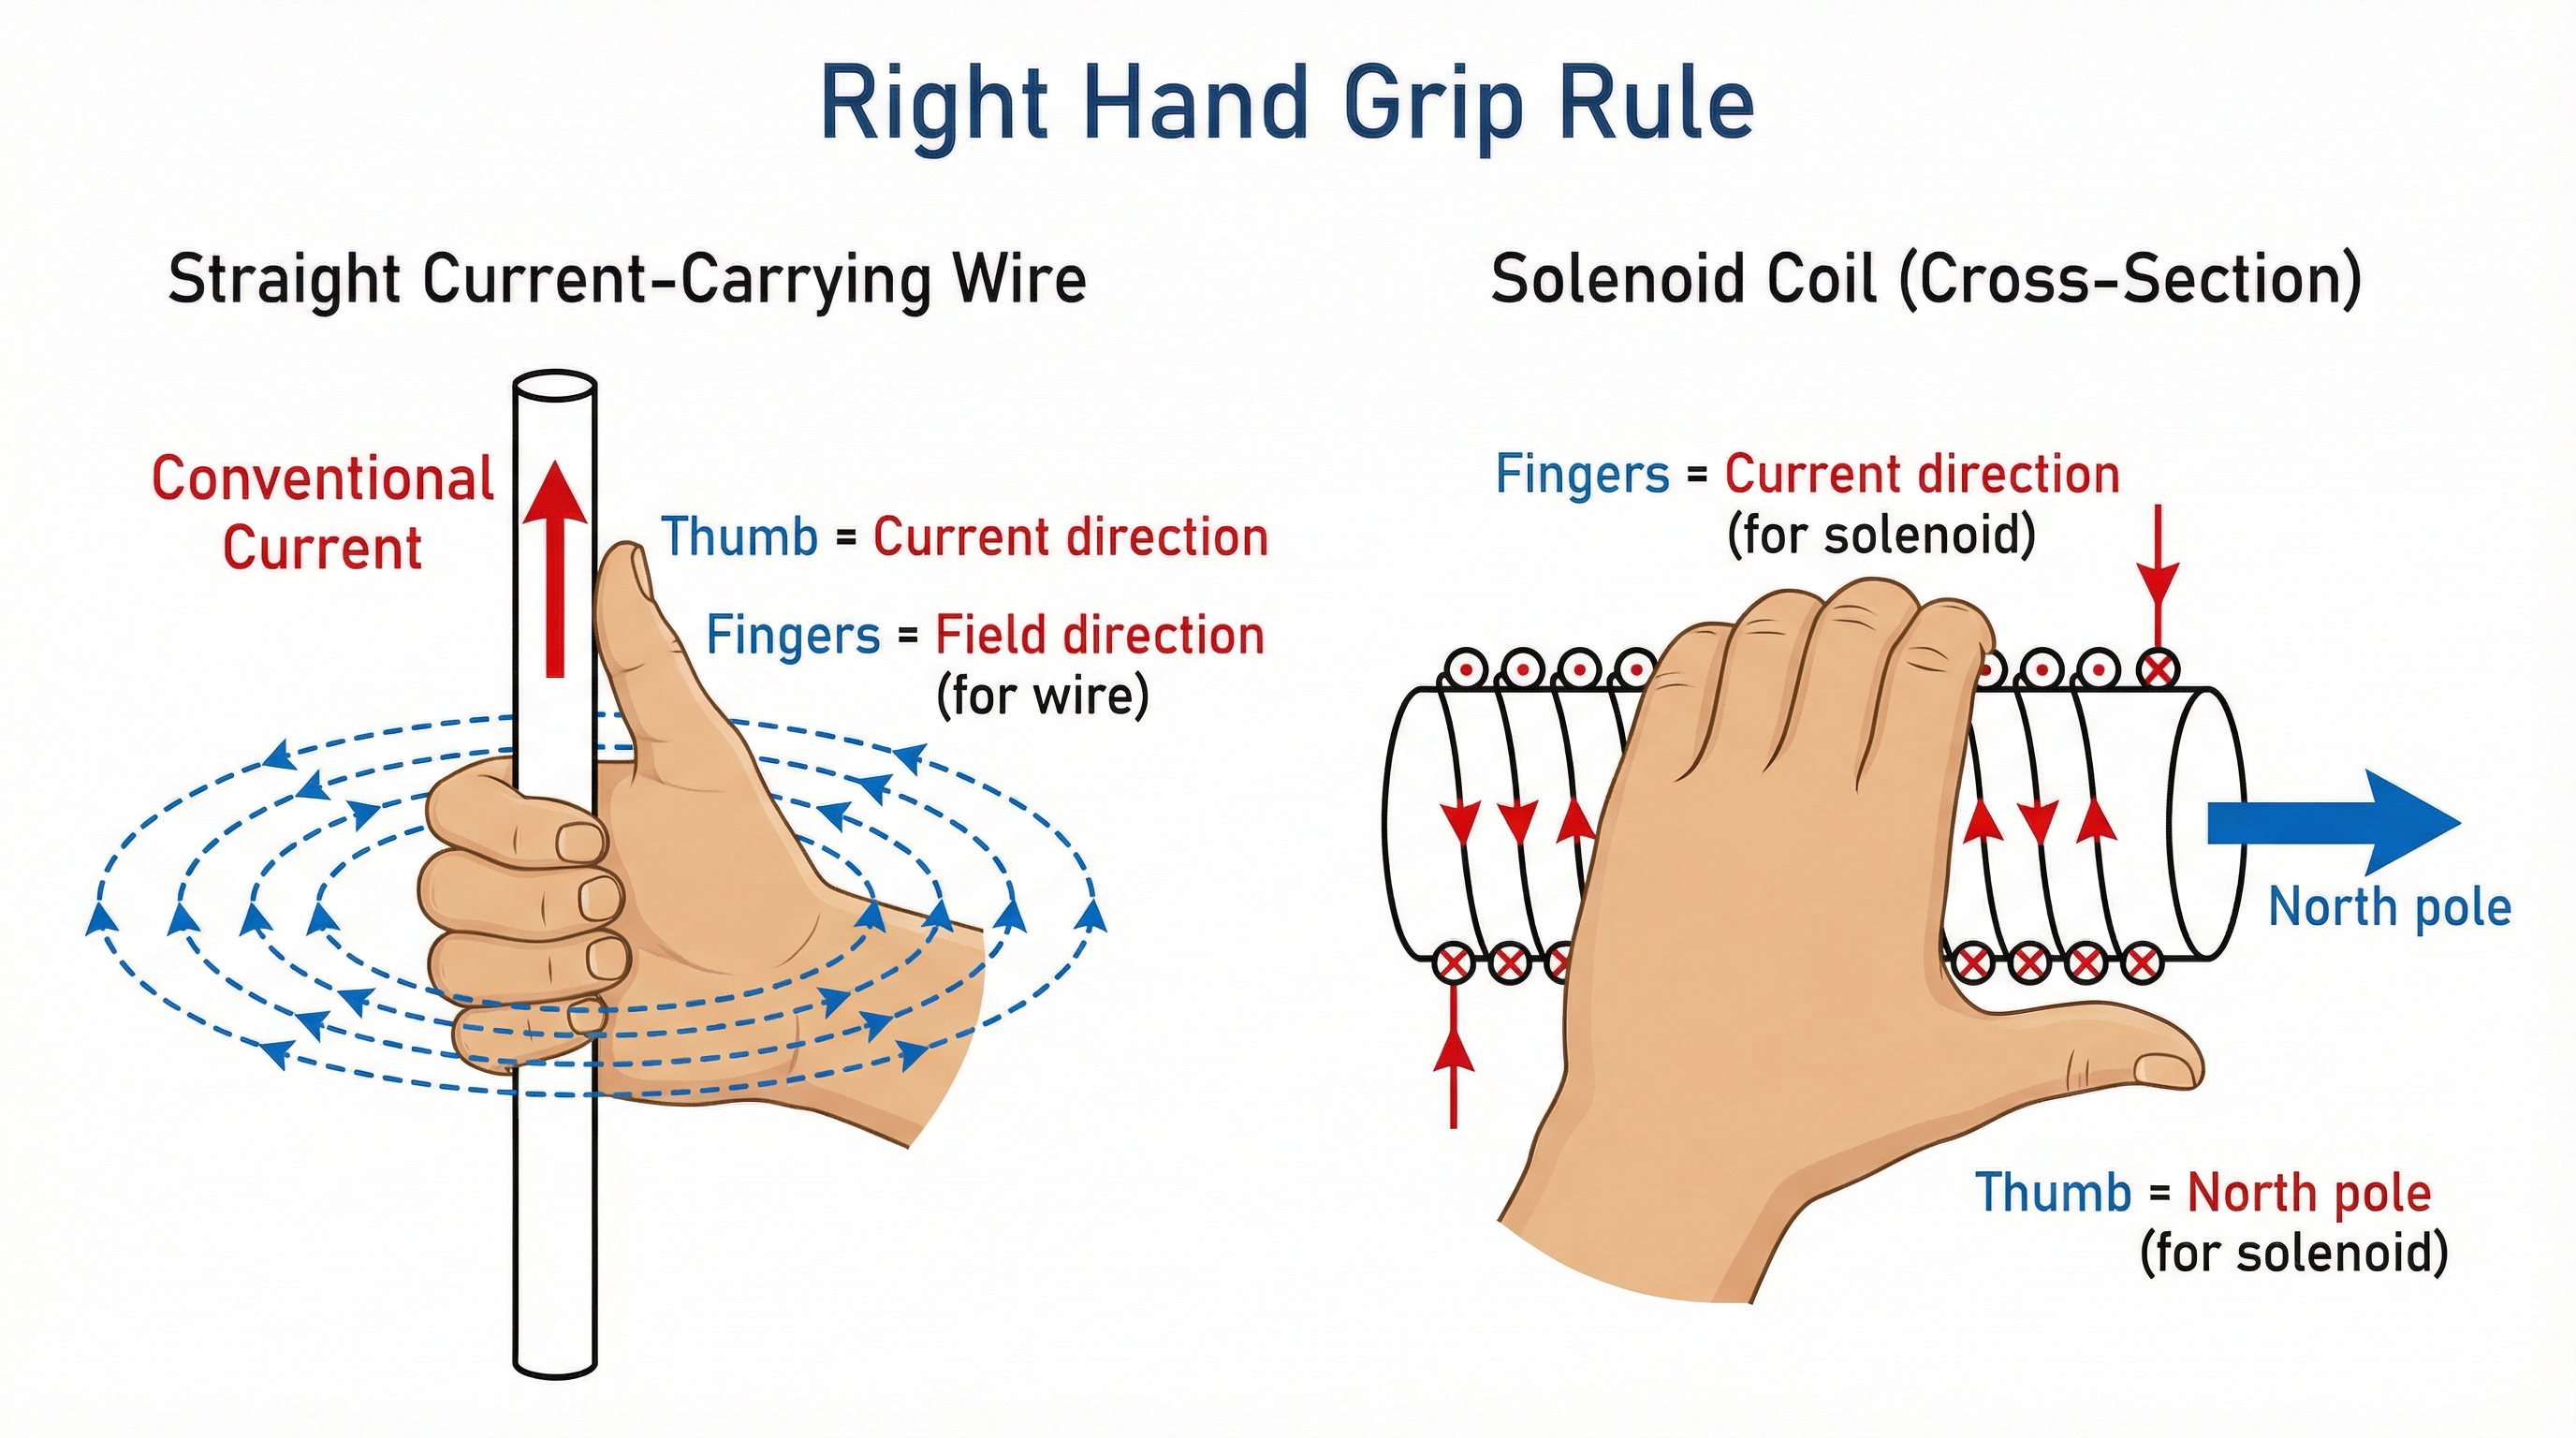
When an electric current flows through a conductor, it generates a magnetic field. For a long, straight wire, the field consists of concentric circles centred on the wire. The direction of this field is determined by the **Right Hand Grip Rule**.
- **The Rule**: Imagine gripping the wire with your right hand. Your thumb should point in the direction of the **conventional current** (from positive to negative). Your fingers will then curl in the direction of the magnetic field lines.
- **Field Strength**: The strength of the field is greatest closest to the wire and decreases as you move further away.
### Concept 4: Solenoids and Electromagnets
A **solenoid** is a coil of wire. When current flows through it, it creates a magnetic field that is remarkably similar to that of a bar magnet. The key features are:
- **Internal Field**: The magnetic field *inside* a long solenoid is strong and **uniform**. This means the field lines are parallel, straight, and evenly spaced. This is a frequently tested point.
- **External Field**: The magnetic field *outside* the solenoid is shaped just like the field of a bar magnet.
- **Polarity**: You can determine the North and South poles of a solenoid using the Right Hand Grip Rule. This time, you curl your fingers in the direction of the current flowing through the coils. Your thumb will then point towards the **North pole**.
An **electromagnet** is simply a solenoid with a soft iron core. The iron core becomes strongly magnetised when current flows, dramatically increasing the strength of the magnetic field. Because soft iron is used, the electromagnet can be switched on and off with the current. You can increase the strength of an electromagnet by:
1. Increasing the current.
2. Increasing the number of turns (coils) on the solenoid.
3. Adding a soft iron core.
## Mathematical/Scientific Relationships
There are no complex mathematical formulas to memorise for this specific topic at GCSE level. The relationships are qualitative. You need to be able to describe the relationships between variables, for example:
- **Field Strength & Current**: The strength of the magnetic field around a wire or in a solenoid is **directly proportional** to the current. (If you double the current, you double the field strength).
- **Field Strength & Distance**: The strength of the magnetic field around a straight wire **decreases** as the distance from the wire increases.
## Practical Applications
- **Electromagnets**: Used in scrapyard cranes to lift and drop cars, in electric bells, and in relays (which are switches operated by an electromagnet). The ability to switch the magnet on and off is key.
- **Compasses**: A plotting compass contains a small, free-moving permanent magnet (the needle). The North pole of the needle is attracted to the Earth's magnetic South pole, which is located near the geographic North Pole.
- **Required Practical: Plotting a Magnetic Field**: Examiners may ask you to describe how to plot the magnetic field of a bar magnet.
- **Apparatus**: Bar magnet, plotting compass, large sheet of paper, pencil.
- **Method**:
1. Place the bar magnet in the centre of the paper and draw around it.
2. Place the plotting compass near one of the poles (e.g., the North pole).
3. Mark a dot on the paper at the position of the North pole of the compass needle.
4. Move the compass so its South pole is now over the dot you just made.
5. Mark a new dot at the position of the compass needle's North pole.
6. Repeat this process of moving the compass and marking dots until you reach the other pole of the magnet or go off the page.
7. Join the dots with a smooth curve and add an arrowhead pointing from North to South. This is one field line.
8. Repeat the process starting from different points around the magnet to draw several field lines."