Acing Floating Point Binary for GCSE and A-Level

Staring at long strings of 1s and 0s can be pretty off-putting. But here's a secret: floating-point binary is just a clever way for computers to handle numbers using scientific notation. It’s the very system that powers everything from the physics in your favourite game to complex scientific modelling, letting computers represent a massive range of numbers in a tiny, fixed amount of space.

Why Floating-Point Binary Isn't as Scary as It Looks
Let's be honest, the moment you see "floating-point binary" on an exam spec, it's easy to switch off. It looks complicated, it’s full of fiddly rules, and it’s a topic that examiners at AQA, OCR, and Edexcel absolutely love to test.
But what if I told you that you already get the main idea behind it?
Think about how you'd write a ridiculously big number, like the distance to the sun (around 150,000,000,000 metres), or a mind-bogglingly small one, like the width of an atom. You wouldn't bother writing out all those zeros. You’d use scientific notation: 1.5 x 10¹¹ m. Easy. This format has two key parts: the significant figures (1.5) and an exponent (¹¹) that tells you where to move the decimal point.
Floating-point binary does exactly the same thing, just in a language computers understand. It splits a number into two main parts:
- The Mantissa: This holds the actual digits of your number (like the '1.5'). It defines the number's precision – how detailed it is.
- The Exponent: This tells the computer how far to shift the binary point left or right (like the '11'). It determines the magnitude – how big or small the number is.
By combining these two, a computer can store an incredible range of values—from tiny fractions to massive figures—all within a standard memory slot, like a 32-bit or 64-bit space. Without this system, computers would be useless for representing the real world accurately.
Examiner's Tip: Floating-point comes up so often because it tests multiple skills at once: your binary conversion, attention to detail, and your ability to apply a strict set of rules. Examiners know students find it tricky, which makes it a perfect topic for sorting out the top grades. Nailing this proves you have a solid grasp of data representation.
This flexibility is essential. A simpler method like fixed-point binary, where the binary point is always in the same place, just doesn't cut it for most jobs. Let's see why.
Floating Point vs Fixed Point at a Glance
| Feature | Fixed-Point Binary | Floating-Point Binary |
|---|---|---|
| Binary Point | Position is fixed and implied. | Position "floats" and is determined by the exponent. |
| Range of Numbers | Very limited. Good for a small, predictable range. | Huge. Can represent tiny fractions and enormous numbers. |
| Precision | Constant and predictable. | Varies depending on the size of the number. |
| Best Use Case | Financial calculations (e.g., £10.50), where you always need two decimal places. | Scientific computing, 3D graphics, physics engines—anywhere with a large, unpredictable range of values. |
As you can see, fixed-point is great for things like storing money, but it's completely impractical for science, engineering, or gaming.
This guide will build your confidence step-by-step. By the time you're done, you'll see floating-point binary isn't a monster to be afraid of, but a logical puzzle you can solve—making you ready for any question they throw at you on exam day.
The Three Key Parts of a Floating Point Number
Getting your head around floating-point binary can feel like a headache, but the good news is it’s all built from just three core parts. Think of them as a team, each with a specific job to do to represent a single number. Once you see how they work together, the whole thing starts to click.
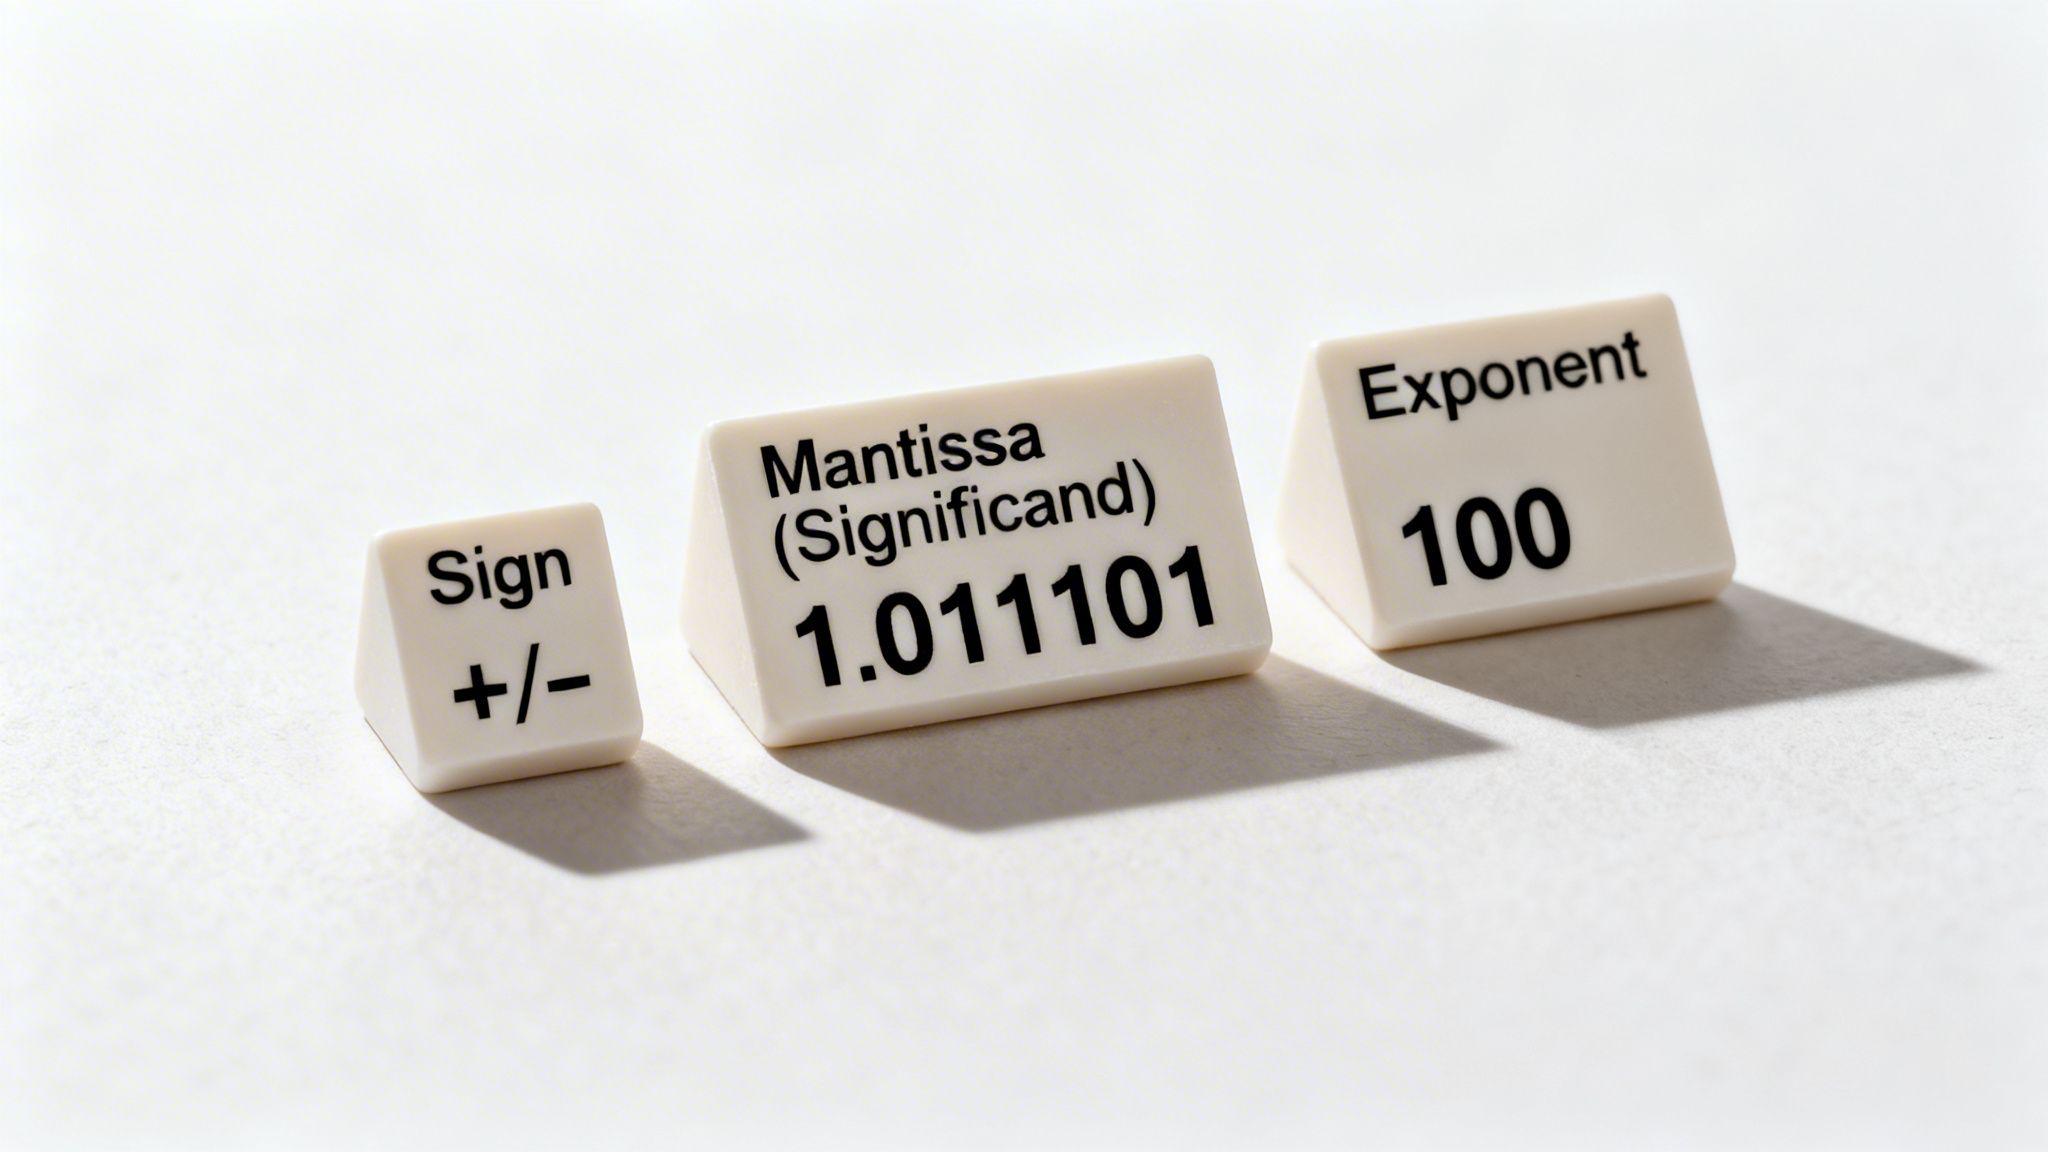
This isn't some random system; it's all laid out in a global standard called IEEE 754. That’s the blueprint used inside every modern computer and, crucially, it’s the one your exam questions are based on. So, mastering how these three parts interact is your ticket to success.
The Sign Bit: The On or Off Switch
Let's start with the easiest bit of all: the sign bit. It’s always just a single bit at the very front of the number.
Its job is incredibly simple – it’s a switch that says if the number is positive or negative.
- A sign bit of 0 means the number is positive.
- A sign bit of 1 means the number is negative.
That’s it. The sign bit doesn't change the number's size, just whether it's above or below zero. In a standard 32-bit floating-point number, this is just one bit out of 32, but its role is vital. Forgetting to check it is a classic mistake and an easy way to lose marks.
The Mantissa: The Digits of Your Number
Next up is the mantissa, sometimes called the 'significand'. While the sign bit tells us if a number is positive or negative, the mantissa holds the actual digits. This part is all about precision.
Think back to scientific notation, like 1.5 x 10¹¹. The mantissa is the equivalent of the "1.5" part – it contains the significant figures. A larger mantissa allows you to store a number with more detail, making your representation more precise.
In floating-point binary, the mantissa is like a ruler. A mantissa with more bits is like a ruler with more millimetre markings—it lets you measure things with greater accuracy. Fewer bits mean you can only get a rougher estimate.
For example, a system with a small mantissa might only store a value like 3.14. A system with a larger mantissa could hold 3.1415926. The more bits we give to the mantissa, the less information we lose. Understanding this trade-off is fundamental, and you can delve deeper into it in our full guide to A-Level floating point representation.
The Exponent: The Power-Shifter
Finally, we have the exponent. This is where the "floating" in floating-point comes from. The exponent's job is to shift the binary point to the left or right, effectively scaling the number up or down.
This component determines the number's magnitude – its overall size. A small exponent gives you a tiny fractional number, while a large one creates an enormous number. It’s the ‘¹¹’ in 1.5 x 10¹¹ that tells you just how big the number truly is.
By tweaking the exponent, a computer can represent a phenomenal range of values – from the diameter of an atom to the distance between galaxies – all using the same fixed number of bits.
These three parts work in perfect harmony:
- Sign: Is it positive or negative? (e.g., 1 bit)
- Mantissa: What are the precise digits? (e.g., 23 bits)
- Exponent: How big or small is it? (e.g., 8 bits)
Together, they create a flexible and powerful system for handling real numbers. The real trick, and a common exam focus, is how the exponent is stored using a special 'bias'. We'll break that down next.
Understanding the Role of the Exponent Bias
We know the exponent's job is to shift the binary point around, setting how big or small a number is. But there’s a crucial detail here that often trips students up – and it's a real favourite for exam questions. The stored exponent isn't quite what it seems, thanks to something called bias.
It's a clever solution to a tricky problem: how can a computer represent both positive and negative exponents (for shifting the point left or right) without needing a separate sign bit just for the exponent? Using a bias simplifies the computer's hardware, making calculations much more straightforward.
What Is Exponent Bias?
Imagine this. You have to represent a range of temperatures from -127°C to +126°C, but you're only allowed to write down positive numbers. What could you do?
A simple fix would be to add a constant value to every temperature. If you added 127 to everything, your range would become 0°C to 253°C. You'd still know what the original temperature was; you'd just have to remember to subtract 127 from whatever number you wrote down.
That's the core idea behind exponent bias. It’s a fixed number added to the actual exponent before it gets stored. The binary pattern you see in the exponent field is this "biased" version, not the real one.
Key Idea: To handle negative exponents without a dedicated sign bit, the computer adds a fixed 'bias' to the true exponent. This ensures the stored value is always a positive integer. To get the true exponent back, you must always subtract this bias.
For an 8-bit exponent, the standard bias is 127. For a smaller 5-bit exponent, you might see a bias of 15. This offset simply shifts the entire range of possible exponents so they are all stored as positive values.
Let's see that in action with a bias of 127:
- A true exponent of +4 is stored as 4 + 127 = 131.
- A true exponent of -3 is stored as -3 + 127 = 124.
- A true exponent of 0 is stored as 0 + 127 = 127.
See how all the stored results (131, 124, 127) are positive? This makes them easy to represent in standard binary and simpler for the processor to work with.
How to Calculate and Use the Bias
The bias value isn't just plucked from thin air. It’s calculated to perfectly centre the range of exponents. The formula is 2^(n-1) - 1, where n is the number of bits in the exponent field.
Let’s take the most common scenario you'll face in your A-Level Computer Science exams: an 8-bit exponent.
- Number of exponent bits (n) = 8
- Calculation: 2^(8-1) - 1 = 2^7 - 1
- Result: 128 - 1 = 127
This value, 127, is the standard bias for single-precision floating-point numbers and is the one you should expect to see most often.
Working with the Bias (An Exam-Style Example)
Right, let's put this into practice. An examiner gives you a floating-point number, and its exponent field has the binary pattern 10000110. What's the real exponent?
First, convert the stored exponent from binary to decimal:
The binary value 10000110 is (1 x 128) + (1 x 4) + (1 x 2) = 134. This is our biased exponent.Next, subtract the bias to find the true exponent:
We use the standard bias of 127. So, the calculation is 134 - 127 = 7.
The true exponent is +7. This tells us that to find the number's actual value, the binary point must be shifted 7 places to the right. Getting this 'un-biasing' step right is absolutely vital for converting a floating-point number back into decimal, which is a skill we'll tackle next.
How Normalisation Creates a Standard Format
Computers love consistency. When you're juggling millions of numbers, you need a single, reliable way to represent them. This is why normalisation is a non-negotiable step in floating-point binary – it makes sure every number has one unique, predictable format.
Imagine telling a computer to recognise "07700 900 123", "07700900123", and "+44 7700 900 123" as the same phone number. It’s a mess. Normalisation is like deciding on one standard way and sticking to it.
For floating-point numbers, that standard format is a binary number that always starts with "1.". Simple as that.
The Golden Rule of Normalisation
The whole point is to adjust your binary number so there’s only one non-zero digit before the binary point. Since this is binary, that digit is always a 1. To get there, we "float" the binary point left or right until the number fits the format.
Of course, you can't just move the point without changing the number's value. Every time we shift the point, we have to tweak the exponent to compensate.
- Moving the point left means you need to increase the exponent.
- Moving the point right means you need to decrease the exponent.
Let's take an unnormalised number like 1011.01. To get it into our standard 1.xxxx format, we need to shift the binary point 3 places to the left, giving us 1.01101. Because we moved it 3 places, our exponent is now +3. The final, normalised number is 1.01101 x 2³.
Getting this right is crucial for top marks. For a deeper dive with more worked examples, check out our guide on the normalisation of floating-point numbers.
Examiner's Insight: A classic mistake students make is adjusting the exponent the wrong way. Just remember it's a balancing act: if you make the mantissa smaller (by shifting the point left), the exponent must get bigger to keep the overall value the same.
Denormalised Numbers: The Exception to the Rule
Okay, so if every number has to start with "1.", how on earth do you represent zero? Or what about incredibly tiny numbers that are almost zero but not quite? This is where a clever exception called denormalised numbers comes into play.
A denormalised number is a special case used when a number is too small to be normalised. This happens when the biased exponent is all zeroes (e.g., 00000000 in an 8-bit exponent). When the computer sees this, it knows the standard rules no longer apply.
Instead of assuming a hidden '1.' before the mantissa, it assumes a '0.'. This neat trick allows the system to represent two very important things:
- True Zero: If the exponent is all zeroes and the mantissa is all zeroes, the number is exactly 0. It’s the only way to store a perfect zero.
- Tiny Values: If the exponent is all zeroes but the mantissa isn't, it represents a number smaller than the smallest possible normalised number. This creates a "graceful underflow," letting the system work with results that are incredibly close to zero instead of just rounding them down and losing all precision.
Understanding these standardised forms is key. It's a concept that pops up elsewhere, like the design choices between Normalized vs Denormalized Data in databases, where efficiency and structure are also constantly in balance.
Being able to explain the difference between normalised and denormalised numbers shows an examiner you've moved beyond just memorising rules and truly understand the topic.
A Step-by-Step Guide to Decimal to Floating-Point Conversion
All the theory is great, but the best way to really nail floating-point binary is to get your hands dirty and convert a number yourself. This is exactly what examiners love to ask, so let's walk through a full example, showing all the working you'd need for top marks.
We'll convert the decimal number 23.5 into a 16-bit floating-point format. For this example, we’ll use 1 bit for the sign, 5 bits for the exponent, and 10 bits for the mantissa. Don't worry, this is a repeatable, four-step recipe you can use for any number they throw at you.
Step 1: Convert to Binary
First things first, we need to split our number, 23.5, into its whole number and fractional parts. We'll convert each to binary on its own.
- The Whole Number (23): The simplest way is repeated division by 2. If you work it through (23 ÷ 2 = 11 r 1, 11 ÷ 2 = 5 r 1, etc.), you'll find reading the remainders from the bottom up gives you 10111.
- The Fractional Part (0.5): For this bit, we use repeated multiplication by 2. It’s a quick one: 0.5 x 2 = 1.0. We take the whole number part (1) and we're left with a fraction of 0, so the job is done. The result is .1.
Stick them back together and you have it: 23.5 in binary is 10111.1.
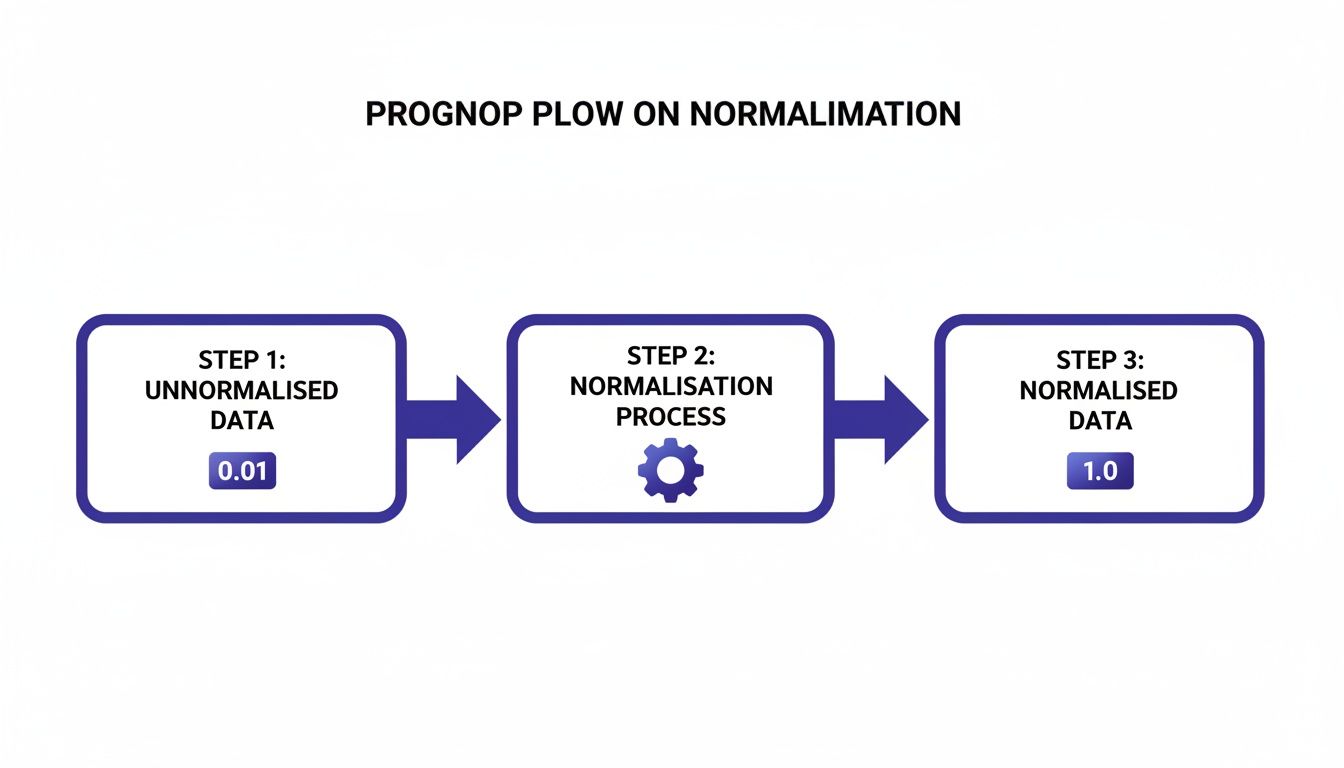
Step 2: Normalise the Number
Now for a crucial step: normalisation. We need to get this binary number into the standard 1.xxxxxxxx format. This means shifting the binary point until only a single '1' is left in front of it.
Our number is 10111.1. To get it into the standard 1.xxxx form, we have to move the binary point 4 places to the left.
Doing this gives us 1.01111.
Because we shifted the point 4 places, our exponent is +4. So our number in normalised form is 1.01111 x 2⁴. This standardisation is vital because it ensures every number has a single, unique representation, which is essential for computers to process them consistently.
Step 3: Calculate the Biased Exponent
Here's the clever bit. To store both positive and negative exponents, computers use a bias. For our 5-bit exponent, the bias is found using the formula 2^(n-1) - 1, where n is the number of bits for the exponent.
- Calculation: 2^(5-1) - 1 = 2⁴ - 1 = 16 - 1 = 15. So, our bias is 15.
- Our True Exponent: From Step 2, we know this was +4.
- Biased Exponent: True Exponent + Bias = 4 + 15 = 19.
Finally, we convert this biased exponent (19) into a 5-bit binary number, which is 10011.
Examiner's Tip: Forgetting to add the bias is one of the most common mistakes students make. Always show your bias calculation clearly in your working. It proves to the examiner you know why you're doing it, not just blindly following a method.
Step 4: Assemble the Final Number
We've got all three pieces of the puzzle. It's time to put them together into our final 16-bit floating-point number.
This table breaks down exactly where each part comes from and how it fits into the final representation.
Worked Example Converting 23.5 to a 16-Bit Float
| Step | Action | Resulting Value |
|---|---|---|
| Sign | The number 23.5 is positive. | 0 |
| Exponent | We calculated the biased exponent as 19. | 10011 |
| Mantissa | The fractional part of our normalised number (1.01111) is 01111. We pad this with zeros to fill the 10 available bits. | 0111100000 |
Now, we just line them up in the correct Sign | Exponent | Mantissa order:
0 | 10011 | 0111100000
And that's it! The decimal number 23.5 is represented in this 16-bit floating-point format as 0100110111100000.
Getting comfortable with these steps is a fantastic way to deepen your knowledge. If you want to explore this further, our guide on data representation for OCR GCSE Computer Science covers even more ground.
How to Convert Floating-Point Binary Back to Decimal
Right, we've covered turning decimal numbers into a complex-looking string of 1s and 0s. But can you go the other way? Reversing the process is a classic exam question because it proves you truly understand how floating-point binary is put together.
Let's say you're given a binary pattern. How do you work backwards to find the original decimal number? We'll break it down step-by-step. It's a systematic process, and once you get the hang of it, you can tackle any number they throw at you.
We'll use a 16-bit format: a 1-bit sign, a 5-bit exponent, and a 10-bit mantissa.
Here’s our binary number: 1 10011 0111100000
Step 1: Split the Pattern
First things first, let's carve up that binary string into its three parts, based on the format we've been given.
- Sign Bit: The first bit on the left.
- Exponent: The next 5 bits.
- Mantissa: The final 10 bits.
Applying this to our example gives us:
- Sign: 1
- Exponent: 10011
- Mantissa: 0111100000
That sign bit of 1 tells us immediately that our final number is going to be negative. Make a note of that – it's an easy detail to forget at the end.
Step 2: Un-bias the Exponent
Next up, the exponent. The value we have here, 10011, isn't the real exponent. It’s been offset by a bias, so we need to reverse that process.
First, let's calculate the bias for a 5-bit exponent using the formula 2^(n-1) - 1:
- Bias = 2^(5-1) - 1 = 2^4 - 1 = 16 - 1 = 15
Now, convert the stored exponent 10011 from binary to decimal:
- (1×16) + (0×8) + (0×4) + (1×2) + (1×1) = 19
Finally, subtract the bias from this value to find the true exponent:
- True Exponent = 19 - 15 = 4
This is our magic number. It tells us we need to shift the binary point 4 places to the right.
Examiner's Tip: I can't tell you how many marks are lost by forgetting to 'un-bias' the exponent. A common mistake is to convert the exponent to decimal (getting 19 in this case) and use that as the shift value. Always, always subtract the bias to find the true exponent.
Step 3: Rebuild the Normalised Number
This is the other spot where people often trip up. You look at the mantissa (0111100000) and think that’s the number you work with. But remember normalisation? Every normalised number starts with a 1. which is implied and not actually stored to save space. We have to add it back in.
Let’s put our number back together:
- Start with the hidden
1.that's always there: 1. - Append the mantissa
0111100000after it: 1.0111100000
We can drop the trailing zeros, so our complete normalised binary number is 1.01111.
Step 4: Convert Back to Decimal
We're on the home straight. We have our normalised number (1.01111) and we know our true exponent is +4. To get our final binary number, we just need to shift the binary point 4 places to the right.
- Shifting
1.01111four places right gives us10111.1.
Now, it's just a simple case of converting this standard binary number to its decimal equivalent.
- Integer part (10111): (1×16) + (0×8) + (1×4) + (1×2) + (1×1) = 23
- Fractional part (.1): (1×0.5) = 0.5
Adding them together, 10111.1 in binary is 23.5 in decimal.
But wait, we're not quite done! Remember that very first step? The sign bit was 1, telling us the number is negative.
So, our final answer is -23.5.
Your Floating-Point Questions, Answered
Once you've got the hang of converting numbers, you start bumping into the "why" questions. These are the tricky points that often come up in exams, separating those who have just memorised a method from those who truly understand it.
Let's dig into a few common sticking points. Nailing these details will give you a real confidence boost and show an examiner you’ve mastered the topic.
Why Are Some Numbers Not Perfectly Accurate?
This is a brilliant question because it gets right to the core of a fundamental limit in computing. The simple truth is that we're using a finite number of bits (like 32 or 64) to represent an infinite range of possible numbers. It’s a bit like being given a small, standard set of Lego bricks and asked to build a perfect sphere – you can get close, but you’ll always see the blocky edges.
For some decimal numbers, this becomes a real problem. A simple value like 0.1, for example, turns into an infinitely repeating pattern when converted to binary (much like how 1/3 becomes 0.333... in decimal). Since the mantissa has a fixed length, the computer has no choice but to chop the end off. This creates a tiny, unavoidable inaccuracy known as a precision error or rounding error.
In computing, "close enough" is often the best you can get. This is perfectly acceptable for things like video game graphics or physics simulations, but it’s precisely why floating-point is a nightmare for financial systems where every single penny must be accounted for.
What's the Big Deal with a Tiny Loss of Precision?
For a single calculation, it isn't a big deal. When a number is rounded, the stored value is incredibly close to the original. If a character in a game is positioned a nanometre away from its "perfect" spot, no one will ever notice.
The danger comes from accumulation. If you’re running millions or even billions of calculations—say, for a complex weather forecast model—these tiny rounding errors can start to compound. Each small error builds on the last, and eventually, the final result can drift significantly and become plain wrong. It’s a limitation that programmers and computer scientists always have to be aware of.
Why Use That Specific Exponent Bias?
The bias (like 127 for an 8-bit exponent) can seem a bit random at first glance, but it’s a very clever piece of engineering. Its purpose is to let us represent both large and small numbers (positive and negative exponents) without needing a separate sign bit just for the exponent.
By adding this fixed offset, we shift the entire range of exponents so they are all stored as positive integers. This makes life much easier and faster for the processor hardware, especially when it needs to compare the magnitude of two floating-point numbers. The formula 2^(n-1) - 1 is used to pick a bias that centres the range of true exponents neatly around zero.
Feeling ready to tackle any floating point binary question? To really lock in your knowledge, consistent practice is key. MasteryMind is an AI-powered revision platform that builds your skills from basic recall to complex problem-solving, with practice questions aligned to your exact exam board. Get instant, examiner-style feedback and see exactly where you need to improve. Start your free plan and turn tricky topics into top marks at https://masterymind.co.uk.
Ready to master this topic?
Practise with quizzes, blurt exercises and exam questions on MasteryMind.
7 days Premium · Then free forever · No card, no charge