Physics Practicals a Level: Your Ultimate 2026 Guide
You're probably in one of two places right now. Either you've looked at an A-Level physics practical and thought, “I can follow the method, but I've got no idea how this turns into exam marks,” or you're aiming high and you've realised that small mistakes in the lab are the difference between a solid grade and a painful one.
That feeling is normal.
GCSE practicals often let you get away with “do the steps, write the result, move on”. A-Level is different. You're not just expected to carry out an experiment. You have to think like someone testing evidence: checking equipment, controlling variables, spotting weak measurements, handling uncertainty, and then writing about all of that clearly enough to earn marks in an exam hall later.
That jump catches students out every year. It also catches teachers, because a student can seem perfectly competent in the room and still lose marks badly when the paper asks them to explain uncertainty, justify a method, or diagnose a faulty reading.
Nailing Your A-Level Physics Practicals Starts Here
A lot of students think practical work sits off to one side of the course. It doesn't. In A-Level Physics, practical skills are built into the qualification itself. Under the AQA specification, a minimum of 15% of all assessment marks is allocated to practical skills through questions that test measurement, analysis, evaluation, graph work, uncertainty, and experimental design in the written papers, as set out in the AQA practical assessment requirements.
That matters for two reasons.
First, practical questions aren't a bonus topic. They are part of your grade. If you're trying to rescue your result, this is one of the quickest areas to improve because the same types of mistakes come up again and again. If you're aiming for the top, this is where clean habits pay off.
Second, practical success at A-Level has two separate sides. There's the lab competence your teachers assess over time, and there's the exam performance where you turn an experiment into marks. Many students only prepare for one of those.
Doing the practical isn't the same as scoring the marks
You can complete a diffraction practical, produce a graph, and still drop marks later because you rounded badly, ignored percentage uncertainty, or didn't mention a control variable in enough detail. That's the gap that matters most in physics practicals at A-Level.
Practical rule: Treat every practical as two tasks. First, do the experiment. Second, rehearse the exam question that could be asked about it.
If you're short on time, that mindset changes everything. Instead of seeing required practicals as isolated lessons, you start seeing recurring patterns: identify variables, check apparatus, record units properly, process data, comment on uncertainty, evaluate limits.
A good revision routine helps with that. If you need a sharper method for organising your revision across calculations, recall, and practical application, this practical physics study system gives a sensible framework that fits the way A-Level Physics works.
Why this feels harder than GCSE
At GCSE, teachers often guide the structure heavily. At A-Level, you're expected to make better decisions yourself. You need to know not just what happened, but why your setup was suitable, what reduced error, and how you'd improve reliability without changing the whole experiment.
That's why students who want better results usually need more than notes. They need repeated exposure to practical-style questions, especially the messy ones. Resources for Online Revision for A-Level can help students practise that style of thinking outside the lab, where most of the marks are won or lost.
The Rules of the Game CPACs and Exam Boards
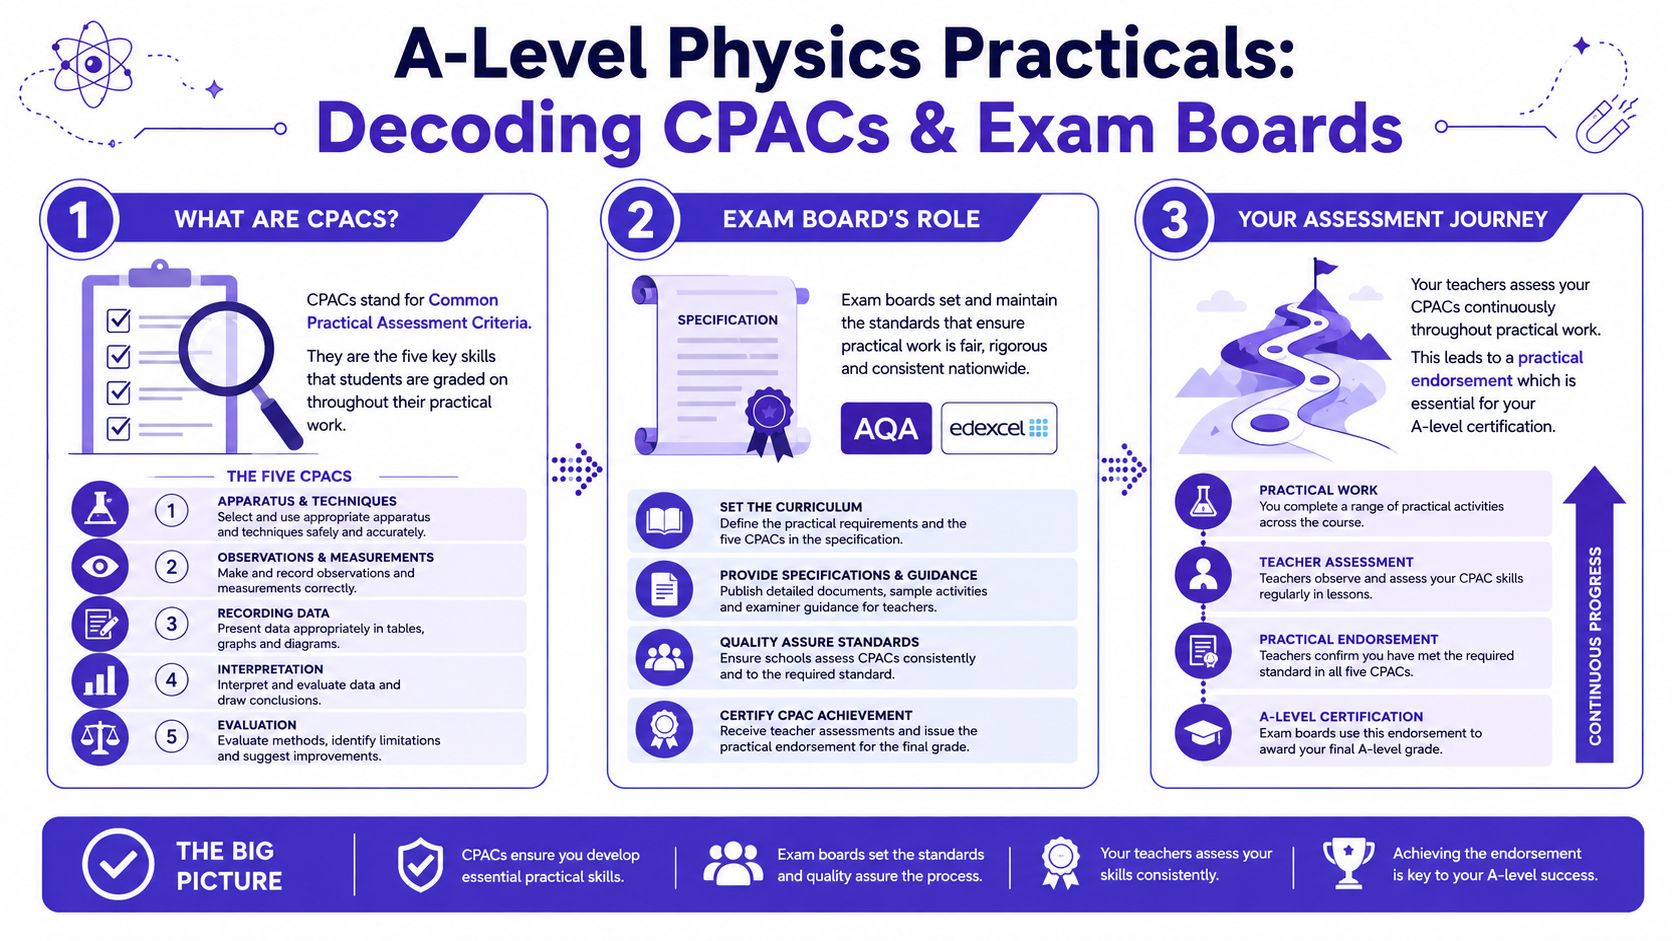
Most confusion starts with one bit of jargon: CPACs. The name sounds bureaucratic, but the idea is simple. These are the practical standards students must show during their course.
The Common Practical Assessment Criteria require a practical endorsement that is separate from the written exam grade, and it depends on documented evidence of routine practical work and consistent performance, as explained in this guide to A-Level practical endorsement and CPACs.
What CPACs mean in plain English
Students often hear “pass the practical endorsement” and assume it's one big test. It isn't. Teachers build evidence over time.
In plain language, the CPAC framework is about whether you can:
- Use apparatus properly without constant rescue
- Work safely and follow instructions sensibly
- Make observations and measurements carefully
- Record work clearly so someone else could follow it
- Analyse and evaluate what your data shows
Teachers don't just tick a box because you turned up. They need evidence that you've shown these skills consistently.
Your practical endorsement is less like one driving test and more like building a folder of proof that you can actually drive.
That's why written records matter so much. If your notes are vague, missing units, or impossible to interpret later, that weakens the evidence.
Why exam boards feel different but overlap a lot
AQA, Edexcel, and OCR package their practical work differently. Students sometimes panic when they compare lists online and think they're revising the wrong course. In reality, the boards overlap heavily in the core physics ideas.
Here's the simplest way to think about it. The names vary, but the practical world is familiar: mechanics, electricity, waves, materials, and data analysis.
| Practical Area | AQA | Edexcel (Core Practicals) | OCR (Practical Activity Groups) |
|---|---|---|---|
| Mechanics and motion | Common through force, motion, and materials investigations | Common through motion and force-based tasks | Common through mechanics-focused practical activity groups |
| Electricity | Circuit and electrical measurement work | Core circuit investigations | Electrical measurements and circuit techniques |
| Waves and optics | Interference, refraction, diffraction-style work | Wave behaviour and optics practicals | Wave and optics practical activities |
| Materials | Resistivity, Young modulus, deformation-style work | Material property investigations | Material behaviour and measurement tasks |
| Data and analysis | Graphs, uncertainties, evaluation in all practicals | Embedded across core practicals | Embedded across practical activity groups |
The exact practical title matters less than the skill underneath it.
What teachers and students should actually track
A sensible checklist is shorter than most students expect:
- Can you identify the variable setup? Independent, dependent, controlled.
- Can you use the apparatus without guesswork?
- Can you record raw data with units and suitable precision?
- Can you turn that data into a graph or calculation correctly?
- Can you explain the uncertainty and suggest a realistic improvement?
For departments comparing support across boards, MasteryMind's covered subjects shows the broader exam-board environment, which is useful when students are moving between resources or teachers are checking alignment.
Mastering Core Experimental Techniques
Students lose a surprising number of marks before the experiment has even started. One of the biggest reasons is simple: they trust the apparatus too quickly. Recent exam analysis indicates that 42% of top-grade students in UK A-Level Physics failed Paper 3 Q1 because of untested faulty equipment, according to the referenced analysis linked through Save My Exams A-Level Physics.
That should change how you walk into the lab.
The checks good students do before anyone says start
A strong practical student doesn't begin by measuring. They begin by testing the setup.
Use this mental routine:
- Check for zero error on instruments such as micrometers and vernier callipers
- Check power and connections on meters, sensors, and power supplies
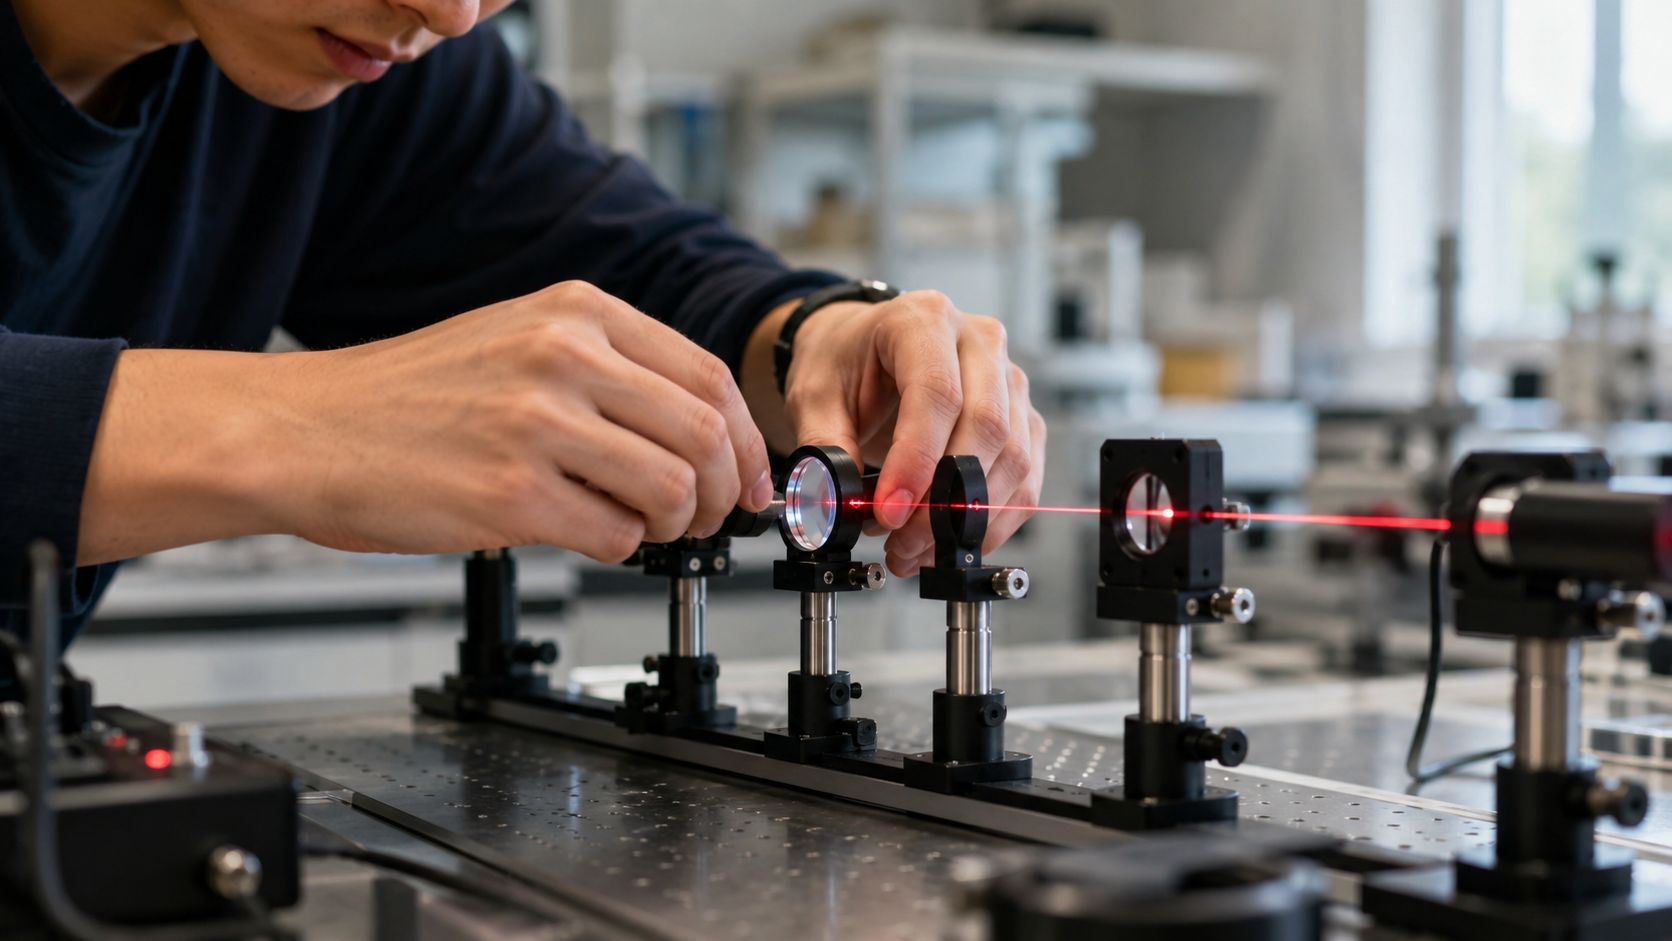
- Check alignment for optics setups, especially lasers, slits, and lenses
- Check scale readability before taking the first reading
- Check whether the value is sensible using a quick estimate
A zero error is a good example of where students know the phrase but don't use it properly. If a micrometer doesn't read zero when fully closed, that offset matters. Ignore it and every reading carries the same built-in mistake.
If a voltmeter battery is dying, or a connection is loose, your readings may drift or stick. Students often blame themselves for “messy data” when the apparatus is the actual issue.
Tricky kit that needs a slower approach
Vernier callipers and oscilloscopes both cause trouble for the same reason. They punish rushing.
With vernier callipers, many students read the main scale but forget to add the vernier scale correctly. With oscilloscopes, they focus on the shape of the trace and forget the actual scales for time-base and voltage sensitivity.
If an instrument gives more precision, it also demands more patience.
A good habit is to say the reading process in your head before you write anything down. Main scale first. Fine scale second. Units last. Then ask whether the answer makes physical sense.
Later in the course, that discipline is worth marks in both practical write-ups and exam questions.
A quick visual explanation can help if apparatus technique still feels abstract:
Precision starts before the first data table
A lot of “uncertainty problems” are setup problems wearing a disguise. If your clamp slips, your ruler is at an angle, or your laser spot is too blurred to place consistently, the data won't improve just because you do more maths later.
That's why strong students slow down at the start. They make the setup boringly stable. They choose eye level carefully. They keep wires tidy. They repeat one test reading before the main set begins.
Teachers spot this quickly. The students who seem calm in practicals usually aren't naturally gifted. They've just built a routine.
A Step-by-Step Practical Example
Take a classic experiment: finding the Young modulus of a wire. This one is useful because it brings together measurement, control of variables, graph work, and evaluation. It also shows the difference between following instructions and thinking like an examiner.
Before touching the apparatus
A student aiming for high marks starts by asking three basic questions.
What am I changing? What am I measuring? What must stay the same?
For this practical, the load is the independent variable. Extension is the dependent variable. The wire material, original length, diameter, and temperature need controlling as far as possible.
That last one, temperature, is where many students become too casual. If the wire heats up, its behaviour changes. So if you add masses too quickly or keep handling the wire unnecessarily, you may be introducing another variable without realising it.
Setting up like someone who wants reliable data
The apparatus often includes a long wire clamped securely, a scale or pointer for extension, a micrometer for diameter, and masses to vary the force. Good students don't just set this up. They interrogate it.
They ask whether the pointer is easy to read. They check whether the wire hangs straight. They make sure the metre rule is fixed, not wobbling around whenever a mass is added.
Then they measure the diameter more than once at different points and in different orientations, because wires aren't perfectly uniform.
A single reading tells you what happened once. A pattern of readings tells you what's trustworthy.
Collecting data without sabotaging your own graph
Now the actual run begins. Add mass in sensible steps. Wait for the wire to settle. Read the scale at eye level. Record force and extension carefully.
A thoughtful student repeats key readings if one looks odd. They don't always restart the whole practical. They just notice when a point doesn't fit the pattern and check whether it was a reading issue, a slip in the apparatus, or a real effect.
A typical sequence of thinking looks like this:
- Apply the load carefully so the wire doesn't swing.
- Wait briefly so the extension stabilises.
- Read at eye level to avoid parallax.
- Write the raw reading immediately with units.
- Check trend as you go rather than waiting until the end.
That last step matters a lot. If the extension should rise steadily with force and suddenly one reading breaks the pattern, don't shrug and carry on. Investigate while the setup is still in front of you.
Turning measurements into marks
After the practical, the student still isn't finished. They calculate stress and strain, then plot the relevant graph or process the data needed for Young modulus.
Exam marks are awarded for these insights. The examiner wants to see that you understand why the graph is used, why a straight-line region matters, and how measured quantities combine to produce the final value.
If you want to practise that skill directly, working through A-Level Past papers is one of the best ways to spot what examiners repeatedly ask about methods, variables, and data interpretation.
A student who scores highly in this area doesn't memorise a script. They rehearse the thought process: define variables, secure the setup, take sensible readings, notice odd data, process with care, and only then evaluate.
Handling Data and Uncertainty Like a Pro
This is the part many students dread, and for good reason. Data shows that 68% of UK A-Level Physics students miss marks on percentage error propagation and significant figures, with the issue linked to a lack of clear worked guidance in procedural materials, as noted through Philip Harris required practical support.
The good news is that uncertainty becomes much less scary once you stop treating it like a weird add-on. It's just a way of answering one question: how sure am I about this value?
Start with the blurry ruler idea
Suppose you measure a pencil with a ruler whose markings are slightly hard to judge. You can still get a sensible answer, but not with perfect certainty. That fuzziness is uncertainty.
If the ruler lets you read to the nearest millimetre, there is a limit to how confidently you can state the pencil length. Physics wants you to acknowledge that limit instead of pretending your answer is exact.
There are two forms students need to keep separate:
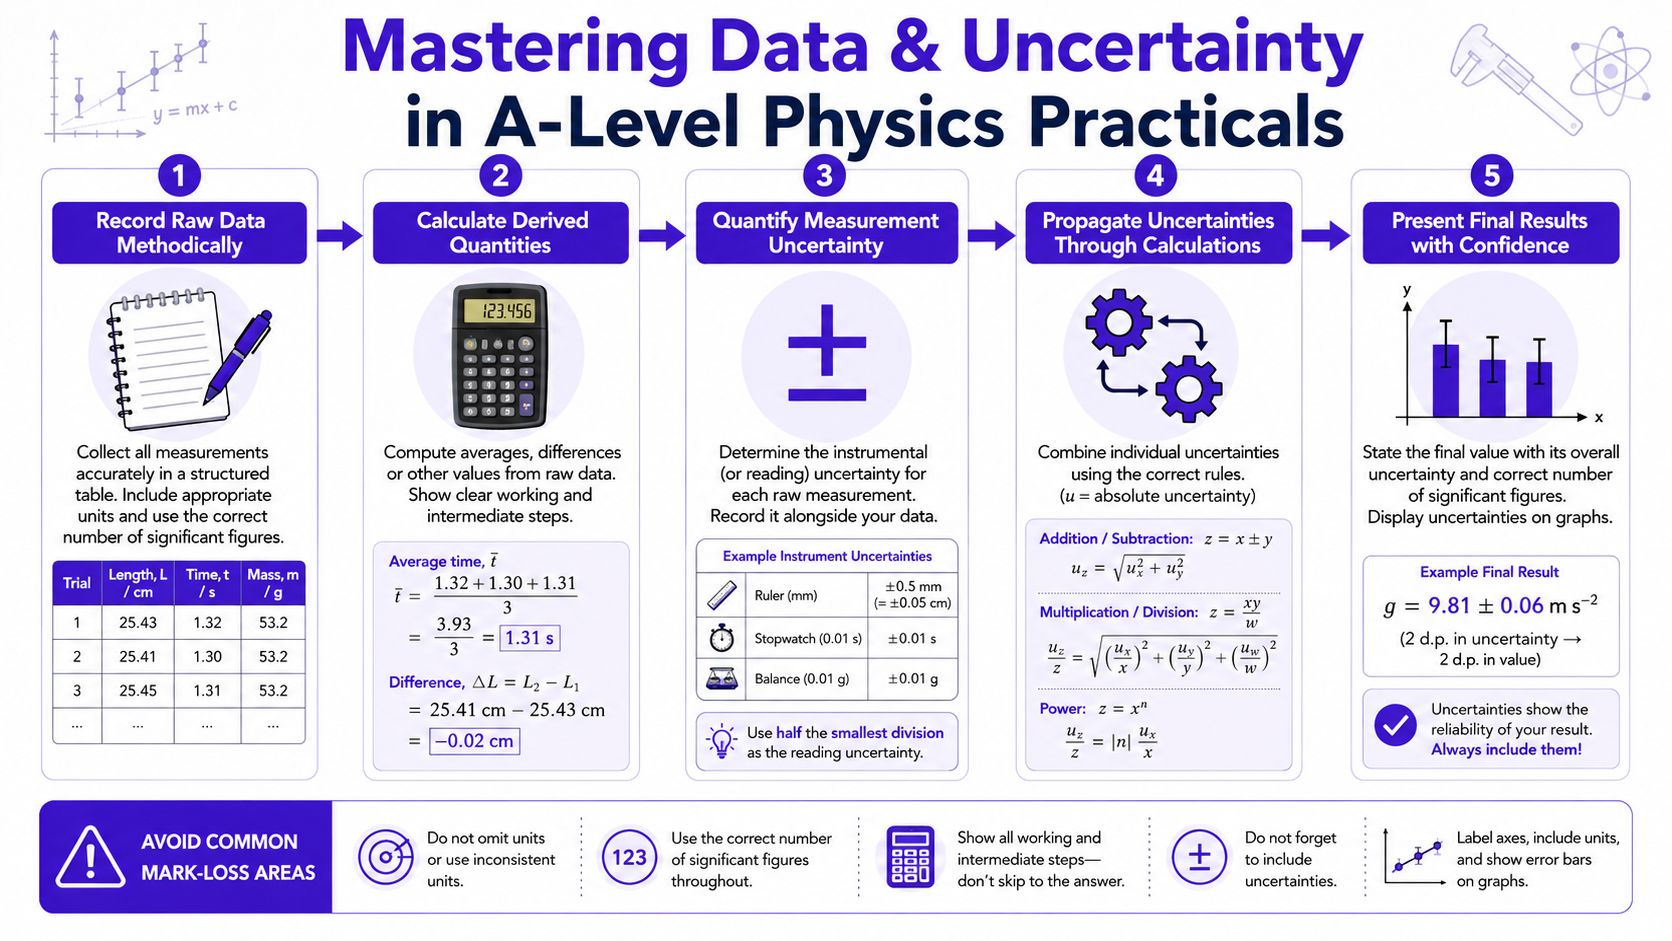
- Absolute uncertainty is the size of the doubt in the original unit, such as ±0.1 cm
- Percentage uncertainty tells you how big that doubt is compared with the value itself
A small absolute uncertainty on a small measurement can be a big percentage uncertainty. That's one of the reasons tiny measurements can be awkward.
The rules students mix up most often
These are the practical rules worth drilling until they feel automatic:
| Calculation type | What to do with uncertainty |
|---|---|
| Addition or subtraction | Add absolute uncertainties |
| Multiplication or division | Add percentage uncertainties |
| Powers | Multiply the percentage uncertainty by the power |
Students often remember one rule and use it everywhere. That's where the marks disappear.
Here's the common logic:
- If values are being added or subtracted, the uncertainty travels in the original units.
- If values are being multiplied or divided, the relative size of each uncertainty matters more, so percentage uncertainty is the useful form.
Significant figures aren't decoration
A beautifully calculated uncertainty can still lose marks if the final answer is written with silly precision.
If your uncertainty suggests the value is only reliable to a certain level, the final result must match that level of confidence. Writing too many digits is like pretending your blurry ruler suddenly became perfect halfway through the calculation.
The number of digits you keep should reflect the quality of the measurement, not the power of your calculator.
Graphs, error bars, and the dreaded worst-fit line
In physics practicals at A-Level, graph questions often reward the students who treat the graph as evidence rather than artwork.
When you draw error bars, you're showing the examiner how uncertain each plotted value may be. That matters because it changes how confident you are in the trend.
For gradient uncertainty, many students know the phrase “line of worst fit” but don't know why they're drawing it. The reason is simple. You're asking: what is the steepest believable line and the shallowest believable line that still fit within the uncertainty of the data?
A practical routine looks like this:
- Plot points neatly using sensible scales
- Add error bars where appropriate
- Draw the best-fit line
- Draw a steepest acceptable line
- Draw a shallowest acceptable line
- Compare gradients to estimate uncertainty in the gradient
This is one of those skills where a teacher can explain it once, but only repeated practice makes it feel normal.
What examiners usually want in words
If a question asks you to comment on uncertainty, they usually want one or more of these ideas:
- How large the uncertainty is compared with the measured value
- Whether the uncertainty affects confidence in the conclusion
- Whether data points support the trend clearly
- How method changes could reduce uncertainty
That last point matters. “Repeat the experiment” is not always enough on its own. Better answers are specific. Use a finer scale. Increase the measured length. Reduce parallax. Stabilise the clamp. Use digital timing if reaction time is the issue.
Specific improvements sound like someone who did the practical.
Structuring the Perfect Practical Write-Up
Strong write-ups don't read like a memory dump from the lab. They read like a clean scientific account. That matters for teachers gathering endorsement evidence and for exam questions that ask for a method, analysis, or evaluation. According to the OCR practical skills handbook, students must demonstrate competence across all five CPAC sections, and this is teacher-assessed through evidence including written records for the required apparatus and techniques.
A write-up structure that actually works
Keep your write-up in five parts.
Aim
State what you are trying to determine or test. Keep it sharp.
Bad version: “To do an experiment with a wire.”
Better version: “To determine the Young modulus of the wire by measuring extension under applied load.”
The aim should show the physics idea, not just the equipment.
Method
Students either gain or lose trust through practical experience. A good method includes specific apparatus, a sensible sequence, and controlled variables.
Include details like:
- Which instrument measured what
- How readings were taken accurately
- What was kept constant
- What was repeated or checked
If you write “measure the extension”, that's too vague. If you write “read the pointer against a fixed scale at eye level after the load settled”, that sounds like real practical competence.
Results and analysis
Your results section should be tidy enough that another student could use it without asking you what any number means.
Use:
- Clear table headings
- Units in headings, not repeated in every box
- Consistent precision
- Space for repeats or mean values where relevant
Then in analysis, show the steps that turn raw data into something useful. If you calculated a gradient, state what physical quantity it represents. If you transformed data, explain why.
A write-up isn't just a record of what you did. It's evidence that you understood what your data means.
Conclusion and evaluation
Students often rush this bit and waste easy marks.
A conclusion should answer the original aim using the data. An evaluation should comment on the quality of the evidence. That means linking your judgement to measurement issues, uncertainty, and the practicality of your improvements.
A weak evaluation says, “Human error may have affected the results.”
A stronger one says that parallax in reading the scale likely increased uncertainty in extension measurements, which would affect the gradient and therefore the final calculated value. It then suggests a fixed pointer or improved scale arrangement.
That kind of answer matches what teachers are looking for when they judge whether your practical record shows CPAC-level thinking.
Your Revision Strategy for Practical Questions
Practical revision goes wrong when students only reread methods. That feels productive, but it doesn't train the skills the exam tests.
For physics practicals at A-Level, better revision looks active. Take a past practical question and do the bits students usually avoid. Sketch the graph. Work out the uncertainty. Identify the faulty method point. Rewrite the evaluation in proper physics language.
A smarter way to revise
Try this weekly cycle:
- One practical recall session. Write the method from memory for a required practical.
- One data session. Take raw values and process them fully.
- One evaluation session. Practise spotting weak control variables and realistic improvements.
- One mixed-paper session. Answer practical questions in unfamiliar contexts.
That last one matters because exam boards rarely reward pure memorisation. They like taking a familiar skill and placing it in a less familiar experiment.

What to do if you're behind
If you haven't done enough practical revision yet, don't panic and don't try to rewrite your entire folder.
Start with these:
- Learn the apparatus and variable setup for each required practical.
- Practise uncertainty and graph questions repeatedly.
- Train yourself to spot poor equipment checks and weak evaluation points.
- Use timed practice so you can explain method and analysis under pressure.
If you're already strong and want top marks, focus on precision. Tight wording. clean graph interpretation. realistic evaluation. That's where the final polish lives.
For students who want repeated, exam-style drilling on this exact skillset, Exam Practice for A-Level is the kind of targeted practice that helps turn practical knowledge into exam-ready performance.
If you want structured support with A-Level Physics revision, MasteryMind is built for exactly this kind of exam prep. It gives UK students specification-aligned practice for AQA, Edexcel, OCR, and WJEC, with examiner-style feedback that helps you spot where your practical explanations, calculations, and evaluations are slipping. If you're trying to recover your grade or push for the top bands, it's a useful way to turn weak practical topics into something you can score on.
Ready to master this topic?
Practise with quizzes, blurt exercises and exam questions on MasteryMind.
7 days Premium · Then free forever · No card, no charge