Pearson Edexcel · A-Level · History
Course version: 9HI0 · Version from Sept 2015
Anglo-Saxon England and the Anglo-Norman Kingdom, c1053–1106 - 2 The…
Full specification wording
Paper 2, Option 2A.1: Anglo-Saxon England and the Anglo-Norman Kingdom, c1053–1106 - 2 The Norman conquest of England and extension of control in Wales and Scotland, 1066–93: William of Normandy’s invasion: William’s military experience; reasons for the Norman victory at Hastings, including the leadership skills of Harold and William, Norman and English troops and tactics.
William’s invasion of 1066 rested on his military experience and the contrasting leadership, troops and tactics at Hastings.
Checked against the Pearson Edexcel 9HI0 specification (opens in a new tab) on .
- Point 1 of 4
Study notes
From the checked teaching notes for this specification point.
The idea
William’s invasion of 1066 rested on his military experience and the contrasting leadership, troops and tactics at Hastings. William had campaigned in Normandy and against rebels, learning siegecraft, cavalry charges and combined-arms warfare. Harold had proved himself against Gruffydd of Wales and at Stamford Bridge, but his forced march south exhausted his army. At Hastings, Harold fought on foot with housecarls and the fyrd, forming a shield wall; William deployed armoured knights, archers and infantry. The battle turned on Harold’s static defence and William’s adaptability: feigned retreats, archery and cavalry exploited gaps. Harold’s death late in the day broke English resistance. Victory owed much to William’s leadership, supply and papal backing, but also to Harold’s failure to rest or reinforce his troops.
What earns the marks
- Explains how William’s earlier campaigns in Normandy, such as the sieges and battles of the 1040s–50s, gave him experience of command, logistics and cavalry warfare that he applied in 1066.
- Analyses Harold’s leadership: his rapid march south after Stamford Bridge, his decision to fight immediately rather than wait for reinforcements, and his personal command of the shield wall.
- Compares the composition and effectiveness of the armies: Norman knights, archers and infantry against English housecarls, the fyrd and the shield wall.
- Evaluates the role of tactics at Hastings, including the English defensive formation, Norman cavalry charges, archery and the feigned retreat, and how these contributed to the Norman victory.
- Reaches a supported judgement on the relative importance of William’s leadership, Harold’s decisions, troop quality and tactics in explaining the outcome.
Common mistakes and how to put them right
Treating the feigned retreat as a single, planned trick rather than a tactic that may have been improvised or repeated.
Put it right: Discuss it as one of several Norman responses to the shield wall, and consider the evidence for deliberate use.
Assuming Harold’s army was entirely exhausted and therefore doomed.
Put it right: Explain that exhaustion was a significant factor but not the sole cause, and weigh it alongside tactical and leadership factors.
Describing the battle as simply a Norman cavalry victory over English infantry.
Put it right: Show that archers and infantry also played important roles, and that the English shield wall initially withstood attacks.
Exam tips
- Plan your answer around the stated factors: William’s military experience, Harold’s leadership, William’s leadership, troops and tactics. This ensures every clause is addressed.
- Use precise examples, such as Harold’s march from Stamford Bridge or the role of the papal banner, to support your analysis rather than general statements.
- When judging reasons for the Norman victory, weigh factors against each other and reach a clear conclusion; avoid listing points without a hierarchy.
Try the lesson
The start of the Paper 2, Option 2A.1: Anglo-Saxon England and the Anglo-Norman Kingdom, c1053–1106 - 2 The Norman conquest of England and extension of control in Wales and Scotland, 1066–93: William of Normandy’s invasion: William’s military experience; reasons for the Norman victory at Hastings, including the leadership skills of Harold and William, Norman and English troops and tactics. lesson, made from checked teaching notes for this specification point.
Have a go first
Which military experience had William, Duke of Normandy, gained before he invaded England in 1066?
Listen
William’s invasion of 1066 rested on his military experience and the contrasting leadership, troops and tactics at Hastings. William had campaigned in Normandy and against rebels, learning siegecraft, cavalry charges and combined-arms warfare. Harold had proved himself against Gruffydd of Wales and at Stamford Bridge, but his forced march south exhausted his army. At Hastings, Harold fought on foot with housecarls and the fyrd, forming a shield wall; William deployed armoured knights, archers and infantry. The battle turned on Harold’s static defence and William’s adaptability: feigned retreats, archery and cavalry exploited gaps. Harold’s death late in the day broke English resistance. Victory owed much to William’s leadership, supply and papal backing, but also to Harold’s failure to rest or reinforce his troops. A strong answer earns marks for these points. Explains how William’s earlier campaigns in Normandy, such as the sieges and battles of the 1040s–50s, gave him experience of command, logistics and cavalry warfare that he applied in 1066. Analyses Harold’s leadership: his rapid march south after Stamford Bridge, his decision to fight immediately rather than wait for reinforcements, and his personal command of the shield wall. Compares the composition and effectiveness of the armies: Norman knights, archers and infantry against English housecarls, the fyrd and the shield wall. Evaluates the role of tactics at Hastings, including the English defensive formation, Norman cavalry charges, archery and the feigned retreat, and how these contributed to the Norman victory. A common slip: Treating the feigned retreat as a single, planned trick rather than a tactic that may have been improvised or repeated. Instead, discuss it as one of several Norman responses to the shield wall, and consider the evidence for deliberate use. Exam tip: Plan your answer around the stated factors: William’s military experience, Harold’s leadership, William’s leadership, troops and tactics. This ensures every clause is addressed.
See it
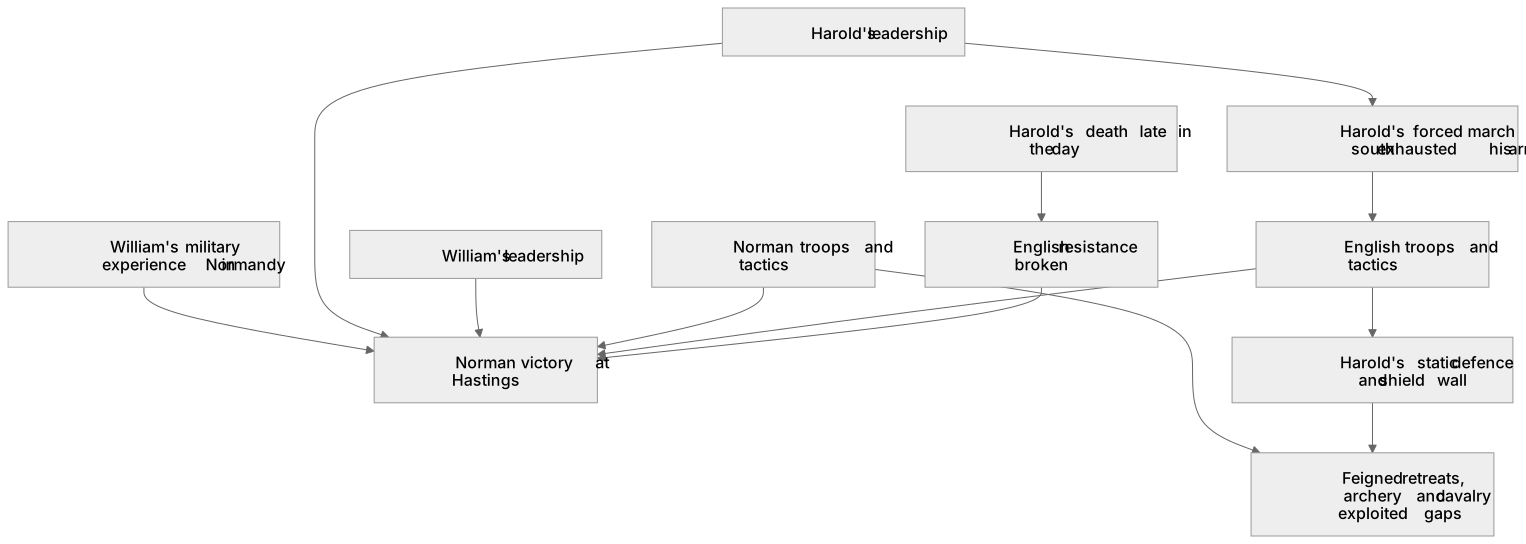
Label the diagram
Some boxes have lost their names. Pick the right name for each number.
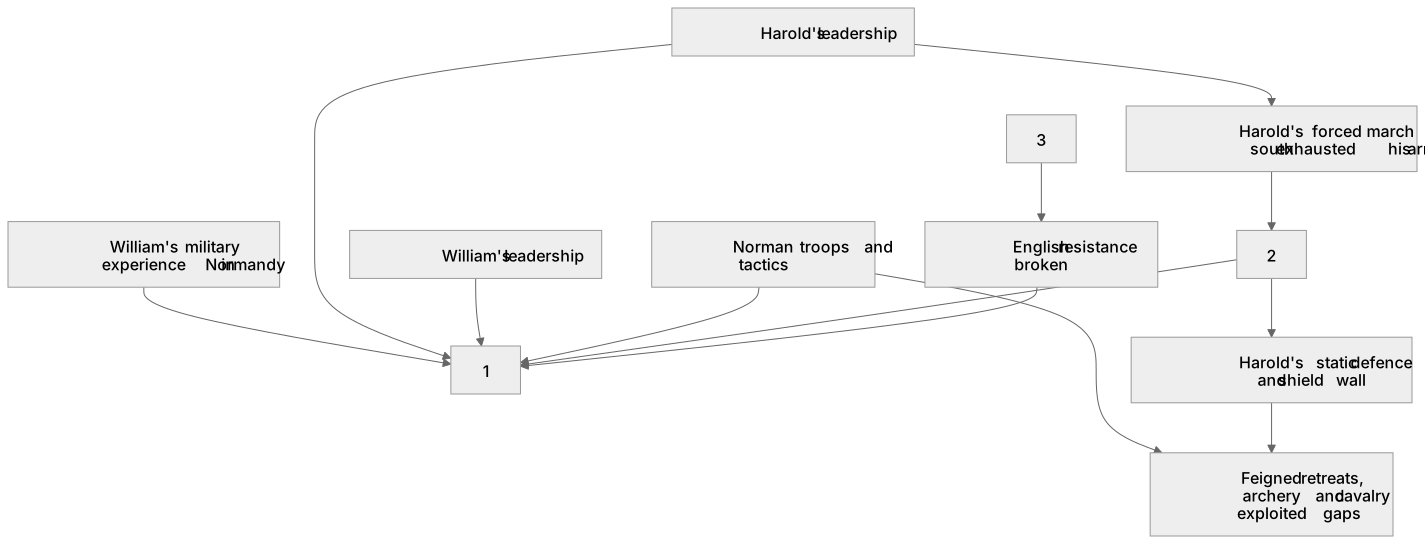
1Box 1
2Box 2
3Box 3
There is more to this lesson
The full lesson goes on to check your understanding and help you earn the marks. Create a free account to carry on, with your progress saved.
A week of Premium from your first lesson · Then the free plan continues · No card, no charge
Test your understanding of Paper 2, Option 2A.1: Anglo-Saxon England and the Anglo-Norman Kingdom, c1053–1106 - 2 The Norman conquest of England and extension of control in Wales and Scotland, 1066–93: William of Normandy’s invasion: William’s military experience; reasons for the Norman victory at Hastings, including the leadership skills of Harold and William, Norman and English troops and tactics.
Active recall beats re-reading. Take an instant quiz now to test what you’ve learned and lock it into long-term memory.
A week of Premium from your first lesson · Then the free plan continues · No card, no charge