Master Trace Table Examples: 8 Steps to Ace Your CS Exams
Whether you're trying to rescue your grade or totally smash your Computer Science exam, one skill is a secret weapon: tracing code. It might seem like a drag, but getting good at it is like having a superpower to see inside a program and know exactly what it's going to do. This isn't just about passing an exam; it's a core skill for finding bugs and really getting how code works.
This guide is built to help you nail that skill. We’ll walk through eight key trace table examples, starting with the GCSE basics and levelling up to the tricky A-Level logic that separates the top grades. We'll break down loops, IF statements, arrays, recursion, and more, pointing out common trip-ups and giving you examiner-style tips. To make it all click, it helps to know how to write step-by-step instructions effectively, so every example is a breeze to follow.
Forget guessing and hoping for the best. By the end of this, you'll have a solid, repeatable method for tracing code like a pro, turning a confusing topic into easy marks. Let's get into it.
1. Simple Loop Trace Table – The Counter
We're kicking off with the absolute basics. This first example is super simple: a loop that just counts up. Nailing this is the key to unlocking tougher problems because it teaches you the main skill: tracking how a variable changes as a program runs, step by step. It's one of the most common trace table examples you'll get in an exam, so it's vital practice.
Let's imagine a program that needs to count from 0 to 4. In pseudocode, it might look like this:
1 SET counter TO 0
2 WHILE counter < 5
3 OUTPUT counter
4 counter = counter + 1
5 ENDWHILE
How to Break It Down
First, set up your table. Make columns for the Line/Step, any variables (just counter here), and the Output. Your job is to walk through the code, one line at a time, updating the table as you go.
- Start (Line 1): The variable
counteris made and set to 0. You write0in thecountercolumn. - First Check (Line 2): The code checks if
counter < 5. Since 0 is less than 5, the condition is true, and the loop starts. - Doing the Loop (Lines 3-4): The current value of
counter(0) is shown in the output. Then,counteris increased to 1. - Repeat: The process repeats. The code jumps back to line 2, checks the condition (1 < 5 is true), outputs 1, and increases
counterto 2. You keep this cycle going.
Examiner's Checkpoint: The most important moment is the final check. When
counterbecomes 5, the conditioncounter < 5is now false. This is when the loop stops. So many marks are lost by students who do one too many or one too few loops. Make a mental note (or a real one on scrap paper) of this stop condition—it's a great exam trick.
This basic structure helps you see how code runs. It's a key skill explained in guides like Understanding Program Logic with Flowcharts and Pseudocode. Master this simple loop trace, and you'll be ready for more complex stuff.
2. Conditional Statement Trace Table – IF/ELSE Logic
Okay, we've got simple loops down. Now let's add some decision-making. This example uses an IF/ELSE structure, a basic part of programming that changes what the code does based on a condition. Knowing how to trace this helps you predict how a program will act in different situations, a skill that's tested a lot in logic-based exam questions. These trace table examples are perfect for seeing how a program "chooses" a path.
Let's look at a simple algorithm that checks if a user's score is a passing grade.
1 SET score TO 65
2 SET grade TO ""
3 IF score >= 50 THEN
4 grade = "Pass"
5 ELSE
6 grade = "Fail"
7 ENDIF
8 OUTPUT grade
How to Break It Down
For this trace, it's a smart move to add a column for the Condition being checked. This makes it super clear why the program took a certain path. Your table should have columns for Line/Step, the variables (score, grade), the Condition Check, and the Output.
- Start (Lines 1-2): First,
scoreis set to65andgradeis set to an empty string (""). Write these starting values in your table. - The Condition (Line 3): The code checks
score >= 50. Since65 >= 50is true, the program will run theTHENpart (line 4). You can writeTRUEin yourCondition Checkcolumn. - Taking a Branch (Line 4): Because the condition was true, the
gradevariable is updated to"Pass". TheELSEpart (line 6) is completely skipped. This is super important; only one path is ever taken. - Final Output (Line 8): The program moves past the
ENDIFand outputs the final value ofgrade, which is now"Pass".
Examiner's Checkpoint: A classic mistake is to trace both the
IFand theELSEpaths. Remember, conditionals are all about making a choice. Once aTRUEcondition is found and its code runs, theELSEis ignored. Adding aTRUE/FALSEcolumn helps you avoid this mistake when you're under exam pressure.
3. Array/List Indexing Trace Table – Accessing and Changing Elements
Moving on from single variables, this example introduces arrays (or lists). Knowing how to trace what happens to arrays is vital because it makes you separate an element's position (index) from its value. This is a common trip-up in exams, but getting it right is the first step to understanding more complex data structures. These array-based trace table examples are a must-know for GCSE and A-Level Computer Science.
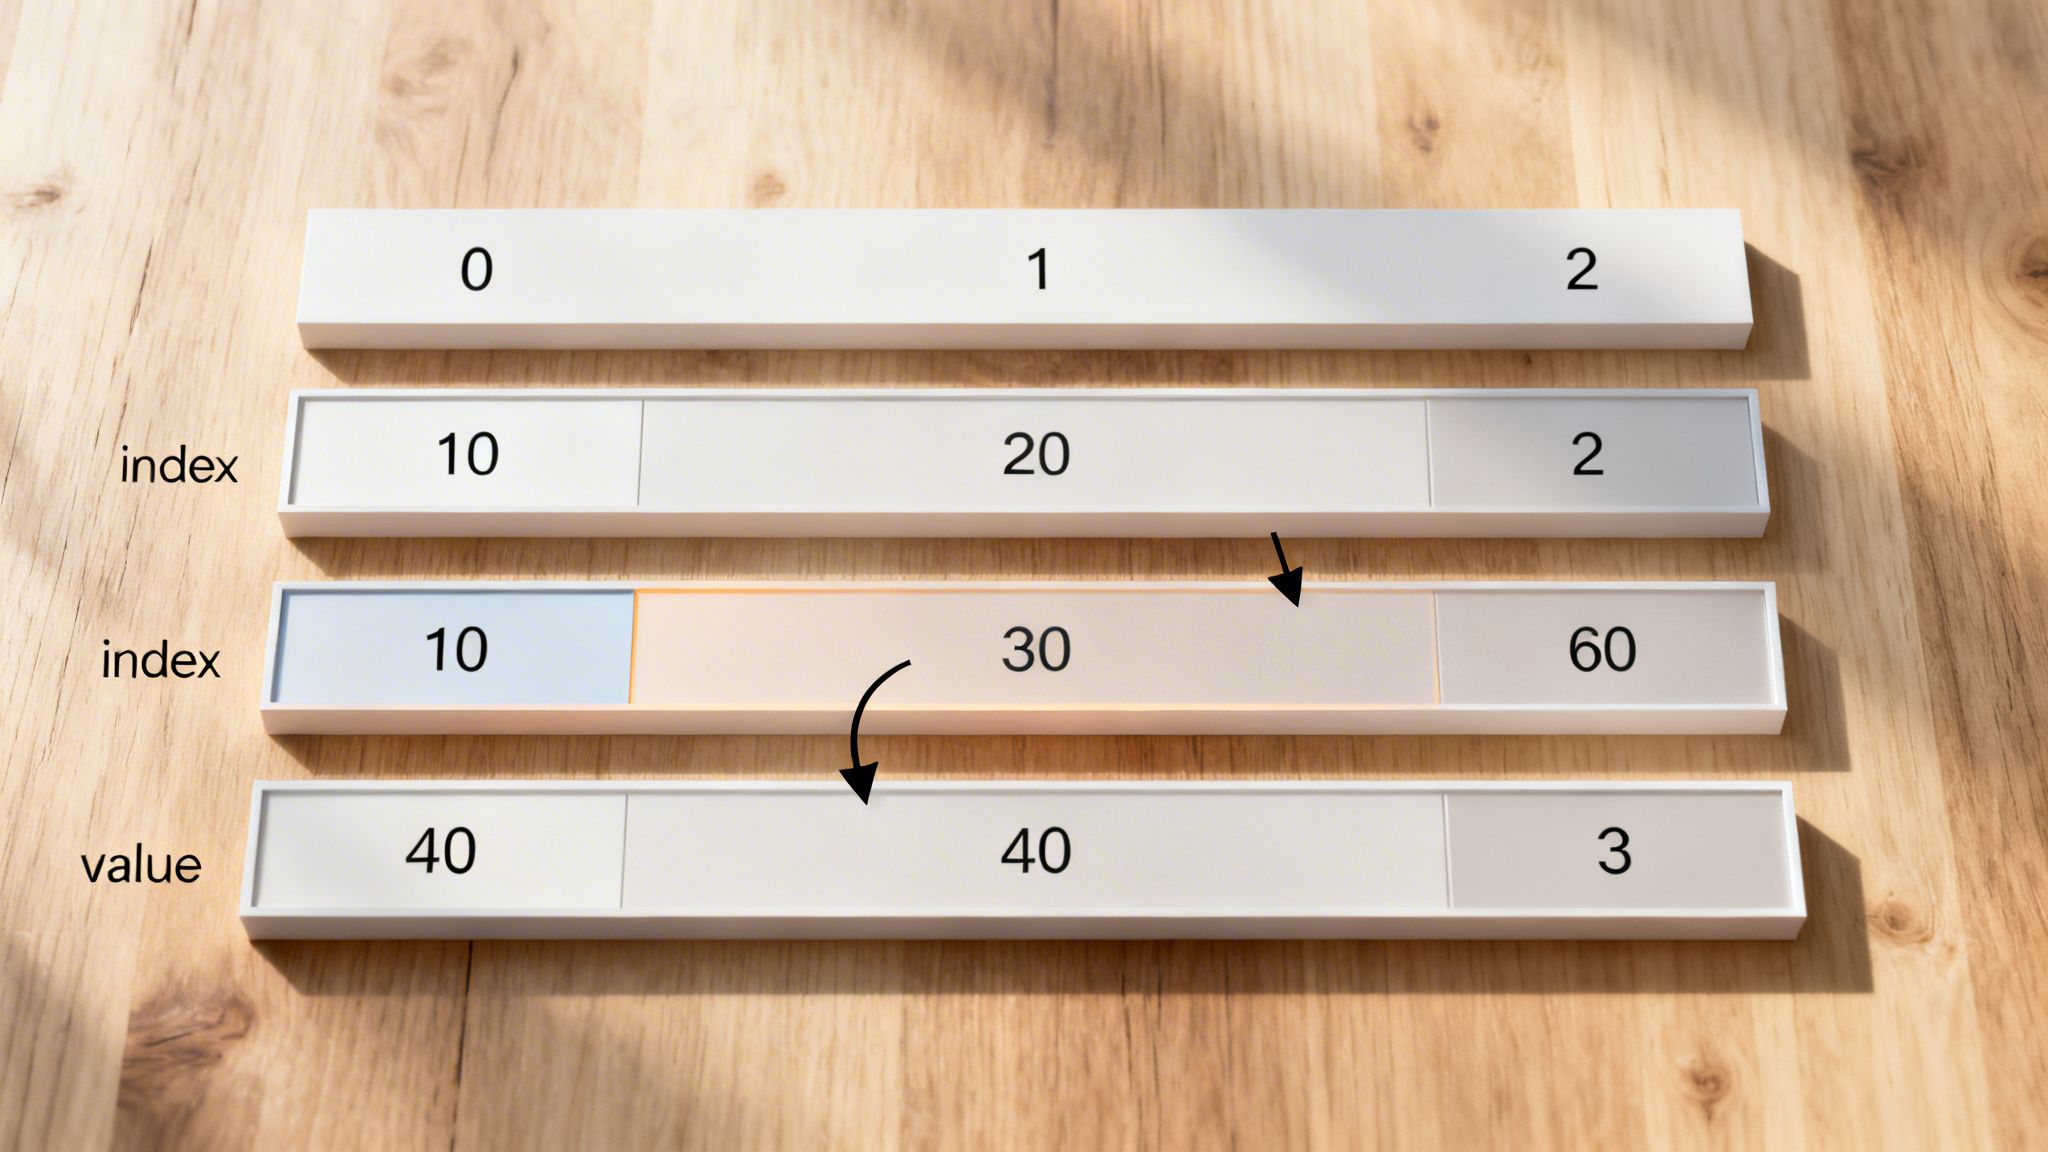
Look at this pseudocode which changes elements in an array. Remember, array indexes almost always start from 0.
1 SET numbers TO [10, 20, 30, 40]
2 SET i TO 0
3 WHILE i < 3
4 numbers[i+1] = numbers[i] + 5
5 i = i + 1
6 ENDWHILE
7 OUTPUT numbers
How to Break It Down
For arrays, it's best to give the whole array its own set of columns in your trace table, with labels for the index (e.g., numbers[0], numbers[1], etc.). This makes it visually obvious how the array changes over time.
- Start (Lines 1-2): The array
numbersis created. Fill in the starting values: 10, 20, 30, 40 in their index columns. The loop counteriis set to 0. - First Check (Line 3): The condition
i < 3is checked. Since 0 is less than 3, the condition is true, and we go into the loop. - Doing the Loop (Lines 4-5): This is the important bit. The code looks at
numbers[i+1]andnumbers[i]. Withias 0, this meansnumbers[1] = numbers[0] + 5. So,numbers[1]becomes10 + 5 = 15. You only update that column in your table. Then,iis increased to 1. - Repeat: The process repeats. The code checks the condition (
1 < 3is true). It then calculatesnumbers[2] = numbers[1] + 5. Using the new value ofnumbers[1], this becomes15 + 5 = 20. The counteribecomes 2.
Examiner's Checkpoint: A classic mistake is using the original array values in every calculation instead of the most recently updated ones. The trace table is your single source of truth; once you change a value in a column, that new value is what you must use for all future steps. This shows the examiner you understand that variables and array elements hold their state.
The loop ends when i becomes 3, as the condition 3 < 3 is false. The final output at line 7 would be the array's final state from your table: [10, 15, 20, 40]. Getting this right shows a solid understanding of how data is changed in memory.
4. String Manipulation Trace Table – Substrings and Characters
Let's move on from numbers and tackle strings. Working with text is a massive part of programming, and this example shows how to trace things like finding a character, getting a piece of a string (a substring), and changing case. Understanding string indexing is vital here, as simple mistakes can mess up your whole trace table.
Let's trace a program designed to pull out and change a name from a full string. Remember, most programming languages use zero-based indexing, meaning the first character is at index 0.
1 SET myString TO "Name:Bob"
2 SET startPosition TO 5
3 SET endPosition TO myString.length()
4 SET extractedName TO myString.substring(startPosition, endPosition)
5 SET finalName TO extractedName.toUpperCase()
6 OUTPUT finalName
How to Break It Down
Set up your table with columns for Line/Step, all variables (myString, startPosition, endPosition, extractedName, finalName), and Output. Always use quote marks for string values to avoid mixing them up with variable names.
- Start (Lines 1-2):
myStringis set to "Name:Bob" andstartPositionis set to 5. - Dynamic Value (Line 3): The program finds the length of
myString(8 characters) and puts this value intoendPosition. - Substring Extraction (Line 4): The code pulls out a substring from index 5 up to (but not including) index 8. This gives us "Bob", which is stored in
extractedName. - Case Change (Line 5): The
.toUpperCase()method is used onextractedName, turning "Bob" into "BOB". This new value is put intofinalName. - Output (Line 6): The final value "BOB" is outputted.
Examiner's Checkpoint: A massive trip-up is off-by-one errors with string indexing and substrings. Double-check if the end-point of a slice or substring is included or not. In most languages (like Python and JavaScript), the character at the end index is not included. A great trick is to write the indexes above the string on your scrap paper (01234567 above "Name:Bob") to stop simple mistakes.
5. Nested Loop Trace Table – Looping Inside a Loop
Now we’re upping the difficulty. Nested loops, where one loop runs inside another, often cause confusion. Tracing them correctly is a sign that you have a solid handle on how programs control their flow. This is one of the more advanced trace table examples you might face, designed to see if you can manage multiple changing variables at once.
Let's work with an algorithm that prints coordinates. The outer loop will handle the 'x' value and the inner loop will handle the 'y' value.
1 FOR x FROM 0 TO 1
2 FOR y FROM 0 TO 2
3 OUTPUT x, y
4 NEXT y
5 NEXT x
How to Break It Down
Your table needs a column for each variable (x and y) and another for Output. The key here is to realize that the inner loop (lines 2-4) must complete all its cycles for every single cycle of the outer loop (lines 1-5).
- Outer Loop Starts (Line 1): The variable
xis set to 0. - Inner Loop Starts (Line 2): The program enters the inner loop, and
yis set to 0. - First Full Inner Cycle (Lines 3-4):
- The values of
xandy(0, 0) are outputted. - The program hits
NEXT y, so it goes back to line 2.ybecomes 1. - The output is (0, 1).
ybecomes 2. - The output is (0, 2). The inner loop condition is now met, and it finishes.
- The values of
- Outer Loop Continues (Line 5): The program hits
NEXT xand goes back to line 1.xis increased to 1. The whole process resets for the inner loop.
Examiner's Checkpoint: The biggest mistake students make is not resetting the inner loop. Once the outer loop variable
xupdates to 1, the inner loop (y) has to start again from its beginning (0). Think of it like the minute hand on a clock completing a full 60-minute cycle for every single hour that passes. Forgetting this reset will ruin your entire trace.
Understanding nested loops is essential for working with 2D arrays, grids, or image processing. By acing this trace, you prove you can handle the non-linear way that more complex algorithms run.
6. Function Call and Return Value Trace Table – Scopes and Returns
Time to level up again. Functions (or subroutines) are the building blocks of almost all programs, but tracing them adds a new challenge: scope. This example shows you how to track variables inside a function versus outside, and how return values send data back to the main program. Getting this right is a huge deal, as it proves you properly understand program flow and memory.
Let's look at a simple program that uses a function to double a number.
1 FUNCTION double(number)
2 local_result = number * 2
3 RETURN local_result
4 ENDFUNCTION
5
6 main_variable = 5
7 doubled_value = double(main_variable)
8 OUTPUT doubled_value
How to Break It Down
To trace this, you need to think about different "contexts" or scopes. A great trick is to create separate sets of columns for the main program and for the function call.
- Start (Line 6): We begin in the main part of the code. The variable
main_variableis set to 5. - Function Call (Line 7): This is the key moment. The program calls the
doublefunction, passing the value ofmain_variable(which is 5) into it. On your trace table, you can draw a line or start a new section for the function's scope. - Inside the Function (Lines 1-3): The value
5is passed into the function'snumberparameter. A new local variable,local_result, is created and given the value5 * 2, which is 10. The function then returns this value. - Return and Assignment (Line 7): The program jumps back to where it was called. The returned value (10) is given to the
doubled_valuevariable in the main scope. At this point, the function'slocal_resultandnumbervariables are gone; they no longer exist. - Final Output (Line 8): The program outputs the final value of
doubled_value, which is 10.
Examiner's Checkpoint: A common error is mixing up variable scopes. Students often mistakenly change the value of
main_variableinside the function, or try to uselocal_resultfrom the main program. The best way to avoid this is to clearly separate your trace table into a 'main scope' and a 'function scope'. Show the parameter being passed in and the value being returned out; this helps you see the data flow.
Mastering function calls in trace table examples like this proves you get how self-contained blocks of code work together, a core concept for writing clean and efficient programs.
7. Sorting Algorithm Trace Table – Bubble Sort Step-by-Step
We're now in more advanced territory. This example tackles a full sorting algorithm. Tracing a Bubble Sort shows how an array’s state changes with every comparison and swap. It’s a brilliant way to see how data gets organised and is a common type of problem in higher-tier GCSE or A-Level exams. These multi-pass trace table examples test your patience and accuracy.
Let's take an unsorted array of numbers: [4, 1, 3, 2]. The goal is to sort it into ascending order. A simplified pseudocode for one pass of Bubble Sort looks like this:
1 SET list TO [4, 1, 3, 2]
2 SET swapped TO true
3 WHILE swapped == true
4 SET swapped TO false
5 FOR i FROM 0 TO length(list) - 2
6 IF list[i] > list[i+1]
7 // Swap the elements
8 temp = list[i]
9 list[i] = list[i+1]
10 list[i+1] = temp
11 SET swapped TO true
12 ENDIF
13 ENDFOR
14 ENDWHILE
How to Break It Down
Setting up the table for a sort is more complex. You need columns for the Pass, the Condition being checked (e.g., list[i] > list[i+1]), a Swap? column, and a column showing the state of the list after each step.
- First Pass, First Comparison: The algorithm compares the first pair:
4 > 1. This is true, so a swap happens. Your table row will note this, and thelistcolumn updates to[1, 4, 3, 2]. - First Pass, Second Comparison: Next, it compares
4 > 3. This is also true, causing another swap. Thelistbecomes[1, 3, 4, 2]. - End of Pass: This continues until the end of the list. After the first pass, the biggest number (4) has "bubbled" to the end. Since at least one swap happened, a new pass starts.
- Next Passes: The process repeats. Pass 2 will move the next-biggest numbers into place. You keep adding new rows for each comparison until a full pass finishes with no swaps.
Examiner's Checkpoint: The key is to track the state of the whole array after every single swap. Don't just change the two numbers being swapped; rewrite the full array in its new state. A common mistake is losing track of the array's current order between steps. Also, remember that the algorithm only stops when a full pass is completed with the
swappedflag stayingfalse.
Tracing sorting algorithms is a key part of many Testing and Debugging Techniques, as it helps you find logic errors in how data is being handled.
8. Recursion Trace Table – The Call Stack and Base Case
Recursion can feel like a mind-bending idea, but a trace table is the perfect tool to make it clear. This technique involves a function calling itself, and tracing it means you have to track not just variables, but a "call stack" of function copies. Mastering this shows how a program handles memory and solves complex problems by breaking them into smaller, identical sub-problems. It's one of the more advanced trace table examples and a favourite for testing deep logical thinking.
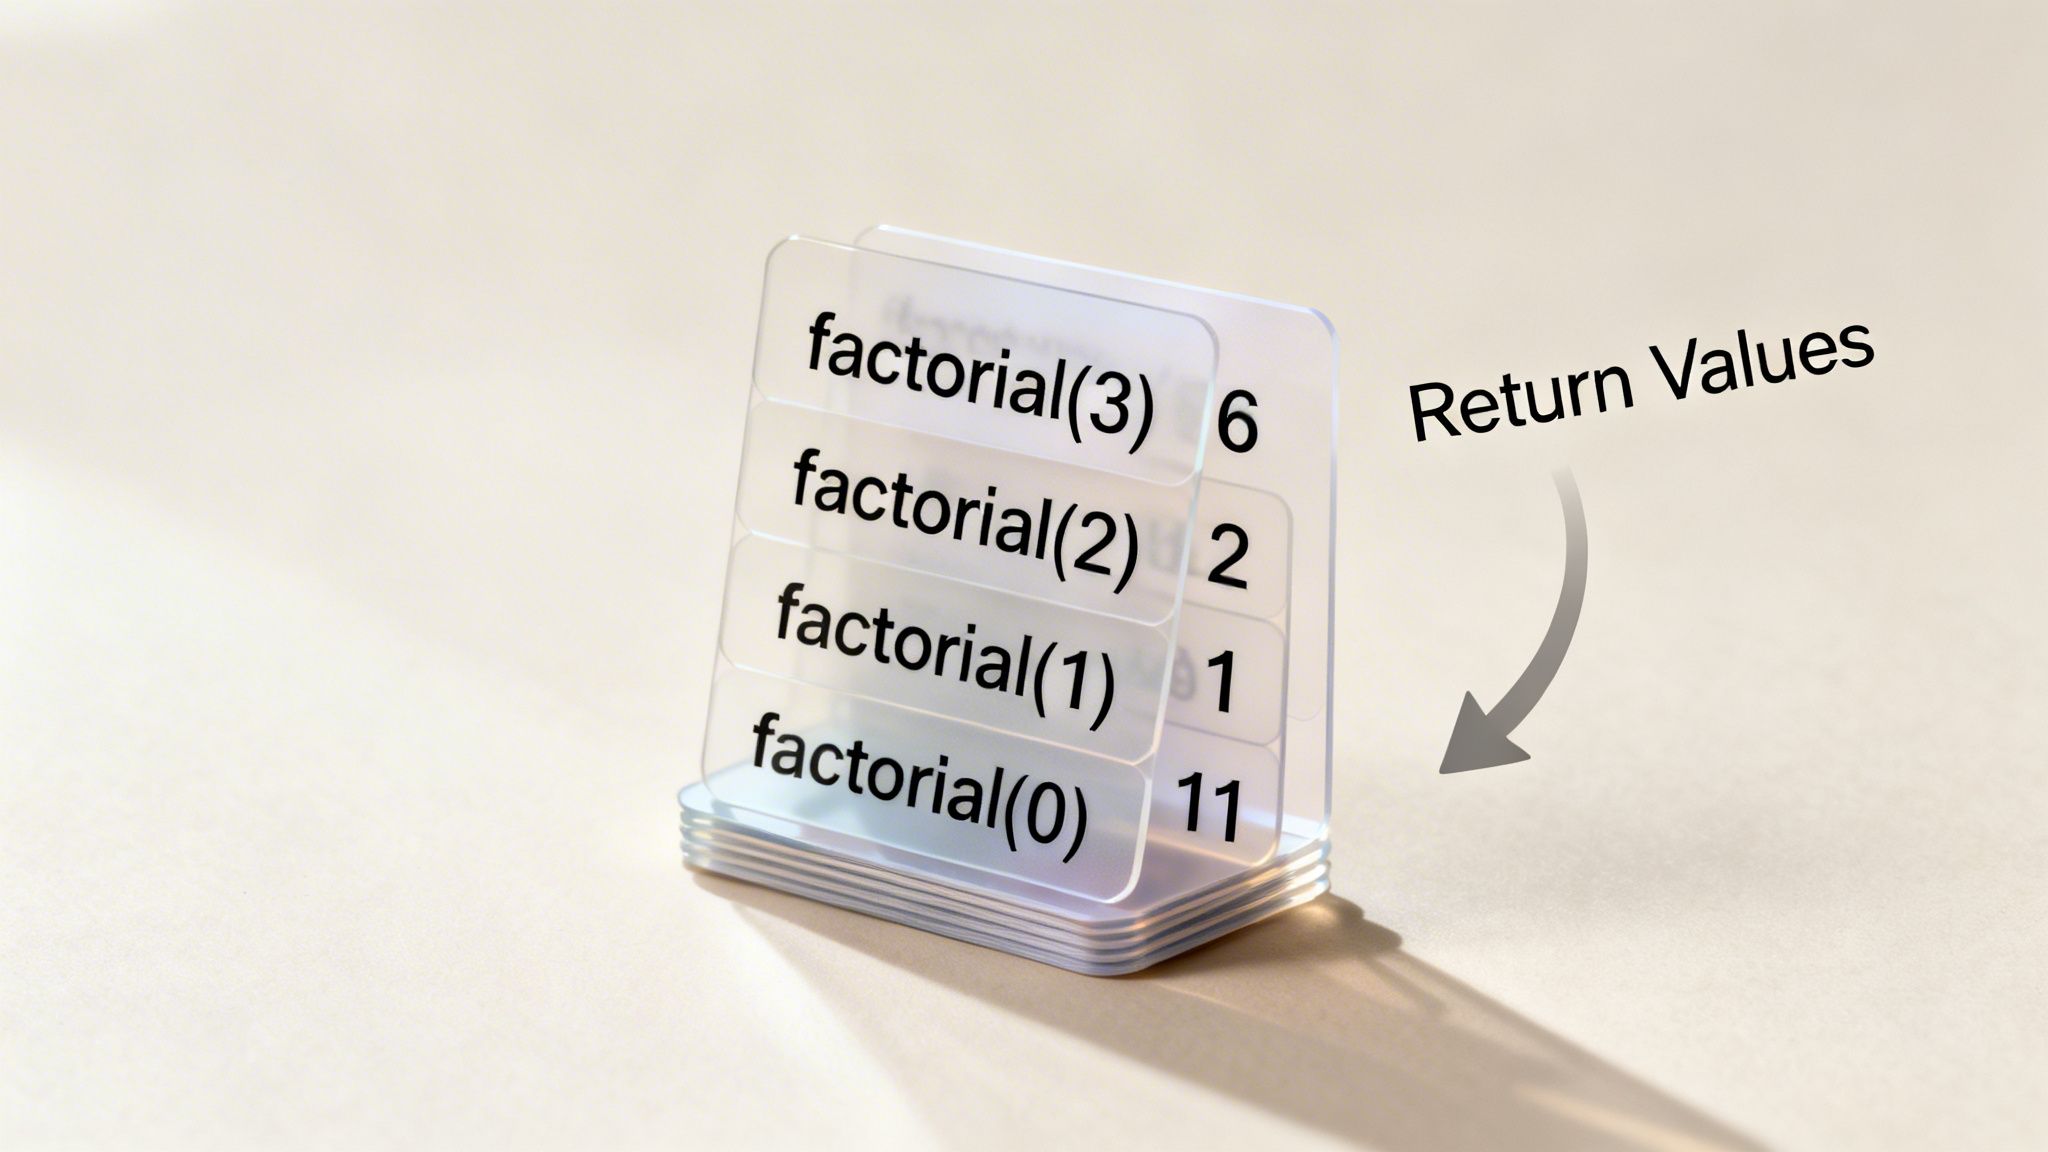
Let's trace a classic factorial function. The factorial of a number n (written as n!) is the product of all positive whole numbers up to n. In pseudocode, a recursive function for this looks like:
1 FUNCTION Factorial(n)
2 IF n = 0 THEN
3 RETURN 1
4 ELSE
5 RETURN n * Factorial(n-1)
6 ENDIF
7 ENDFUNCTION
How to Break It Down
To trace recursion, you need columns for the Call Level (to track how deep you are), the parameter n, and the Return Value. Each time the function calls itself, you start a new, indented row showing a new "call" being added to the stack.
- Initial Call: The trace starts with
Factorial(3).nis 3. TheIFcondition on line 2 (3 = 0) is false. - Building the Stack: The code moves to line 5. To figure out its return value, it must first call
Factorial(2). You add a new, indented entry in your table for this second call, wherenis 2. This repeats:Factorial(2)callsFactorial(1), andFactorial(1)callsFactorial(0). Each call is a new level deeper in the stack. - Hitting the Base Case: In the
Factorial(0)call, the condition on line 2 (0 = 0) is finally true. This is the base case, which stops the recursion. It returns 1 (line 3). - Unwinding the Stack: Now the stack "unwinds". The value 1 is returned to the
Factorial(1)call. It can now finish its calculation on line 5:RETURN 1 * 1, so it returns 1. This value is passed up toFactorial(2), which calculatesRETURN 2 * 1and returns 2. Finally,Factorial(3)gets this value and calculatesRETURN 3 * 2, giving the final answer of 6.
Examiner's Checkpoint: Tracing recursion is a two-part process: building the call stack (going "down") and unwinding it with return values (coming "up"). Students often forget the unwinding part. A great technique is to draw an arrow from a function's return value back to the line in the calling function that's waiting for it. Clearly marking the base case is also vital—it’s the anchor that stops the whole process from becoming an infinite loop.
Understanding this stack-based logic is fundamental for A-Level computer science. You can Explore Recursive Algorithms in more detail to solidify your grasp of this powerful programming pattern.
8 Trace Table Examples Comparison
| Example | Complexity 🔄 | Resources & Time ⚡ | Expected Outcomes ⭐📊 | Ideal Use Cases | Key Advantages & Tips 💡 |
|---|---|---|---|---|---|
| Simple Loop Trace Table – Counter Increment | Low 🔄 | Minimal resources; quick ⚡ | ⭐⭐⭐ Understand iteration and variable state; predict final value 📊 | Introductory GCSE lessons; basic loop practice | Direct code→state mapping; Tip: include a "Step" column 💡 |
| Conditional Statement Trace Table – IF/ELSE Logic | Medium 🔄 | Low–Moderate; multiple paths increase time ⚡ | ⭐⭐⭐ Understand branching and boolean evaluation; debug conditions 📊 | Decision logic exercises (GCSE/A‑Level); debugging | Shows executed branch clearly; Tip: add a "Condition" column 💡 |
| Array/List Indexing Trace Table – Element Access and Modification | Medium 🔄 (scales with length) | Moderate; can become large for long arrays ⚡ | ⭐⭐⭐⭐ Prevent off‑by‑one errors; predict array state after ops 📊 | Array manipulation, sorting/searching tasks (GCSE/A‑Level) | Clarifies index↔value relation; Tip: use index‑labeled grid and show state after each change 💡 |
| String Manipulation Trace Table – Substring and Character Operations | Low–Medium 🔄 | Low; quick for short strings ⚡ | ⭐⭐⭐ Trace indexing, concatenation, slicing; track length changes 📊 | Python string exercises, text processing (GCSE) | Practical for real code; Tip: show string length and use quotes for values 💡 |
| Nested Loop Trace Table – Multiple Variable Iteration | High 🔄 | High; long tables and more steps ⚡ | ⭐⭐⭐⭐ Understand nesting order and total iterations; Big O insight 📊 | 2D data, matrix ops, algorithm complexity (A‑Level) | Teaches inner/outer interaction; Tip: calculate outer×inner and use indentation 💡 |
| Function Call and Return Value Trace Table – Scope and Return Values | Medium–High 🔄 | Moderate; additional tables for scopes ⚡ | ⭐⭐⭐⭐ Understand scope, parameter passing, and return flow 📊 | Modular code tracing, recursion prep, A‑Level function questions | Clarifies caller vs callee context; Tip: separate columns for function and caller scope 💡 |
| Sorting Algorithm Trace Table – Bubble Sort Step‑by‑Step | High 🔄 | High; many comparisons/passes (time‑consuming) ⚡ | ⭐⭐⭐⭐ Learn swaps, passes, and O(n²) behaviour; trace array evolution 📊 | Sorting algorithm teaching and exam practice (A‑Level) | Visualizes algorithm mechanics; Tip: use a row per comparison and highlight swaps 💡 |
| Recursion Trace Table – Call Stack and Base Case | Very High 🔄 | High; deep call stacks and many rows ⚡ | ⭐⭐⭐⭐ Deep understanding of recursion, call stack and unwinding; memory impact 📊 | Recursion, tree traversal, divide‑and‑conquer (A‑Level) | Demonstrates call stack clearly; Tip: indent per call level and mark base case explicitly 💡 |
Turn Theory into Marks: Your Next Steps to Mastery
We’ve travelled through a series of trace table examples, moving from the simple comfort of a basic loop to the more brain-bending territory of nested structures and even recursion. The main lesson is always the same: trace tables aren't just about filling in boxes. They are a way to train your brain to think with the same precision as a computer.
This methodical, line-by-line approach is your most reliable tool for debugging your own code and, more importantly, for breaking down those tricky exam questions designed to catch you out. By turning abstract code into a concrete, step-by-step process, you remove the guesswork. You’re no longer hoping your logic is right; you are proving it, one value at a time.
Key Insights to Take Forward
Looking back at the examples, from basic loops to Bubble Sort, a few key patterns pop up:
- Setup is Everything: Your first step is always to find every variable, array, or output that will change. These become your columns. Forgetting a variable is the most common and easiest mistake to avoid.
- One Line, One Action: Never try to process multiple lines of code in a single row of your table. Each line in the algorithm is a separate action, and your table must show that single change.
- Conditions are Crossroads: Pay close attention to
IF,ELSE, andWHILEstatements. The result of a condition decides the entire future path of the program. Make a mental note of the condition's outcome before deciding which line to run next.
The real skill you've built isn't just following instructions; it's developing a step-by-step mindset. You've learned to slow down, focus on the current state of the program, and trust the process. This discipline is what separates a good programmer from a great one.
From Practice to Performance
Mastering trace tables is a direct investment in your grades. In an exam, they give you a structured way to show your working, which can earn you partial marks even if your final answer has a small error. More importantly, they give you a system to fall back on when you're under pressure and faced with a piece of code that seems deliberately confusing.
The path forward is clear: practice. Don't wait until you're in an exam hall to try these techniques. Work through these examples again. Change the starting values and see how the outputs change. This active practice is what makes the knowledge stick, turning a theoretical exercise into a practical, repeatable skill.
Ready to move beyond static examples and get real-time, examiner-style feedback? MasteryMind offers unlimited, curriculum-aligned trace table questions that adapt to your skill level. Stop wondering if you're on the right track and start getting instant corrections that turn mistakes into learning moments at MasteryMind.
Ready to master this topic?
Practise with quizzes, blurt exercises and exam questions on MasteryMind.
7 days Premium · Then free forever · No card, no charge