Installation Art — OCR GCSE Study Guide
Exam Board: OCR | Level: GCSE
This guide explores Installation Art (OCR GCSE 2.4), focusing on how artists transform three-dimensional spaces into immersive environments that engage audiences physically and psychologically. It provides practical guidance on developing concepts, experimenting with materials, and documenting work across all four Assessment Objectives. Mastering this topic requires both critical analysis of key practitioners and confident, spatially-aware practical skills.
## Overview
Installation Art is a dynamic and contemporary art form where the artist uses the entire exhibition space as their canvas. Unlike traditional sculpture, which is an object to be looked at, an installation is an environment to be experienced. For your OCR GCSE Art and Design course, this topic challenges you to move beyond creating discrete objects and instead to design a holistic spatial experience that engages an audience physically and psychologically. Marks are awarded for your ability to manipulate space, light, sound, and objects to create a powerful, immersive, and conceptually-driven artwork.

## Key Knowledge & Theory
### Core Concepts
To excel in this area, candidates must grasp the core principles that underpin Installation Art. The central idea is **site-specificity**, meaning the artwork is designed for a particular location and its meaning is inextricably linked to that space. This is not a sculpture that can be moved; the room is the art. Another key concept is **immersion**, the feeling of being enveloped by the artwork. This requires you to consider the entire volume of the space — floor, walls, ceiling, and the air in between. Finally, **sensory engagement** is crucial; think about how your work can appeal to senses beyond sight, such as sound, touch, or even smell, to create a multi-layered experience.
### Key Practitioners/Artists
| Name | Period/Style | Key Works | Relevance |
|---|---|---|---|
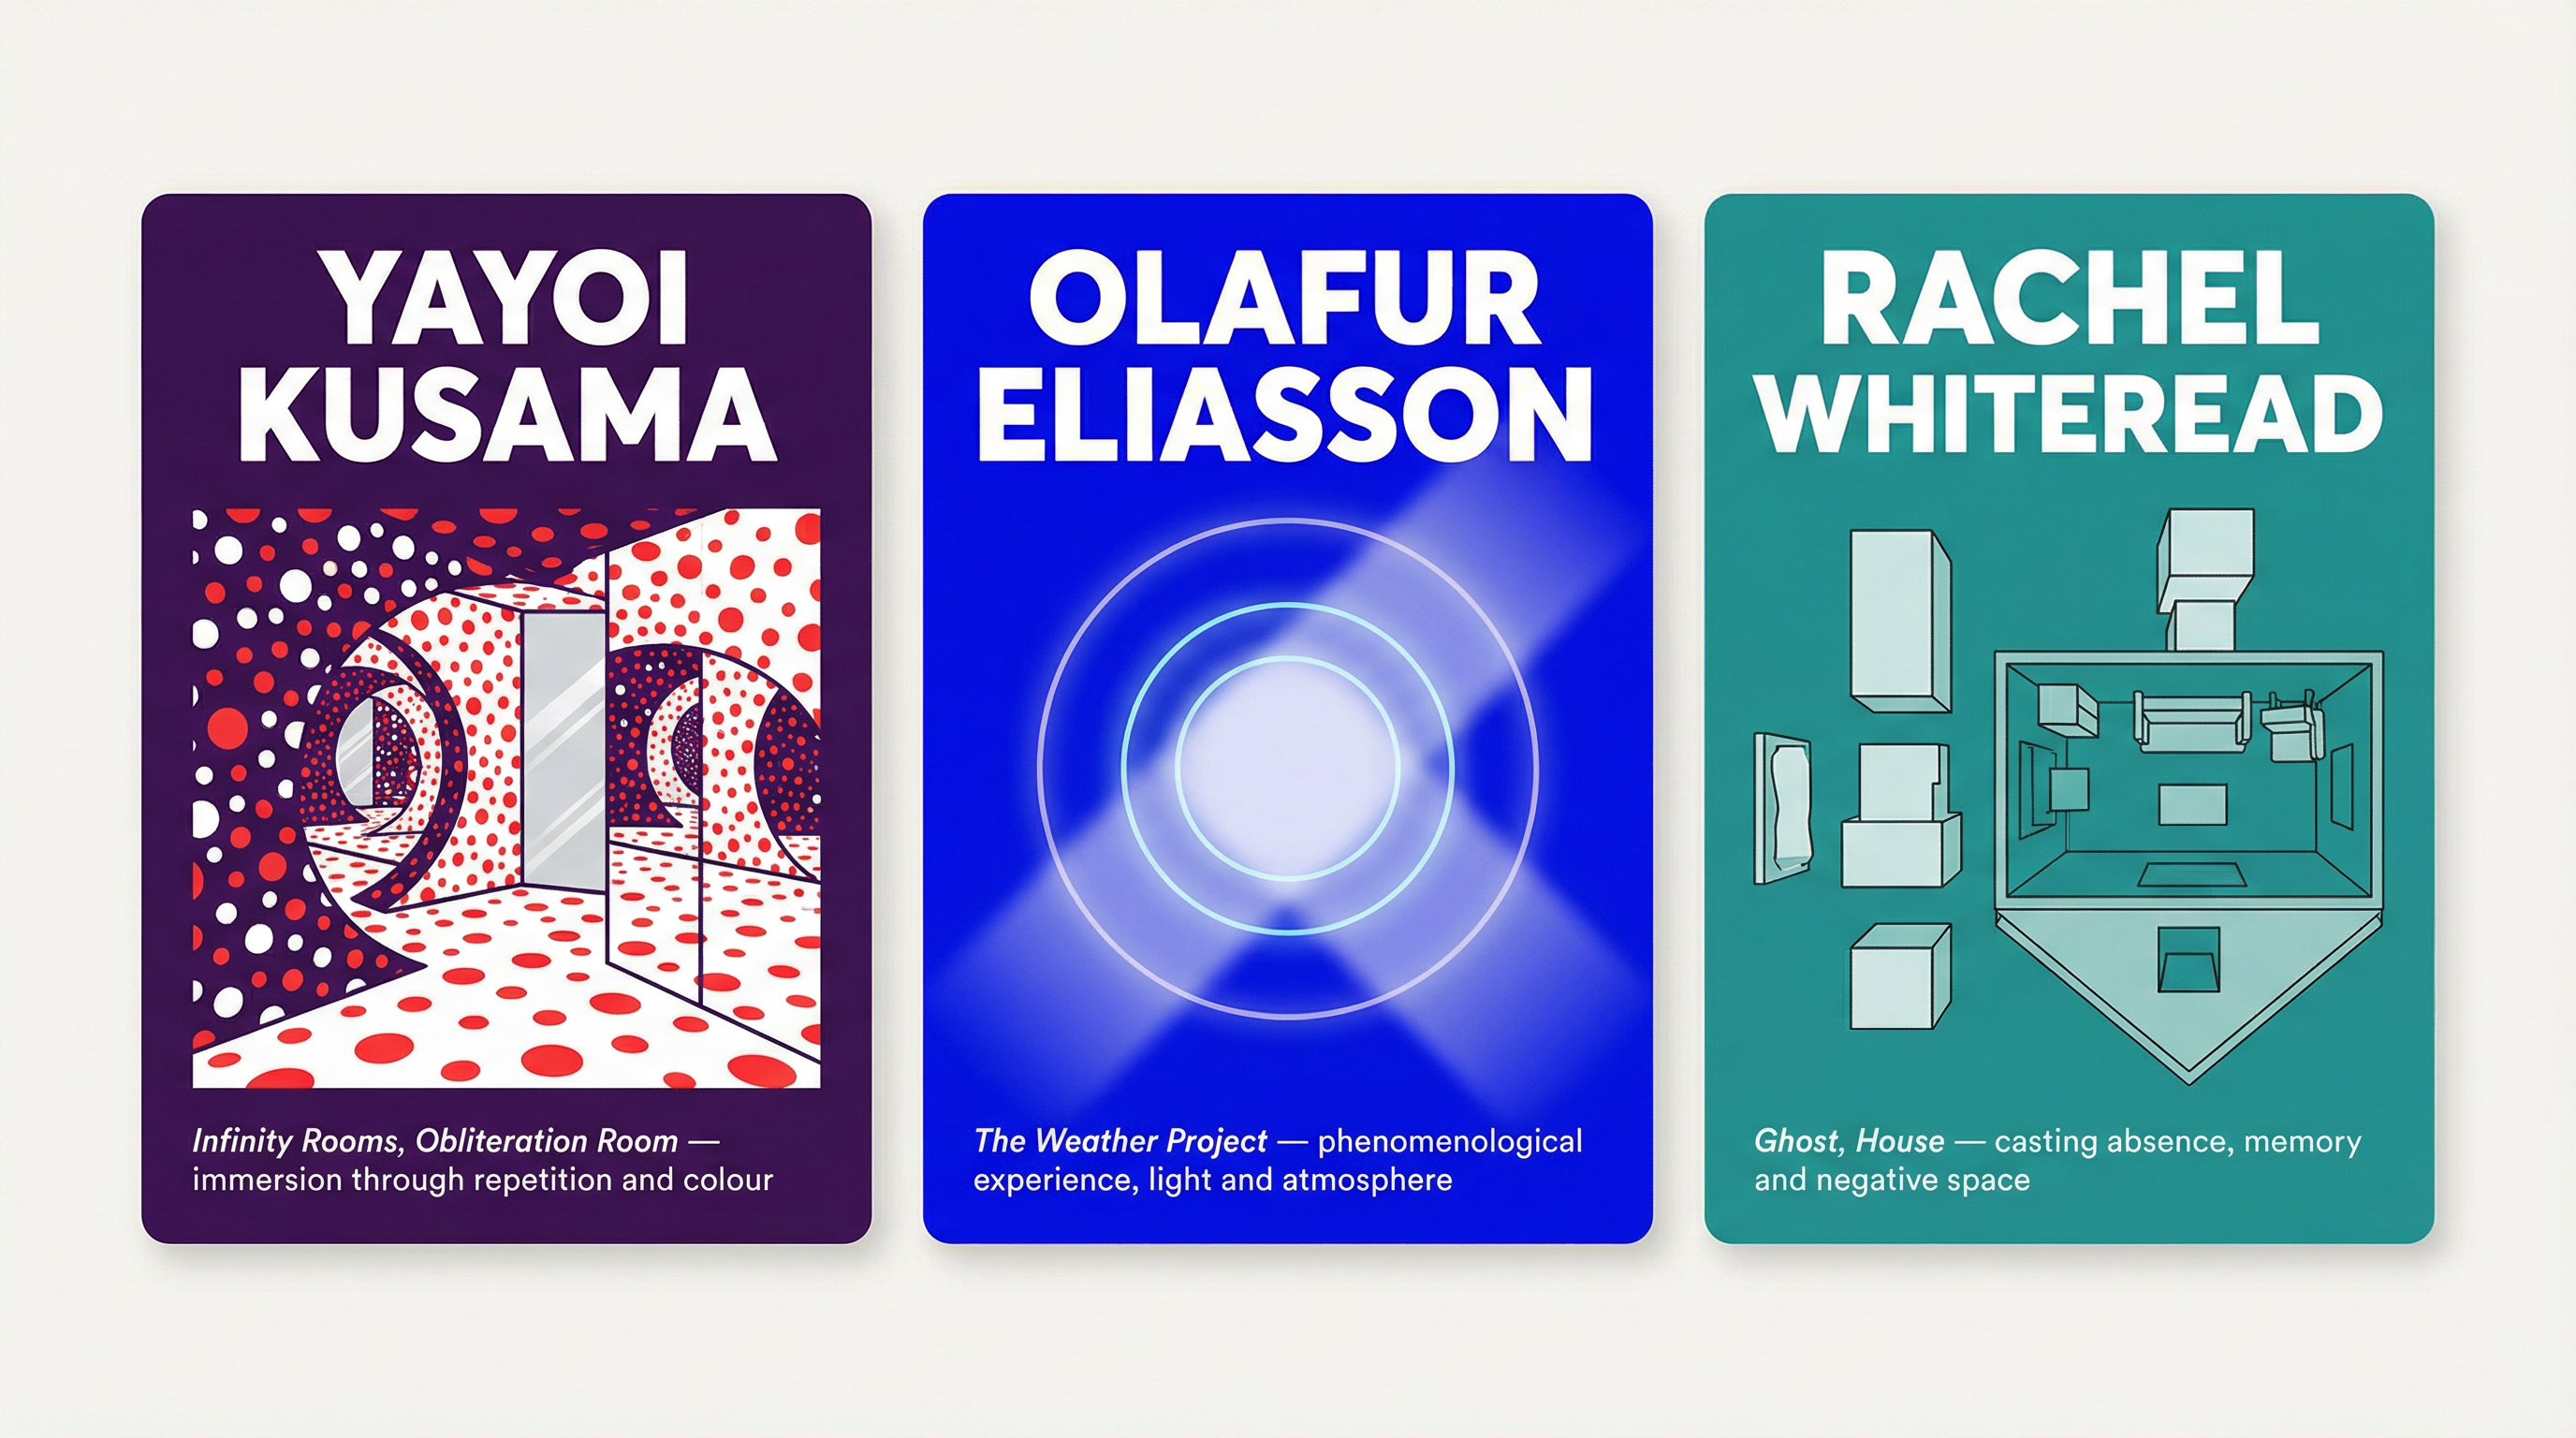
| Yayoi Kusama | Contemporary (1950s–present) | *Infinity Mirror Rooms*, *Obliteration Room* | Master of immersion through repetition, pattern, and optical illusion. Her work is a prime example of how to transform a simple room into an infinite, disorienting universe, directly engaging the viewer's perception of space. |
| Olafur Eliasson | Contemporary (1990s–present) | *The Weather Project*, *Ice Watch* | Explores natural phenomena (light, water, temperature) to create powerful, atmospheric installations. Credit is given for analysing how he uses artificial means to replicate natural experiences, altering the viewer's sensory perception. |
| Rachel Whiteread | Contemporary (1980s–present) | *Ghost*, *House*, *Embankment* | Known for casting the 'negative space' inside and around objects, from hot water bottles to entire houses. Her work powerfully explores themes of memory, absence, and domesticity, providing a strong conceptual basis for projects. |
| Bruce Nauman | Post-Minimalism (1960s–present) | *Corridor Installations*, *Live-Taped Video Corridors* | Uses architecture, sound, and video to create psychologically charged and often unsettling experiences. His work is an excellent reference for exploring themes of surveillance, control, and the body in space. |
### Technical Vocabulary
Using precise terminology is essential for high marks. Candidates should aim to use these words accurately in their annotations and written responses.
- **Site-Specific**: Created for a particular location.
- **Immersive**: Surrounding the viewer, creating a total environment.
- **Phenomenological**: Relating to the subjective experience of phenomena; how things feel.
- **Sensory Engagement**: Activating senses beyond sight (sound, touch, smell).
- **Maquette**: A small-scale model of a planned work.
- **Elevation Drawing**: A 2D drawing of a 3D space from one side, showing heights.
- **Floor Plan**: A diagram showing the layout of a space from above.
- **Negative Space**: The space around and between the subject(s) of an image.
- **Ephemerality**: The quality of being temporary or lasting for a short time.
- **Viewer Agency**: The capacity for the viewer to act or make choices within the artwork.
## Practical Skills
### Techniques & Processes
Successful installation work depends on rigorous practical experimentation. You must explore a range of techniques to discover what best serves your concept.
1. **Spatial Manipulation**: Use materials like fabric, string, or cardboard to divide, re-shape, or alter the perceived dimensions of a space. Experiment with creating low ceilings, narrow corridors, or false walls.
2. **Lighting**: This is one of the most powerful tools. Use coloured gels, spotlights, projections, or fairy lights to change the mood and focus of a space. Document how different lighting conditions affect your materials and the overall atmosphere.
3. **Projection**: Use a digital projector to cast images or videos onto surfaces. This can instantly transform a space and is an effective way to introduce narrative, pattern, or movement.
4. **Sound**: Incorporate a soundscape to enhance the immersive quality. This could be ambient noise, a recorded monologue, or music. Consider how sound can guide the viewer or create a specific emotional response.
5. **Casting**: Following Rachel Whiteread's example, experiment with casting negative space using plaster, alginate, or even wax to explore themes of memory and presence/absence.
### Materials & Equipment
Your choice of materials is a key part of the artistic message. Don't just pick things you like; pick things that mean something in the context of your project. Always consider the safe use of all equipment.
- **Found Objects**: Everyday items can be arranged to create powerful installations, often carrying their own histories and associations.
- **Light Sources**: Projectors, LEDs, spotlights, torches. Always conduct a risk assessment for electrical equipment.
- **Mirrors & Reflective Surfaces**: Mirrored acrylic, tin foil, or polished metal can be used to manipulate light and create illusions of space.
- **Fabric & Textiles**: Can be used to soften a space, create partitions, or absorb sound. Consider transparency, weight, and texture.
- **Audio Equipment**: Speakers, headphones, microphones. Ensure cables are safely managed.
## Portfolio/Coursework Guidance
### Assessment Criteria
Your portfolio is assessed against four equally weighted Assessment Objectives (AOs). You must provide evidence for all four.
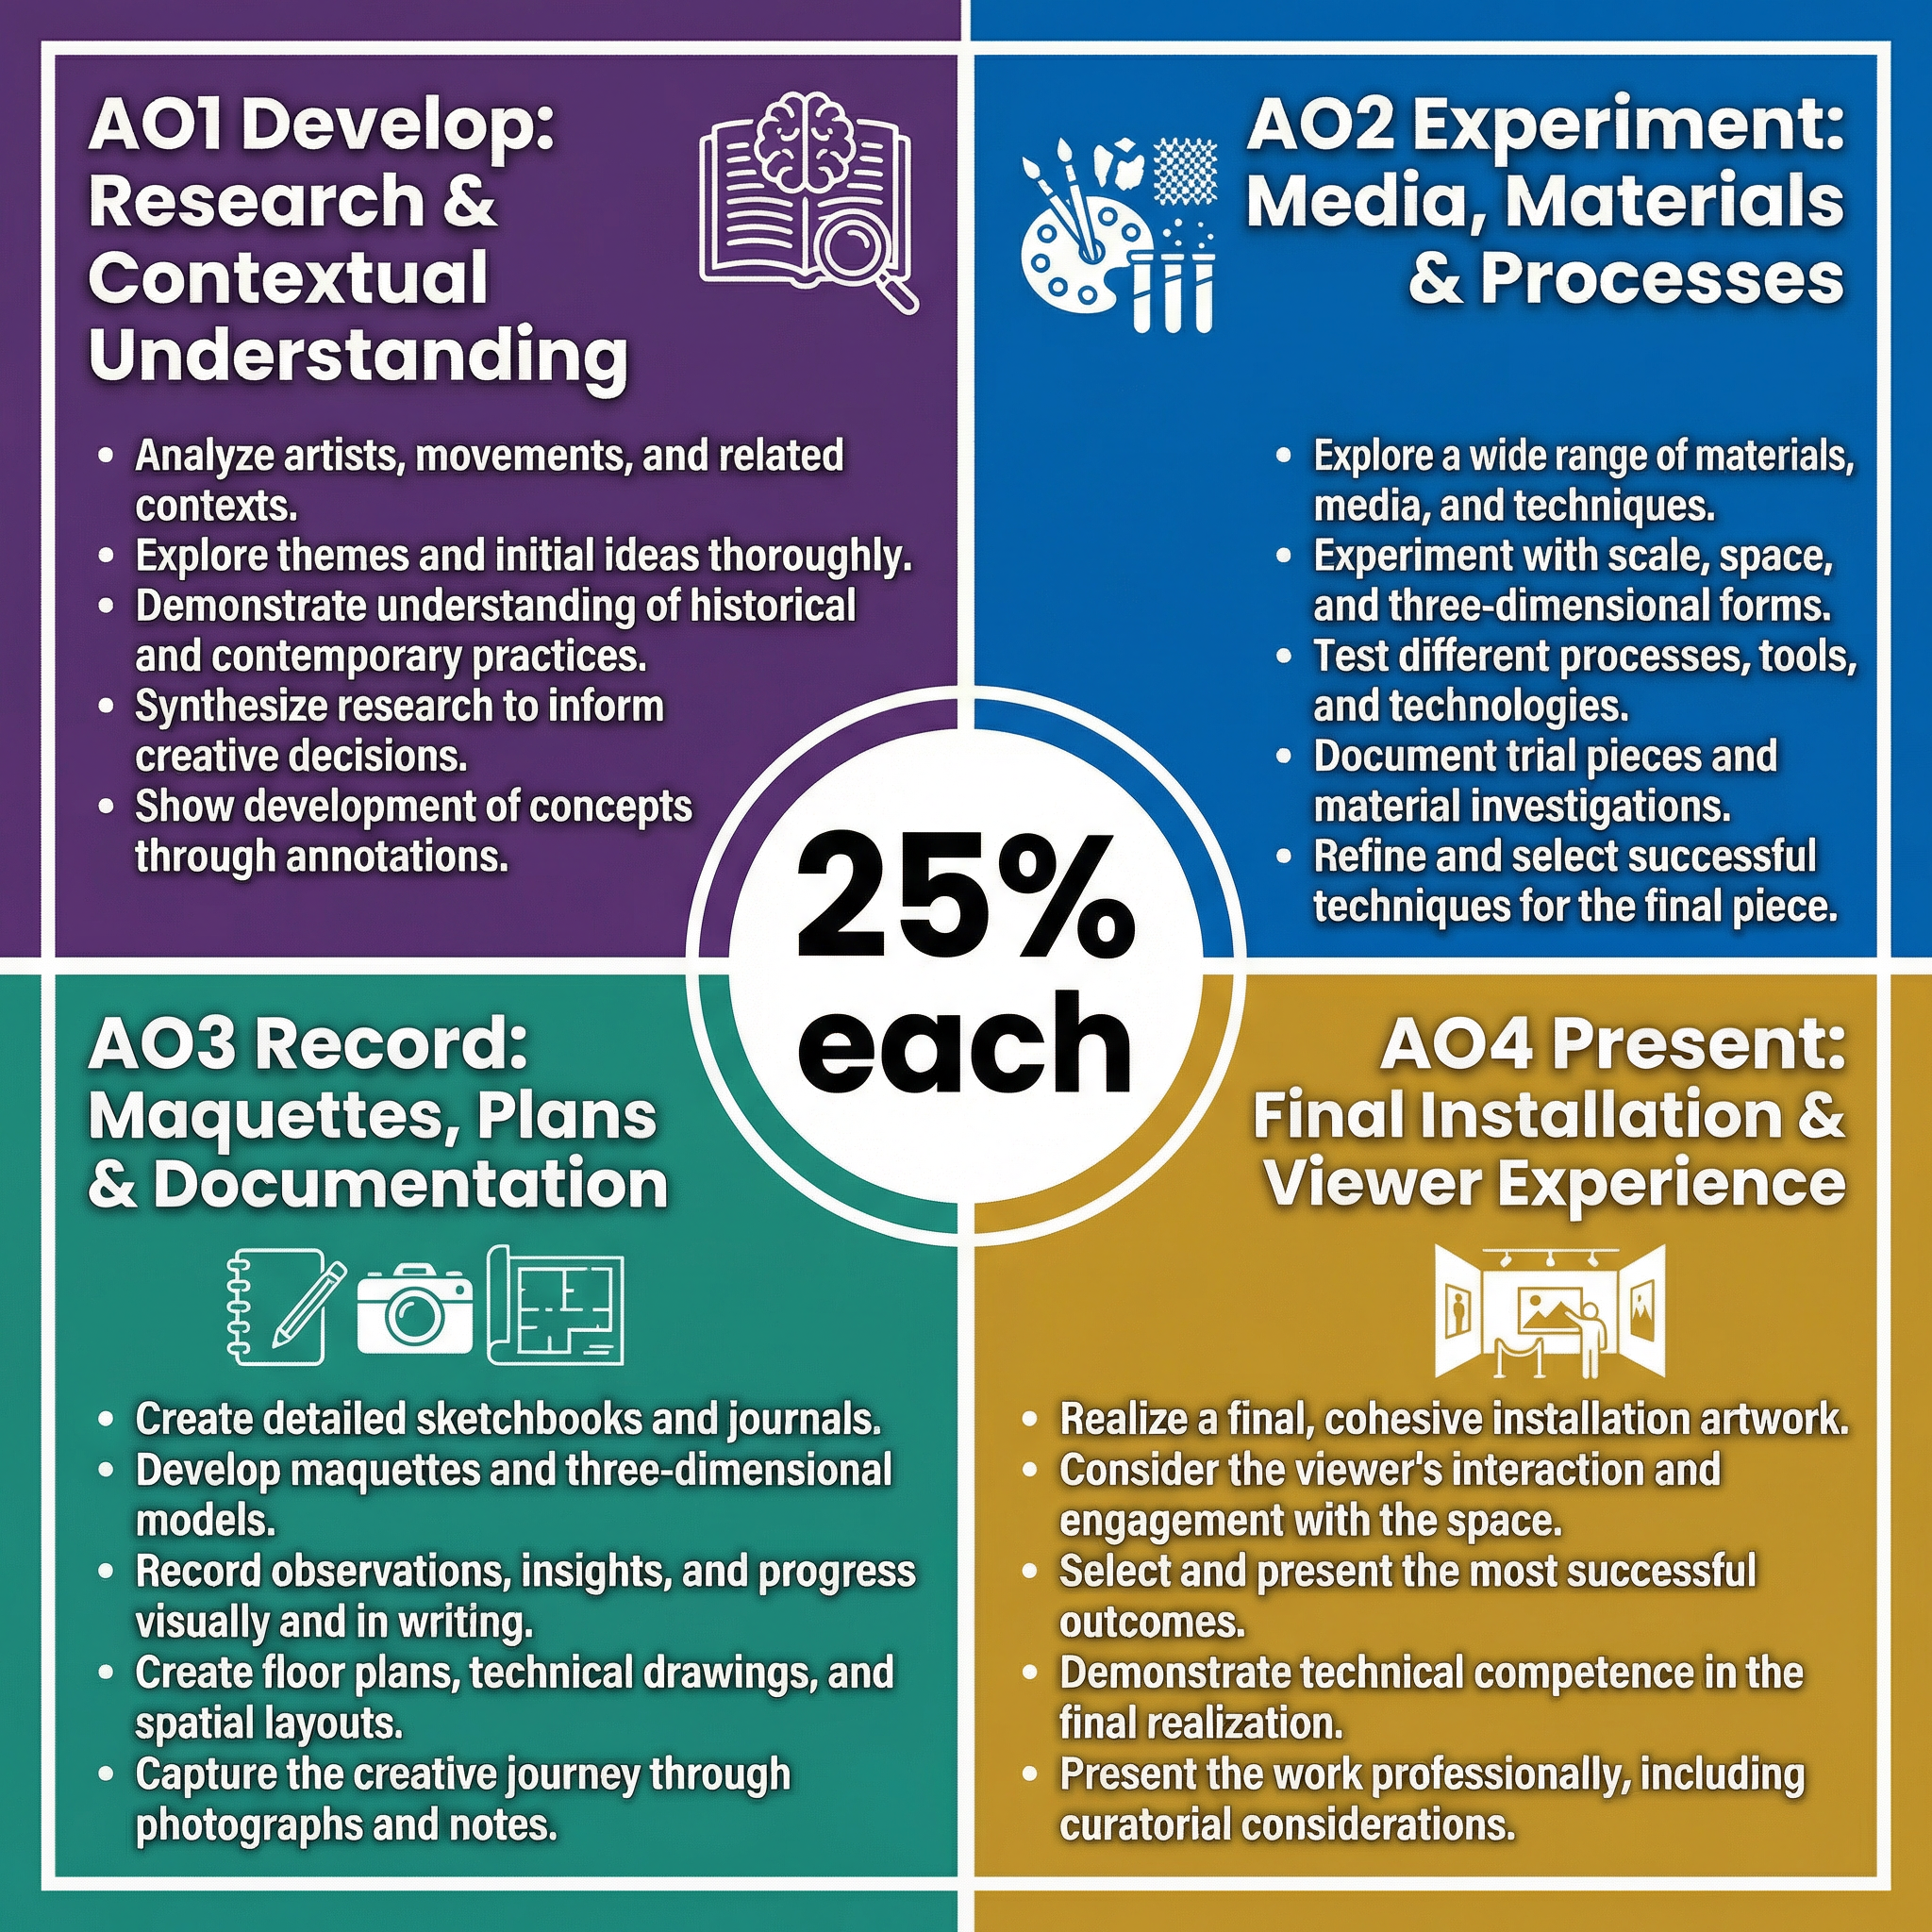
- **AO1: Develop (25%)**: Show you have researched relevant artists and developed your ideas. Annotations must analyse, not just describe, how artists' work informs your own.
- **AO2: Experiment (25%)**: Evidence of exploring different media, materials, and techniques. Your sketchbook should be full of tests, trials, and happy accidents.
- **AO3: Record (25%)**: Document your journey through drawings, photographs, maquettes, and written notes. This is where you show your thinking process.
- **AO4: Present (25%)**: The final outcome. This is your resolved installation, presented through high-quality photographs or video, demonstrating your technical skill and conceptual understanding.
### Building a Strong Portfolio
- **Annotate Everything**: Explain your thinking. Why did you choose that material? What did you learn from that experiment? How does this link to your chosen artist?
- **Show Your Journey**: Examiners want to see the development of your idea, not just the final piece. Include mind maps, initial sketches, and photos of work-in-progress.
- **Quality over Quantity**: A few well-documented, insightful experiments are better than a hundred superficial ones.
- **Document Professionally**: Your final installation will be de-installed. The only evidence you have is your documentation. Take well-lit, high-resolution photographs from multiple viewpoints. A short video walkthrough is an excellent way to capture the experience.
## Exam Component
### Written Exam Knowledge
While the majority of marks are for your portfolio, Installation Art concepts can appear in the written exam (Component 1). You may be asked to analyse an unseen image of an installation or compare two practitioners.
- **Be Prepared to Analyse**: Use your technical vocabulary to break down how an artist has used space, light, and materials to create an effect.
- **Link to Context**: Discuss how the work might relate to its social, cultural, or historical context.
### Practical Exam Preparation
For the Externally Set Assignment, you might receive a theme that lends itself to an installation-based response. If so:
- **Start with a Maquette**: A small-scale model is the quickest way to test your spatial ideas under timed conditions.
- **Plan Your Space**: If you have a designated space, measure it and create a floor plan. If not, think about how your work could be adapted to different potential spaces.
- **Manage Your Time**: Break down the practical exam into clear stages: research, experimentation, development, and final outcome. Allocate time for each.