AQA · GCSE · Biology
Course version: 8461 · Version from Sept 2018
Record results as both length measurements and as careful, labelled…
Full specification wording
Control and coordination: Record results as both length measurements and as careful, labelled biological drawings to show the effects.
This statement describes how to record the outcomes of the seedling practical.
Checked against the AQA 8461 specification (opens in a new tab) on .
- Point 6 of 7
- 3 key terms
Study notes
From the checked teaching notes for this specification point.
The idea
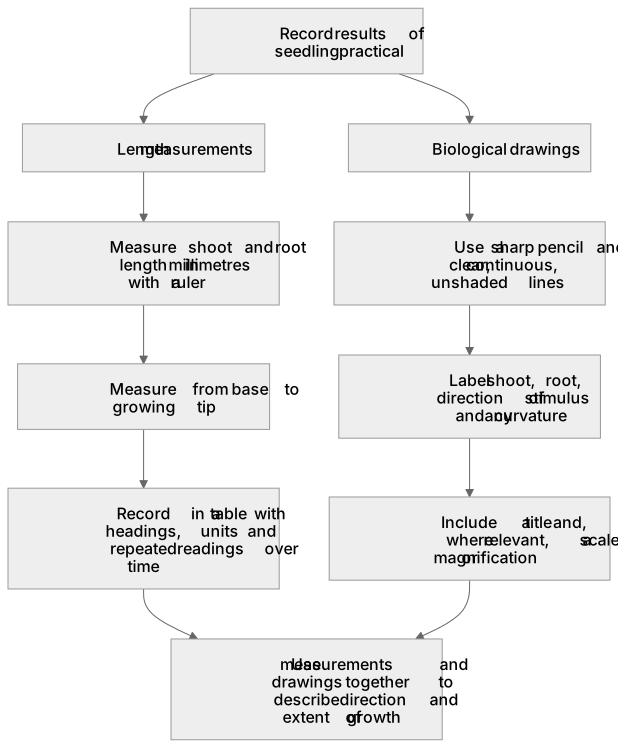
This statement describes how to record the outcomes of the seedling practical. Length measurements give quantitative data: use a ruler to measure shoot and root length in millimetres from the base of the shoot or root to the tip, and record values in a table with units. Biological drawings give qualitative evidence of the direction and pattern of growth. A good drawing is made with a sharp pencil, uses clear continuous lines without shading, is large enough to show detail, and includes labels for the shoot, root, direction of light or gravity, and any curvature. A title and magnification or scale should be included where appropriate. Together, measurements and drawings allow trends to be described and conclusions to be supported.
What earns the marks
- Measure shoot and root length in millimetres using a ruler, from the base to the growing tip.
- Record measurements in a table with clear headings, units and repeated readings over time.
- Make biological drawings with a sharp pencil using clear, continuous, unshaded lines.
- Label the shoot, root, direction of the stimulus and any curvature or bending.
- Include a title and, where relevant, a scale or magnification for the drawing.
- Use drawings alongside measurements to describe the direction and extent of growth.
Common mistakes and how to put them right
Drawing with sketchy or shaded lines.
Put it right: Biological drawings should use clear, continuous lines without shading.
Omitting units or measuring from inconsistent points.
Put it right: Measure from the same reference point and state the unit.
Labelling the drawing with conclusions rather than structures.
Put it right: Labels should identify plant parts and the direction of the stimulus.
Exam tips
- Practise measuring from the base of the shoot or root to the tip so repeated readings are comparable.
- Annotate drawings with short labels and a title rather than writing long paragraphs on the diagram.
- When describing results, quote actual measurements and refer to the direction of bending shown in the drawing.
Try the lesson
The start of the Control and coordination: Record results as both length measurements and as careful, labelled biological drawings to show the effects. lesson, made from checked teaching notes for this specification point.
Have a go first
A student investigates the phototropic response of curved plant shoots. How should the student record the results to best show the effects of the response?
Listen
This statement describes how to record the outcomes of the seedling practical. Length measurements give quantitative data: use a ruler to measure shoot and root length in millimetres from the base of the shoot or root to the tip, and record values in a table with units. Biological drawings give qualitative evidence of the direction and pattern of growth. A good drawing is made with a sharp pencil, uses clear continuous lines without shading, is large enough to show detail, and includes labels for the shoot, root, direction of light or gravity, and any curvature. A title and magnification or scale should be included where appropriate. Together, measurements and drawings allow trends to be described and conclusions to be supported. A strong answer earns marks for these points. Measure shoot and root length in millimetres using a ruler, from the base to the growing tip. Record measurements in a table with clear headings, units and repeated readings over time. Make biological drawings with a sharp pencil using clear, continuous, unshaded lines. Label the shoot, root, direction of the stimulus and any curvature or bending. Exam tip: Practise measuring from the base of the shoot or root to the tip so repeated readings are comparable.
See it
Key words
Say what each word means before you turn the card.
Biological drawing skills
Try answering aloud or in your head before turning the card.
Quantitative measurement
Try answering aloud or in your head before turning the card.
Recording and presenting data
Try answering aloud or in your head before turning the card.
See every definition
- Biological drawing skills
- Making a drawing with a sharp pencil using clear, continuous, unshaded lines, large enough to show detail, with labels, a title and, where relevant, a scale or magnification.
- Quantitative measurement
- Using a ruler to measure shoot and root length in millimetres from the base of the shoot or root to the tip, recording values in a table with units.
- Recording and presenting data
- Recording measurements in a table with clear headings, units and repeated readings over time, and using drawings alongside measurements to describe the direction and extent of growth.
Label the diagram
Some boxes have lost their names. Pick the right name for each number.
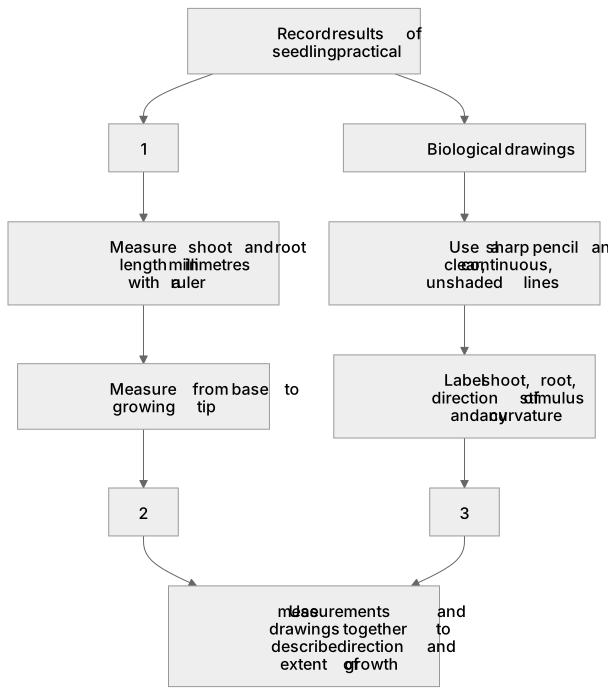
1Box 1
2Box 2
3Box 3
There is more to this lesson
The full lesson goes on to check your understanding and help you earn the marks. Create a free account to carry on, with your progress saved.
A week of Premium from your first lesson · Then the free plan continues · No card, no charge
Test your understanding of Control and coordination: Record results as both length measurements and as careful, labelled biological drawings to show the effects.
Active recall beats re-reading. Take an instant quiz now to test what you’ve learned and lock it into long-term memory.
A week of Premium from your first lesson · Then the free plan continues · No card, no charge