Pearson Edexcel · A-Level · Design and Technology
Topic 7: Potential hazards and risk assessment
This topic covers the essential principles of identifying, assessing, and controlling hazards in the Design and Technology workshop. Understanding risk assessment is critical not only for exam success but for ensuring safe practical work throughout your coursework.
- 7 min read
- 3 worked examples
- 4 practice questions
- 6 key terms
Study Notes
Overview
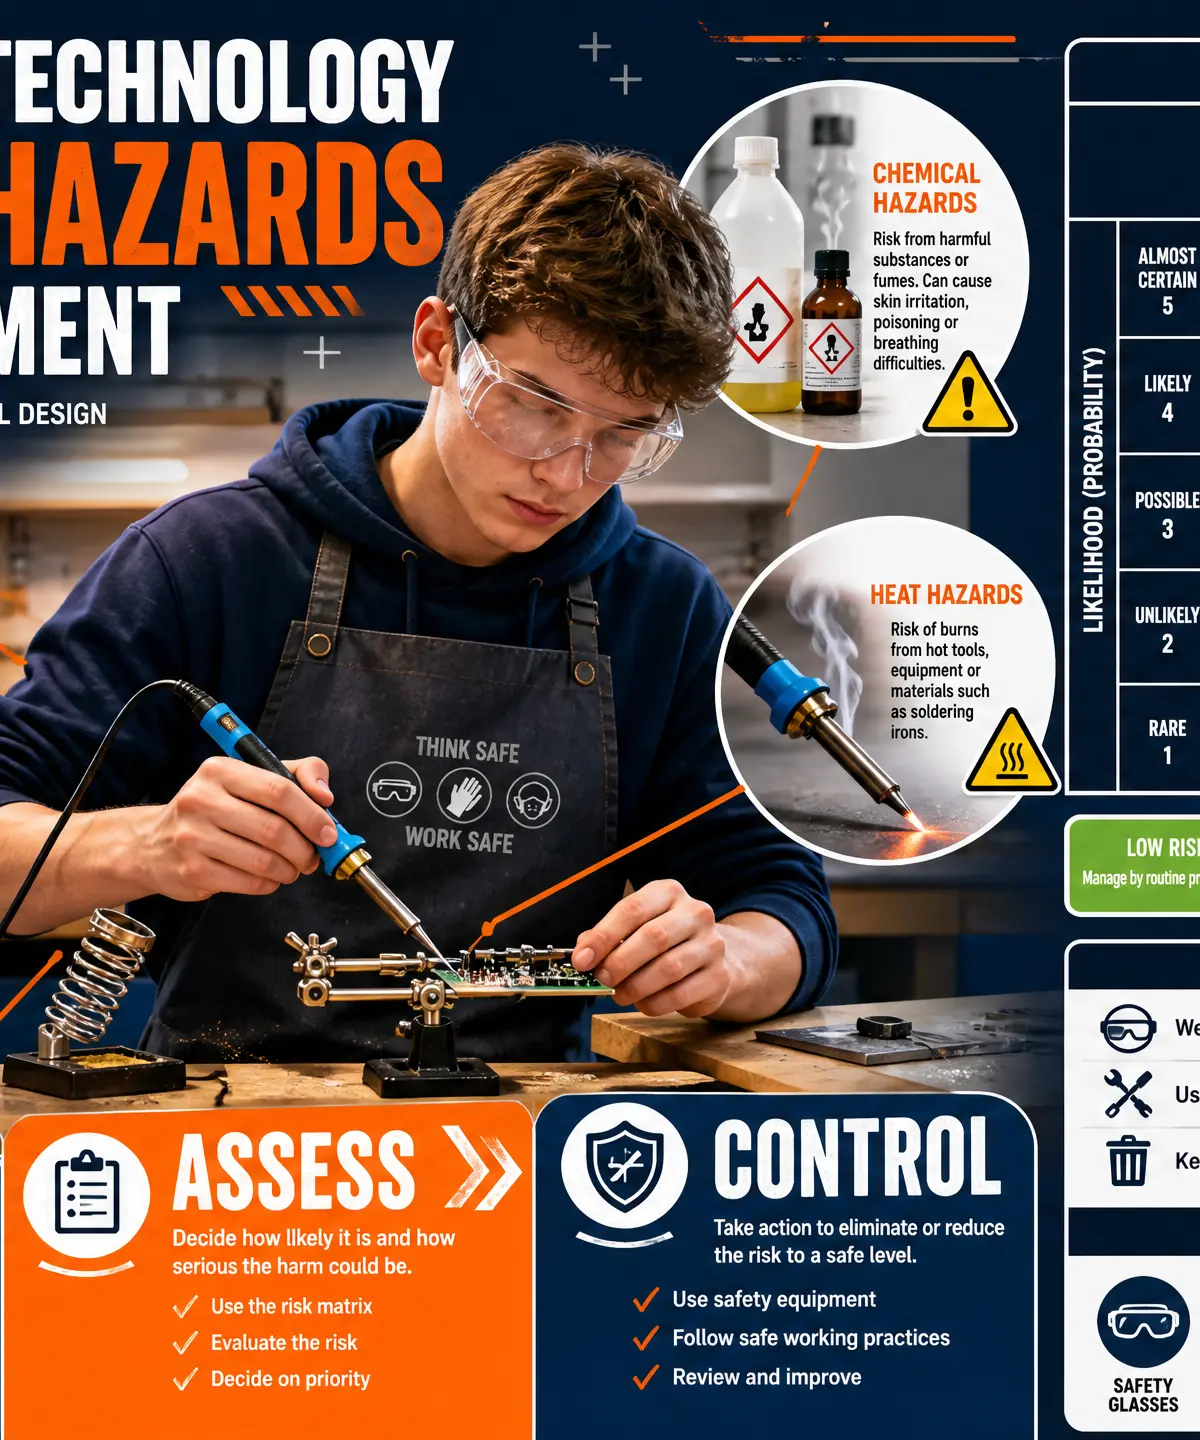
Health and safety is the cornerstone of all practical work in Design and Technology. Topic 7 focuses on understanding the difference between a hazard and a risk, identifying potential sources of harm in the workshop, and applying formal risk assessment processes to implement effective control measures. This knowledge is essential for both the theoretical exam and for demonstrating safe working practices in your NEA (Non-Exam Assessment) portfolio.
Listen to the Topic Podcast
Listen to this 7-minute audio guide covering the core concepts, common exam mistakes, and a quick-fire recall quiz.

Key Knowledge & Theory
Core Concepts: Hazard vs. Risk
A fundamental requirement for this topic is distinguishing between a hazard and a risk. Examiners frequently penalise candidates who use these terms interchangeably.
- Hazard: Anything that has the potential to cause harm (e.g., a sharp chisel, a trailing cable, wood dust).
- Risk: The likelihood that a hazard will cause harm, combined with the severity of that harm.
Risk = Likelihood × Severity
The Six Categories of Workshop Hazards
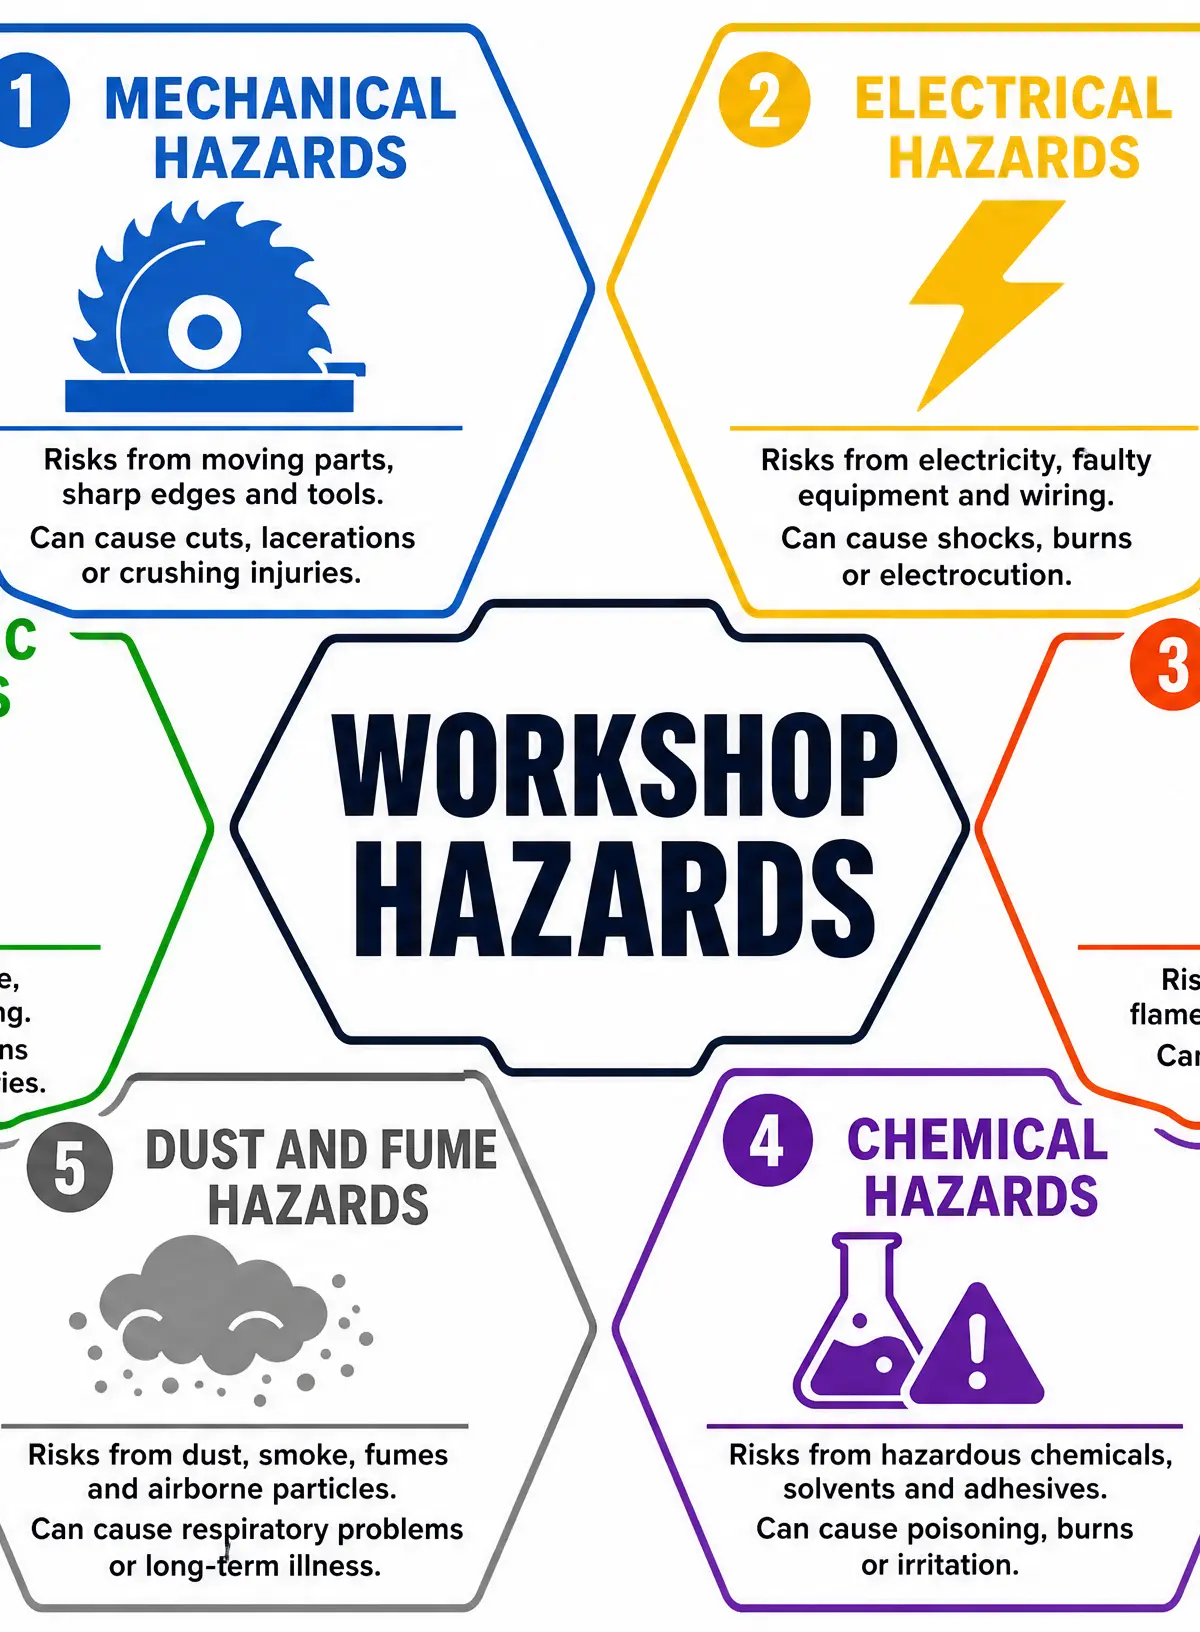
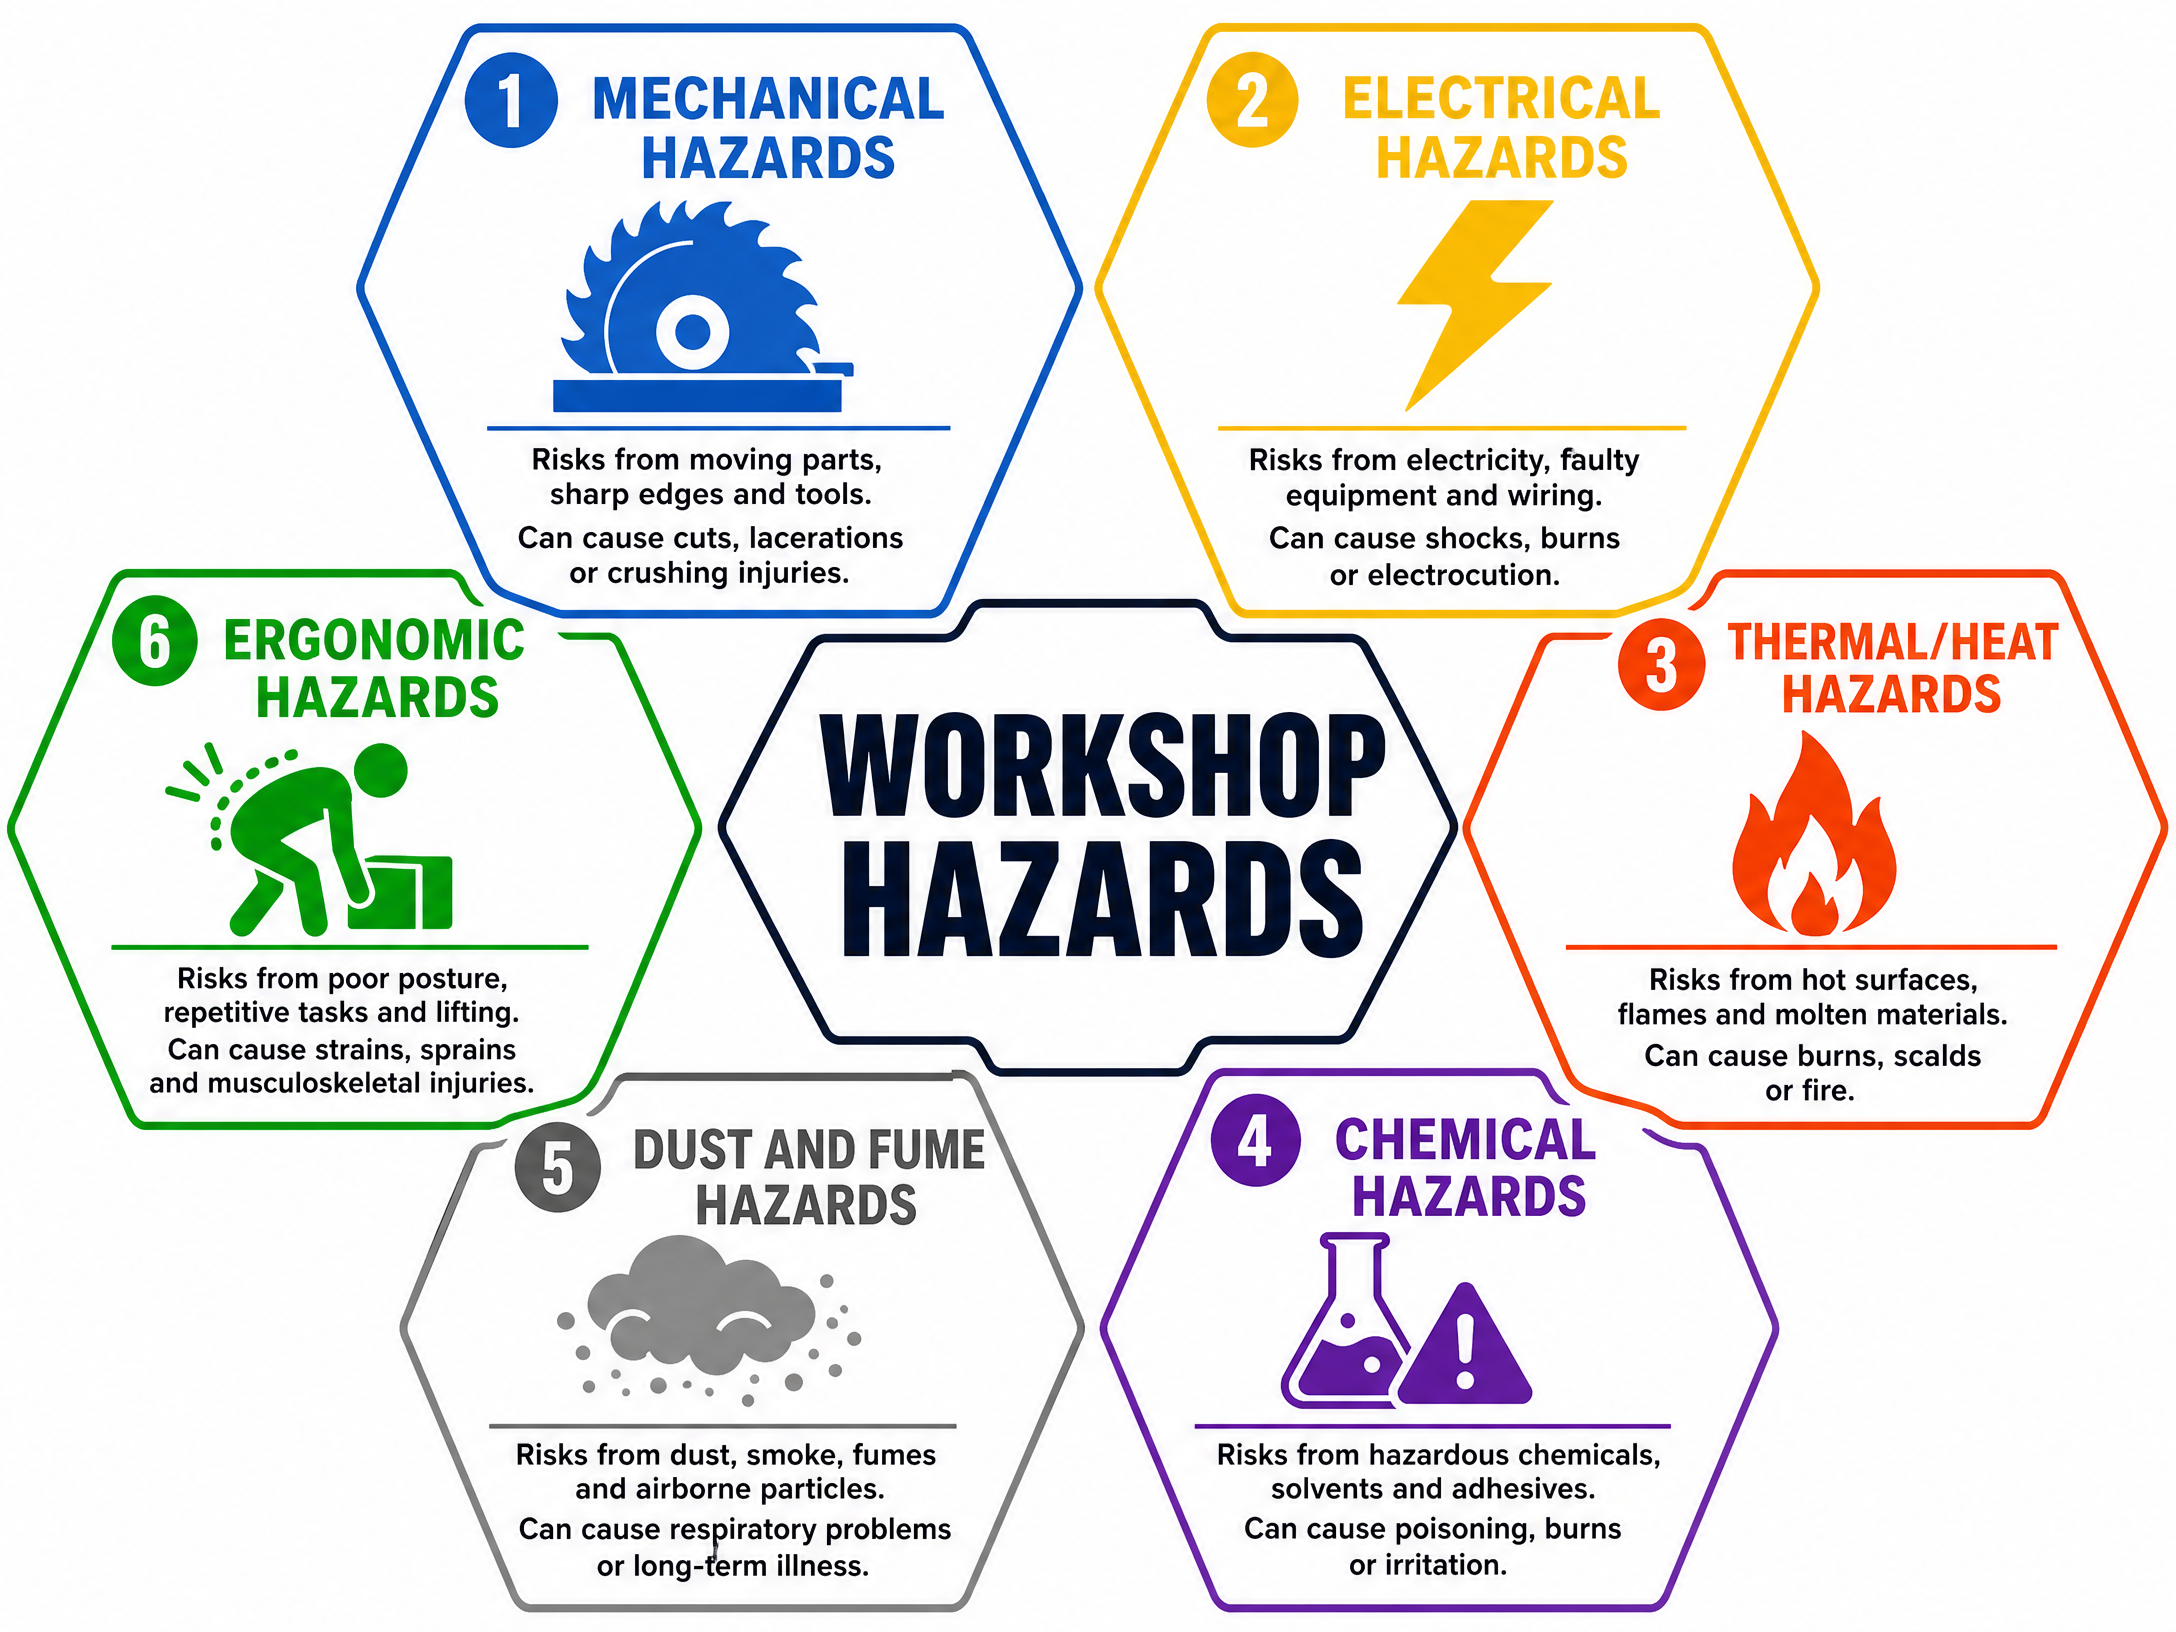
You must be able to identify and classify hazards into these six main categories:
| Hazard Category | Description & Examples | Relevance to D&T |
|---|---|---|
| Mechanical | Risks from moving parts, sharp edges, and tools. (e.g., bandsaw blades, chisels, drills) | Primary cause of cuts, lacerations, and crush injuries during practical making tasks. |
| Electrical | Risks from faulty wiring, damaged plugs, or incorrect use. (e.g., frayed cables on a sander) | Can cause electric shock, burns, or electrocution; common when using power tools. |
| Thermal / Heat | Risks from hot surfaces, flames, or molten materials. (e.g., soldering irons, kilns, strip heaters) | Can cause severe burns or start fires; relevant when working with plastics and metals. |
| Chemical | Risks from hazardous substances. (e.g., epoxy resins, solvent-based adhesives, spray paints) | Can cause skin irritation, poisoning, or respiratory issues; strictly governed by COSHH regulations. |
| Dust & Fume | Risks from airborne particles and smoke. (e.g., MDF dust from sanding, fumes from laser cutting) | Can cause asthma, allergic reactions, or long-term lung disease; requires extraction systems. |
| Ergonomic | Risks from poor posture, repetitive strain, or incorrect lifting. (e.g., hunching over a workbench) | Causes musculoskeletal injuries over time; often overlooked by students in their risk assessments. |
Technical Vocabulary
- COSHH: Control of Substances Hazardous to Health. UK regulations requiring employers (and schools) to control exposure to hazardous materials.
- Hierarchy of Control: A system used in industry to minimise or eliminate exposure to hazards, ranked from most effective (Elimination) to least effective (PPE).
- PPE: Personal Protective Equipment (e.g., safety goggles, aprons, ear defenders).
- Risk Assessment: A systematic process of evaluating the potential risks that may be involved in a projected activity or undertaking.
Practical Skills
The Risk Assessment Process
You must be able to describe the formal five-step risk assessment process used in industry and in your school workshop:
- Identify the hazards: Look closely at the tools, materials, and environment.
- Decide who might be harmed and how: Consider the operator, classmates, teachers, and visitors.
- Evaluate the risks and decide on precautions: Use a risk matrix to calculate the risk score.
- Record your findings and implement them: Put control measures into action.
- Review your assessment and update if necessary: Reassess if a new tool or material is introduced.
Evaluating Risk: The Risk Matrix
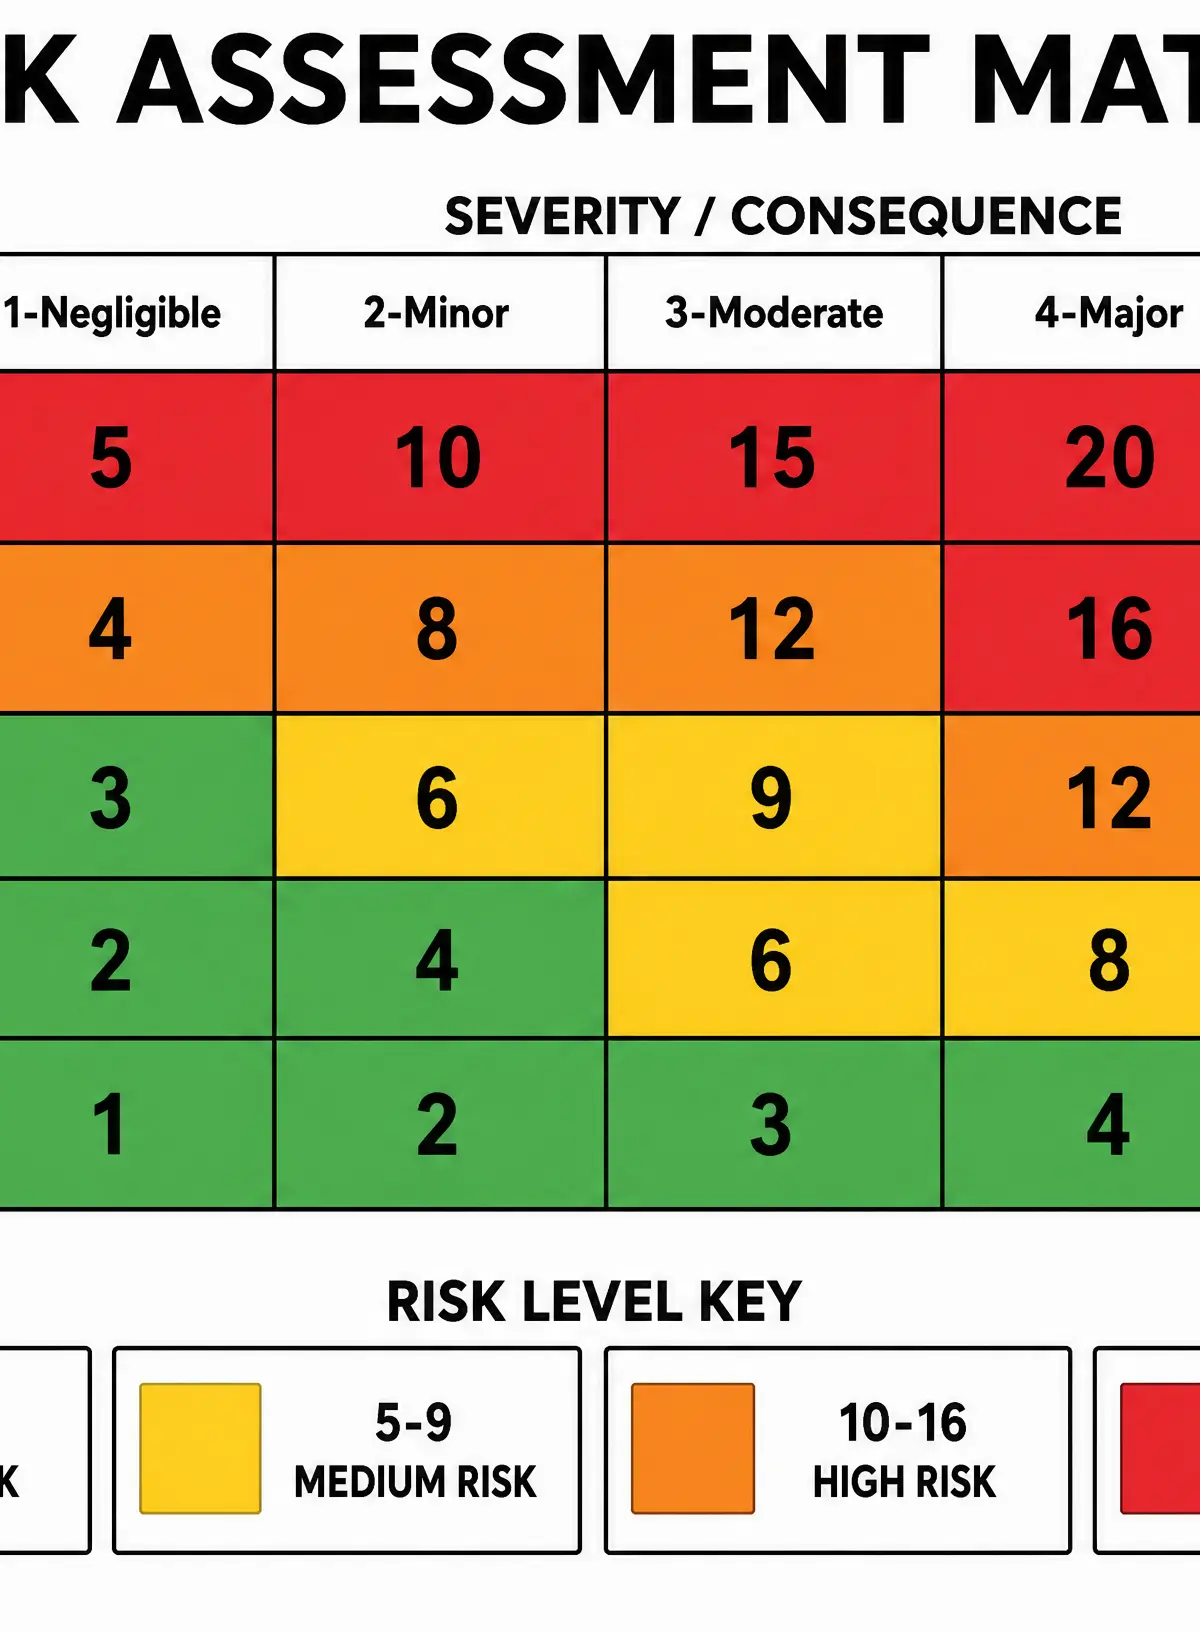
To evaluate risk objectively, we use a Risk Matrix. This involves assigning a numerical value (usually 1 to 5) to both the Likelihood of the event occurring and the Severity of the consequence.
For example, using a pillar drill without training:
- Likelihood of injury: 4 (Likely)
- Severity of injury: 4 (Major - e.g., deep cut or entanglement)
- Risk Score: 4 × 4 = 16 (High Risk)
Implementing Control Measures
Control measures must follow the Hierarchy of Control:
- Elimination: Physically remove the hazard (e.g., do not use the hazardous machine).
- Substitution: Replace the hazard (e.g., use water-based paint instead of solvent-based).
- Engineering Controls: Isolate people from the hazard (e.g., machine guards, LEV/dust extraction).
- Administrative Controls: Change the way people work (e.g., safety training, warning signs, limiting exposure time).
- PPE: Protect the worker with equipment (e.g., goggles, dust masks). Note: This is the last line of defence.
Portfolio/Coursework Guidance
Assessment Criteria for NEA
In your Non-Exam Assessment (NEA), examiners allocate specific marks for demonstrating safe working practices and applying risk assessment. You are assessed on:
- Your ability to identify specific hazards related to your chosen materials and manufacturing processes.
- The implementation of appropriate control measures in your manufacturing diary.
- Photographic evidence of you working safely (e.g., wearing correct PPE, using machine guards).
Building a Strong Portfolio
To secure top marks in the making section of your portfolio:
- Create a detailed Risk Assessment table before you begin manufacturing. List the process (e.g., "Using the bandsaw"), the hazard, the risk score, and specific control measures.
- Annotate your making diary with safety notes. Instead of just writing "I cut the wood," write "I cut the timber using the tenon saw, ensuring the work was securely clamped in the vice to prevent slipping (Mechanical Hazard control)."
- Show, don't just tell. Include photos of yourself wearing an apron and safety goggles while operating machinery.
Exam Component
Written Exam Knowledge
In the written paper, you will typically encounter questions asking you to:
- Identify hazards in a given workshop scenario or photograph.
- Calculate a risk score given a specific likelihood and severity.
- Suggest appropriate control measures for a specific manufacturing process.
- Explain the difference between a hazard and a risk.
Exam Preparation Strategy
- Practise applying the Hierarchy of Control to different scenarios. If asked for a control measure, try to think of an Engineering or Administrative control before defaulting to PPE.
- Learn the specific COSHH requirements for common D&T materials (e.g., MDF dust, epoxy resin, acrylic cement).
Visual Resources
2 diagrams and illustrations
Interactive Diagrams
1 interactive diagram to visualise key concepts
Conceptual Flow Outline
The Risk Assessment and Control Process
Worked Examples
3 worked examples — open one to explore the question and available guidance.
Practice Questions
Test your understanding — click to reveal model answers
State the formula used to calculate a risk score. (1 mark)
Hint: Think about the two factors that make up a risk.
Identify two items of Personal Protective Equipment (PPE) that should be worn when using a centre lathe to turn a piece of mild steel. (2 marks)
Hint: Think about the specific hazards of turning metal (flying swarf, loose clothing).
Explain why Local Exhaust Ventilation (LEV) is considered a more effective control measure than a dust mask when sanding MDF. (3 marks)
Hint: Refer to the Hierarchy of Control. Where does LEV sit compared to a dust mask?
A school is planning to introduce a new chemical solvent for joining acrylic. Discuss the steps the D&T department must take to ensure the safe use of this new substance, making reference to relevant legislation. (6 marks)
Hint: Mention the 5 steps of risk assessment, the specific legislation for chemicals, and the hierarchy of control.