Pearson Edexcel · GCSE · Design and Technology
Polymers: Specialist techniques, tools, equipment and processes to shape, fabricate, construct and assemble a high-quality polymer prototype
This topic covers the essential specialist techniques, tools, equipment, and processes required to shape, fabricate, construct, and assemble high-quality polymer prototypes. Mastering these practical skills and their theoretical justifications is crucial for both the written exam and your non-exam assessment (coursework).
- 8 min read
- 3 worked examples
- 2 practice questions
- 6 key terms
Study Notes
Overview
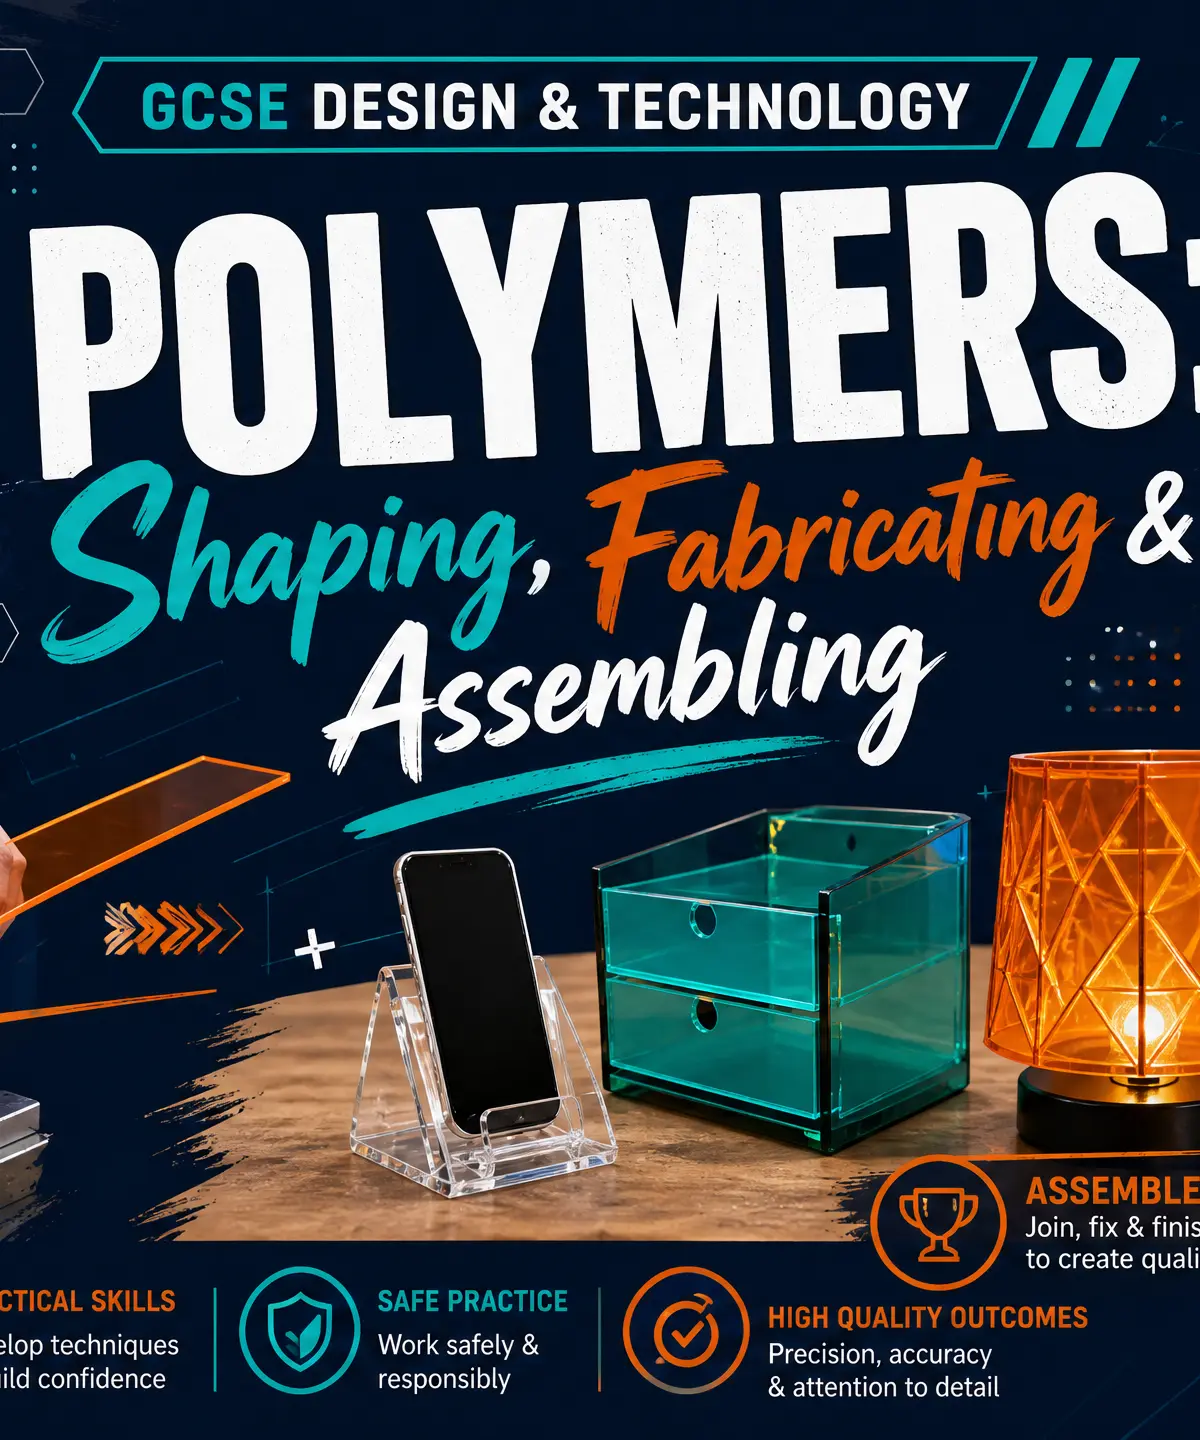
Polymers are ubiquitous in modern product design. Topic 4.7 focuses on the practical application of polymers in the workshop, bridging the gap between theoretical material properties and physical prototype creation. As a GCSE Design and Technology candidate, you must not only know how to use specialist techniques, tools, and equipment to shape, fabricate, construct, and assemble polymers, but also be able to justify why a specific process or material was selected for a given application.
Listen to the companion podcast for this topic to reinforce your understanding of these key concepts:

Key Knowledge & Theory
Core Concepts: Polymer Families
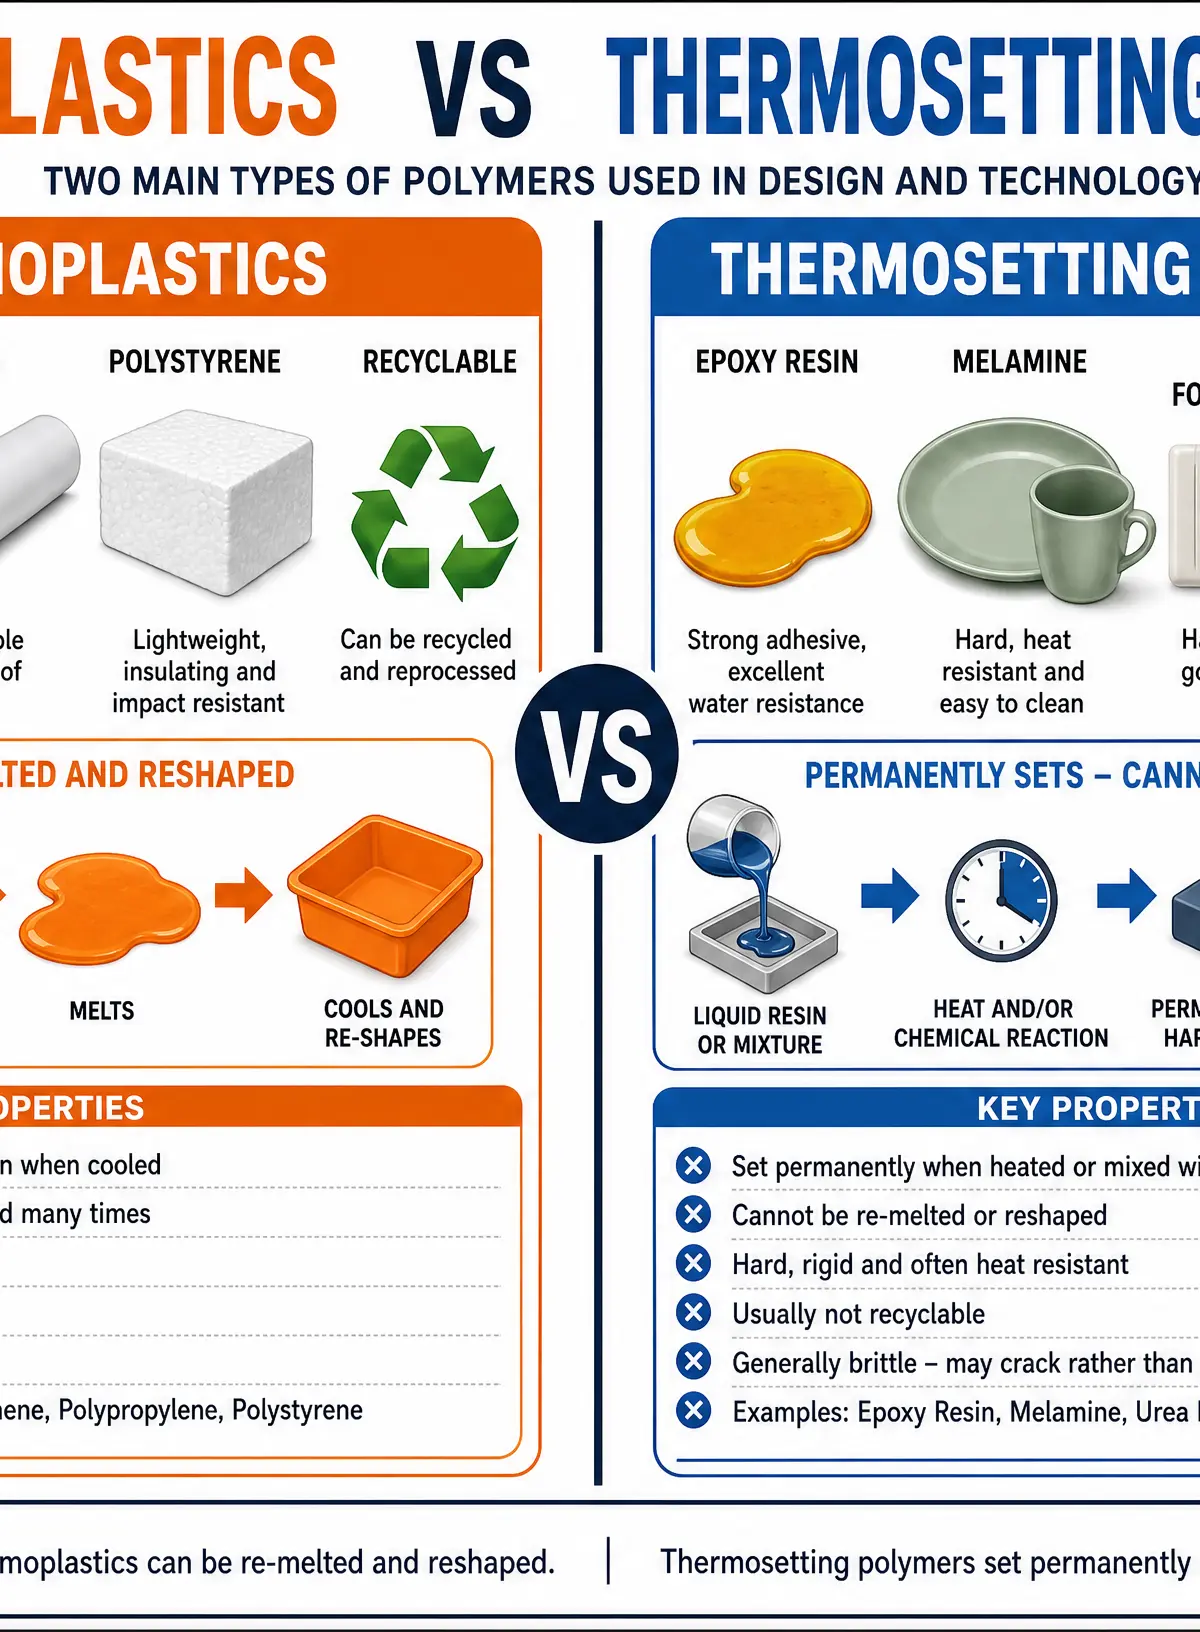
Understanding the fundamental difference between the two main polymer families is the foundation of this topic. The type of polymer dictates the shaping processes and adhesives that can be used.
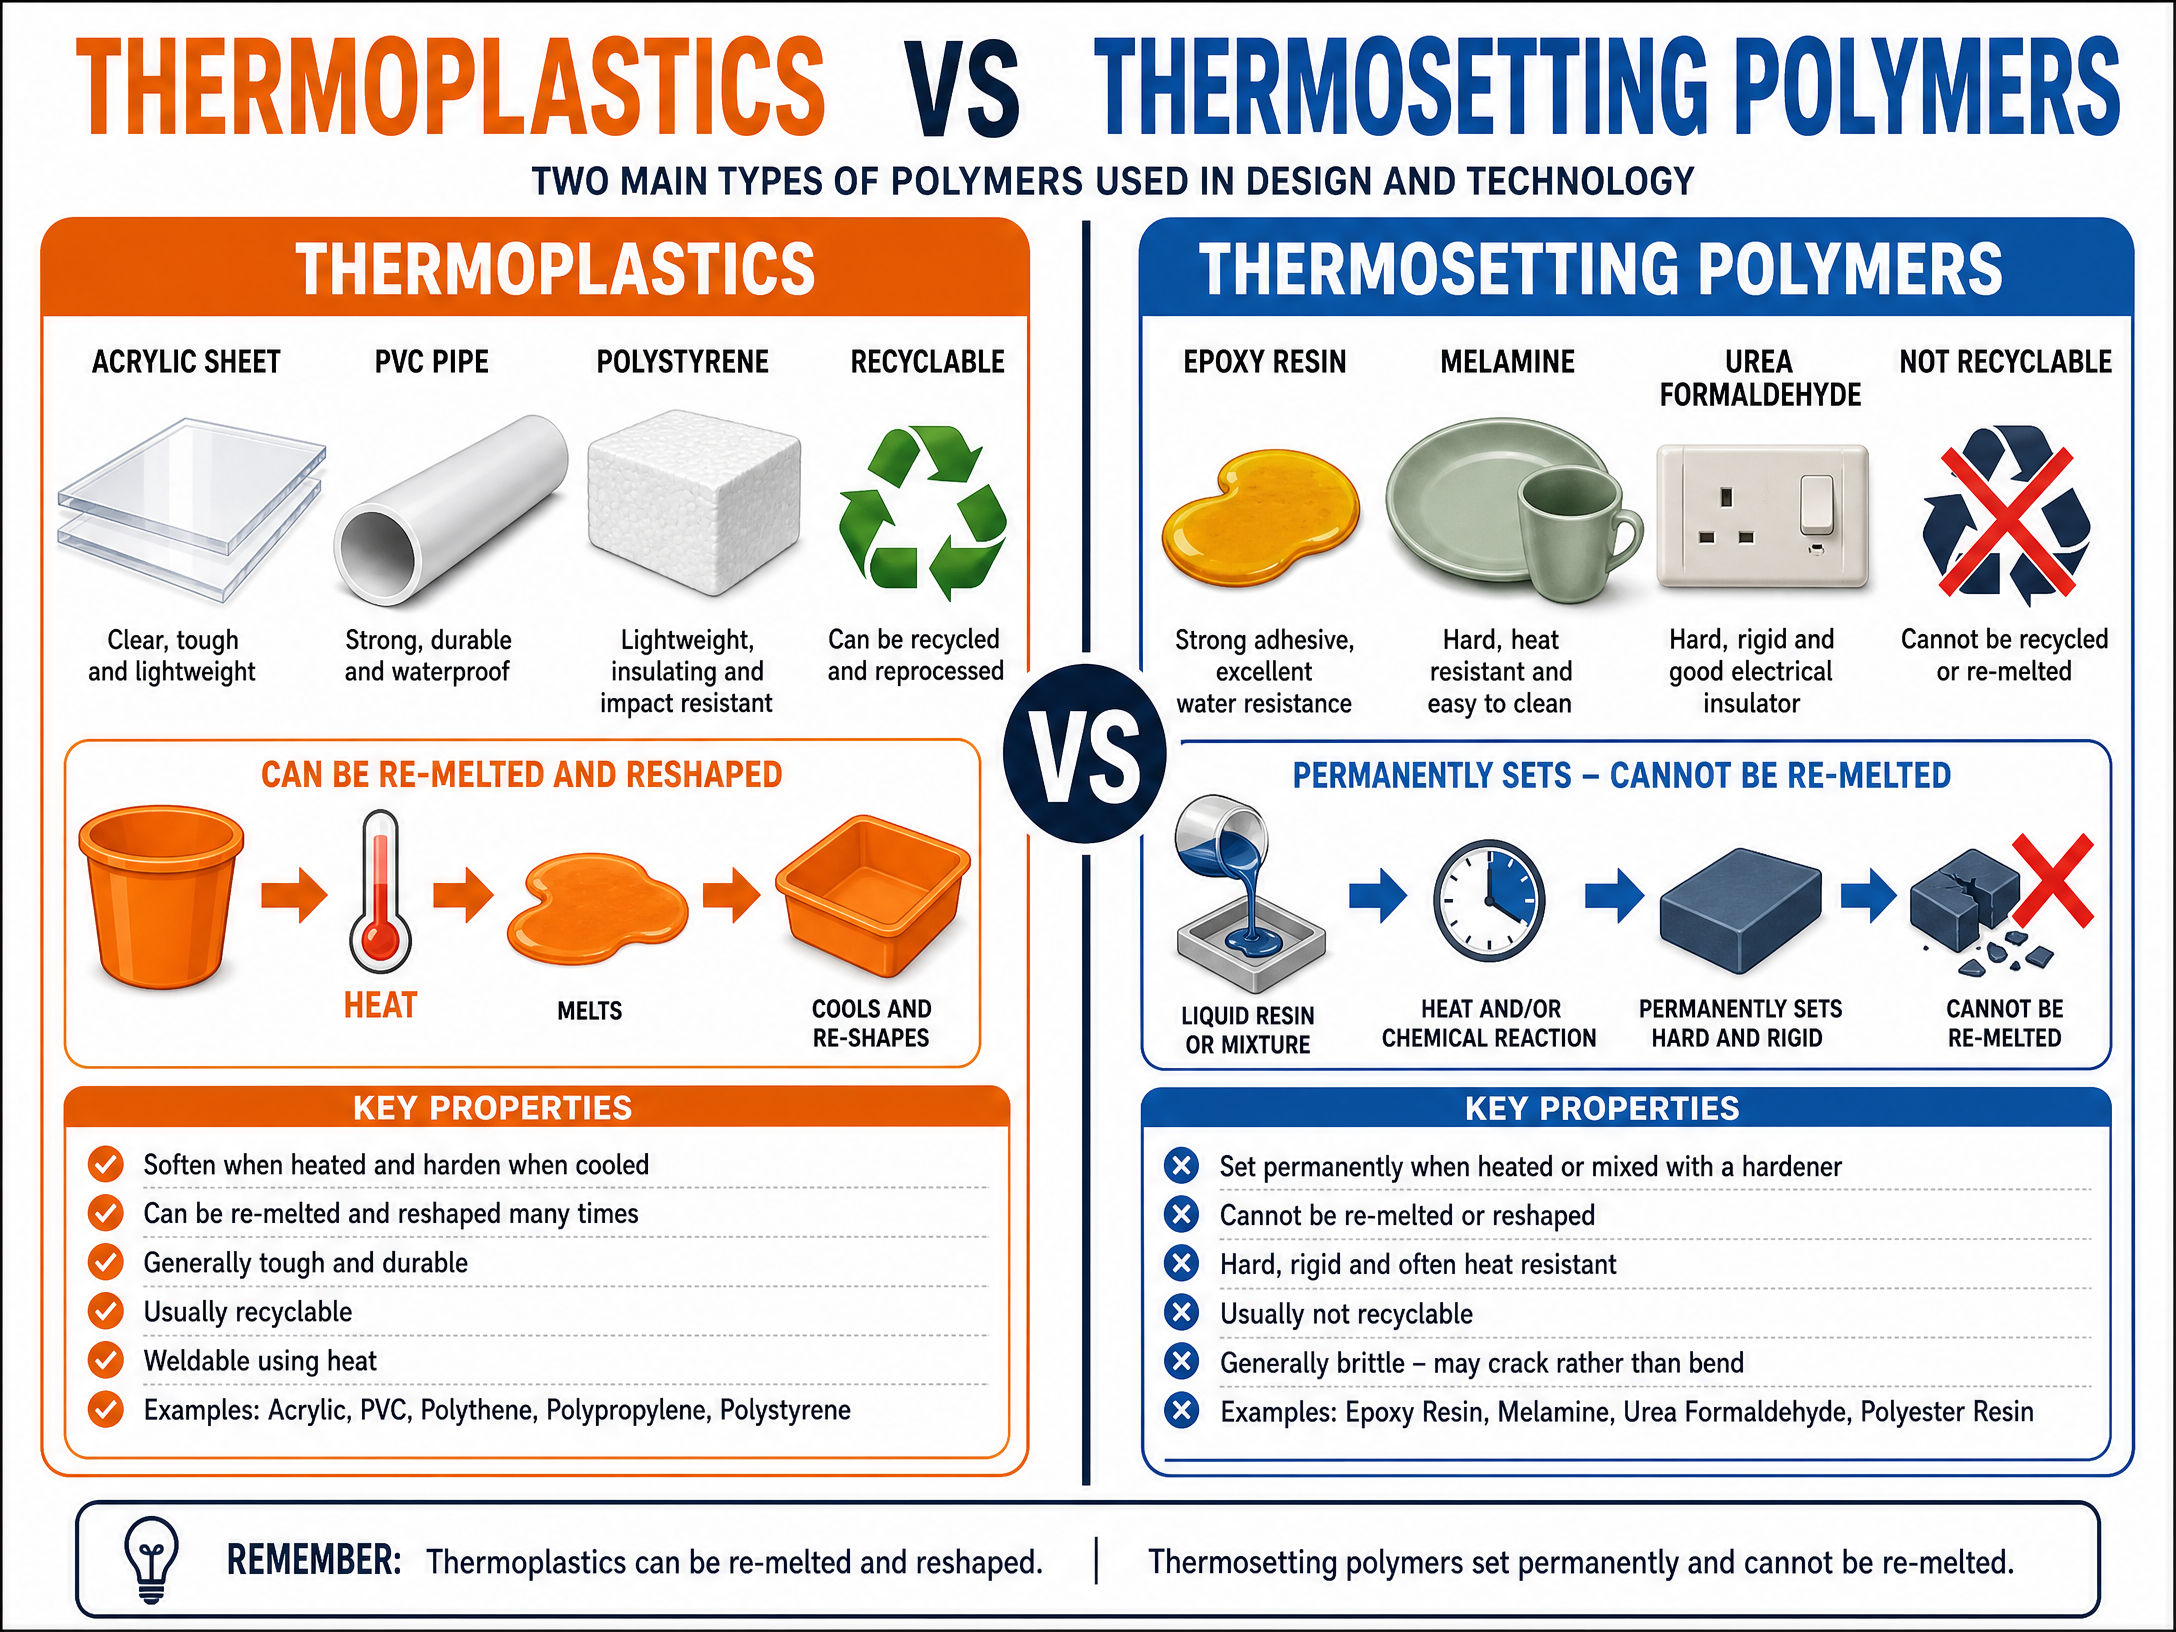
- Thermoplastics: These polymers soften when heated and harden when cooled. This process is physical and reversible, meaning they can be re-melted and reshaped multiple times. They are generally recyclable. Examples include Acrylic (PMMA), Polyvinyl Chloride (PVC), Polypropylene (PP), Polystyrene (PS), and High-Density Polyethylene (HDPE).
- Thermosetting Polymers (Thermosets): These polymers undergo a chemical reaction when heated or mixed with a catalyst (hardener). Once set, they form rigid cross-links and cannot be re-melted or reshaped. They are generally harder, more brittle, and more heat-resistant than thermoplastics. Examples include Epoxy Resin, Urea Formaldehyde, Melamine Formaldehyde, and Polyester Resin.
Technical Vocabulary
- Thermoplastic: A polymer that can be repeatedly softened by heat and hardened by cooling.
- Thermosetting Polymer: A polymer that sets permanently through a chemical reaction and cannot be re-melted.
- Vacuum Forming: A shaping process where a heated thermoplastic sheet is drawn over a mould by a vacuum.
- Line Bending: A shaping process where a thermoplastic sheet is heated along a narrow line using a strip heater, allowing it to be bent to a specific angle.
- Solvent Cement: An adhesive (like Tensol cement) that works by chemically dissolving the surfaces being joined, fusing them together as the solvent evaporates.
- Abrading: The process of progressively smoothing a surface using abrasive materials (e.g., wet-and-dry paper) from coarse to fine grades.
Practical Skills
Techniques & Processes: Shaping
Examiners expect candidates to understand the step-by-step procedures for key shaping processes.
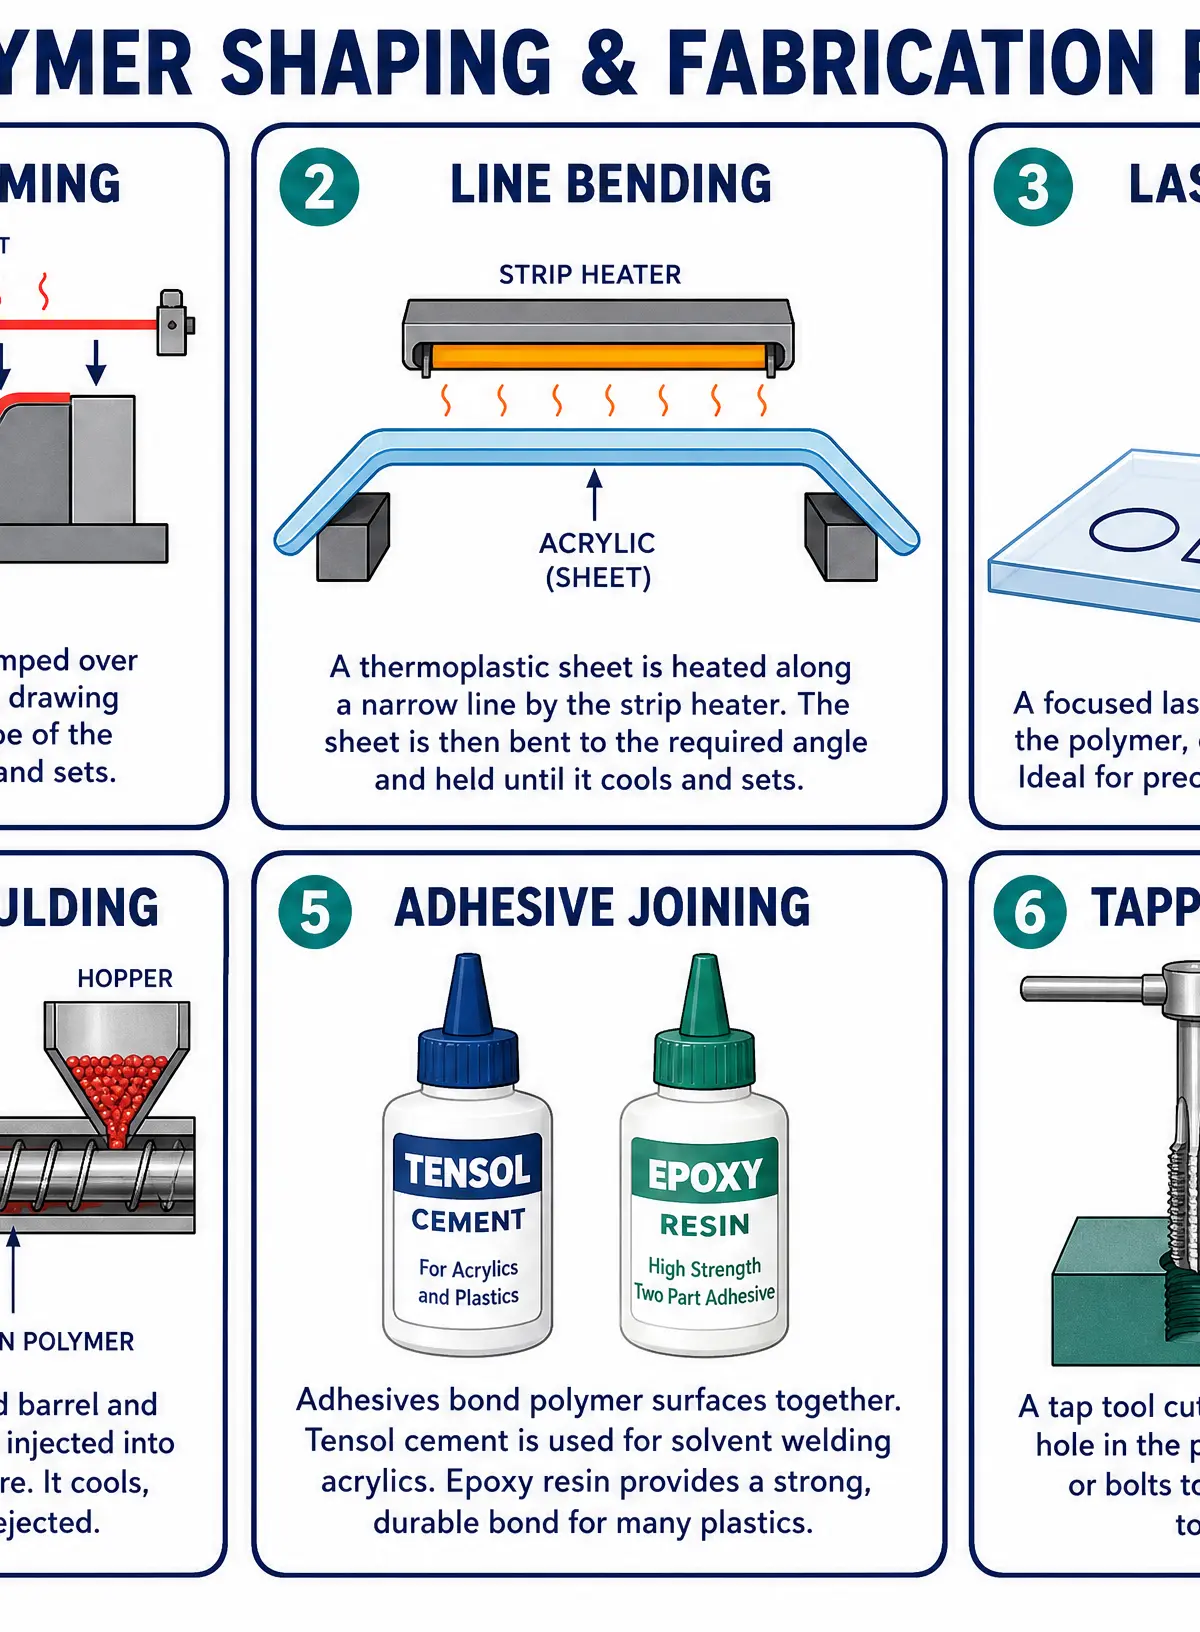
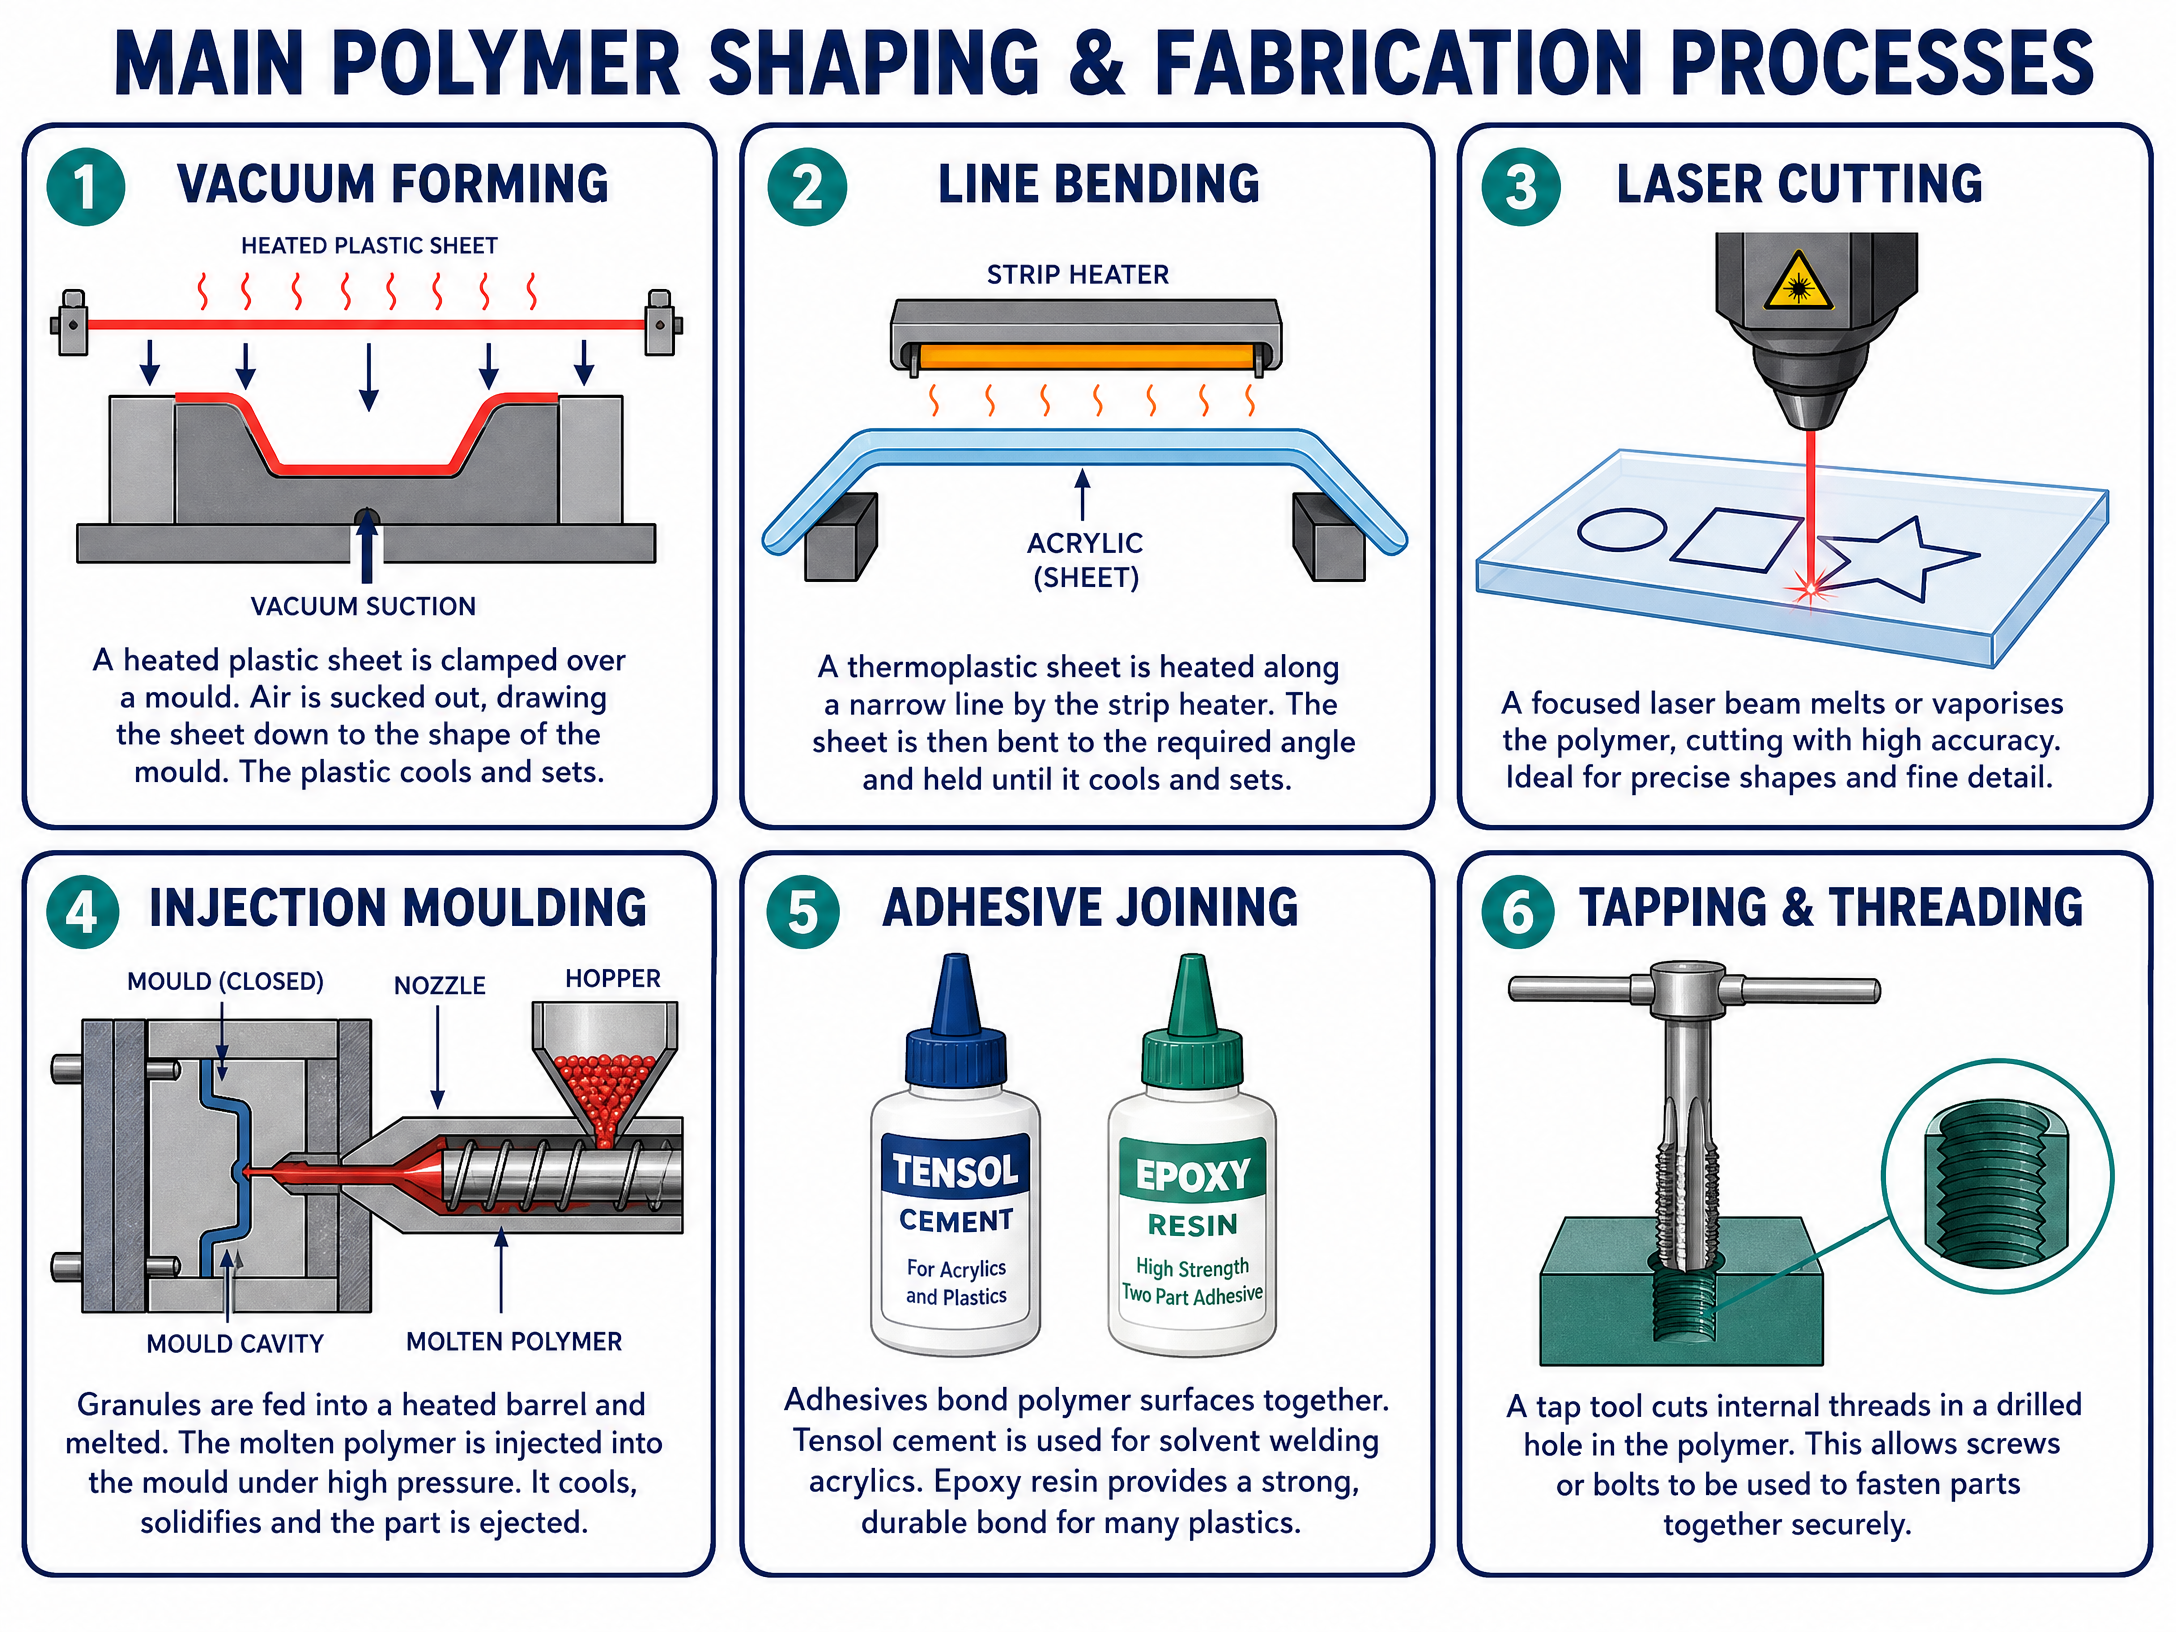
1. Vacuum FormingUsed to create shallow, 3D hollow shapes (e.g., packaging blisters, product casings).
- Process: A thermoplastic sheet (often HIPS or acrylic) is clamped and heated until pliable. A mould (often MDF or 3D printed) is raised into the soft plastic. A vacuum pump removes the air between the mould and the sheet, and atmospheric pressure forces the plastic tightly over the mould. The plastic cools, sets, and is removed.
- Key Consideration: The mould must have 'draft angles' (tapered sides) to allow the formed plastic to be removed easily.
**2. Line Bending (Strip Heating)**Used to create straight bends in thermoplastic sheet (e.g., for display stands or enclosures).
- Process: The polymer sheet is placed over a strip heater. The narrow heating element softens the plastic along a specific line. Once pliable, the plastic is bent to the required angle using a jig or former, and held in place until cool.
- Key Consideration: This process is only suitable for thermoplastics. Thermosets would crack or scorch.
**3. Laser Cutting and Engraving (Digital Manufacture)**Used for highly precise cutting of 2D profiles and surface engraving.
- Process: A CAD (Computer-Aided Design) file directs a focused, high-power laser beam. The laser melts, burns, or vaporises the polymer, leaving a clean edge. Acrylic is particularly well-suited to laser cutting as it produces a polished edge.
- Key Consideration: Ensures high accuracy and repeatability, crucial for batch production or complex prototype components.
Techniques & Processes: Fabricating, Constructing, and Assembling
Joining polymer components requires the correct selection of adhesives or mechanical fixings.
1. Adhesives
- Tensol Cement (Dichloromethane): A solvent cement used specifically for joining acrylic. It melts the surfaces, fusing them together for an incredibly strong, clear, almost invisible joint. Safety: Must be used in a well-ventilated area due to hazardous fumes.
- Epoxy Resin (e.g., Araldite): A two-part adhesive (resin and hardener). When mixed, a chemical reaction occurs, creating a very strong, rigid, gap-filling bond. Excellent for joining dissimilar materials (e.g., polymer to metal).
- Contact Adhesive (e.g., Evo-Stik): Applied to both surfaces, left until touch-dry, then pressed together for an instant bond. Good for bonding flexible polymers, foams, or applying veneers.
2. Mechanical Fastening
- Tapping and Threading: Cutting internal threads into a drilled hole in a polymer block using a 'tap' tool. This allows machine screws to be used, creating a joint that can be disassembled (knock-down fitting).
- Nuts, Bolts, and Washers: Used for through-hole joints. Crucial point: Washers must be used when bolting polymers to spread the clamping load and prevent the bolt head or nut from cracking or crushing the relatively brittle plastic.
Surface Treatments and Finishes
Finishes improve both aesthetics and function.
- Abrading and Polishing: Using progressively finer grades of wet-and-dry abrasive paper (e.g., 120 grit up to 1200 grit) to remove scratches, followed by a polishing compound (e.g., Brasso) and a buffing wheel to restore a high-gloss, crystal-clear finish on acrylic.
- Laser Engraving: Adding permanent surface detail, logos, or text.
- Vinyl Decals: Applying cut self-adhesive vinyl graphics for branding or colour.
Portfolio/Coursework Guidance
Assessment Criteria
In your Non-Exam Assessment (NEA), examiners are looking for clear evidence of decision-making and technical competence.
- Selection: You must justify why you chose a specific polymer (e.g., "I selected acrylic for the casing because it is a thermoplastic that can be easily line-bent, and it takes a high-quality polished finish").
- Process Justification: Explain why a process was used over an alternative (e.g., "I used Tensol cement rather than epoxy resin because it creates a stronger, solvent-welded joint that remains transparent, maintaining the aesthetic of the clear acrylic").
- Quality of Manufacture: Marks are awarded for precision, accuracy, and the quality of the final finish (e.g., perfectly polished edges with no visible file marks).
Building a Strong Portfolio
- Photographic Evidence: Document every stage of manufacture. Include close-up photos of high-quality joints, polished edges, and complex cuts.
- Annotation: Do not just describe what the photo shows. Explain the process, the tools used, the health and safety precautions taken, and why the process was successful.
Exam Component
Written Exam Knowledge
Questions on polymers frequently appear in the written paper. You will be expected to:
- Identify specific polymers suitable for given products.
- Describe manufacturing processes step-by-step (often using notes and sketches).
- Compare and evaluate different methods of joining or shaping.
Practical Exam Preparation
When preparing for practical tasks, ensure you are familiar with the health and safety requirements of the workshop. Know how to safely operate the vacuum former, strip heater, and laser cutter, and understand the COSHH regulations regarding solvent cements like Tensol.
Visual Resources
2 diagrams and illustrations
Interactive Diagrams
1 interactive diagram to visualise key concepts
Conceptual Flow Outline
The progressive finishing process for acrylic edges
Worked Examples
3 worked examples — open one to explore the question and available guidance.
Practice Questions
Test your understanding — click to reveal model answers
State one thermoplastic and one thermosetting polymer. For each, give a typical product application and explain why the material is suitable.
Hint: Think about heat resistance for the thermoset, and clarity or formability for the thermoplastic.
A student is designing a desktop tidy made from 3mm acrylic. They plan to use line bending to create the shape. Explain why line bending is an appropriate process for this material and product.
Hint: Link the properties of acrylic to the mechanics of the line bending process.